
API Keys
Overview
API Keys are essential tools for enabling secure and seamless integration between your system and the Xenith platform. They act as unique identifiers that authenticate and authorize access to various features and services, ensuring that your data and operations remain protected. With API Keys, you can automate processes, retrieve data, and interact with Xenith's features programmatically, all while maintaining control over what each key can do through customizable permissions.
On the Xenith platform, you have the flexibility to create, edit, and delete API Keys as your needs evolve. Each key can be assigned specific permission levels for different transaction types, such as Pay In, Pay Out, and Balance inquiries, allowing you to tailor access for specific use cases. Proper management of API Keys is crucial to maintaining security and ensuring that only authorized systems and users can perform designated actions. This guide will walk you through managing API Keys effectively, from setting them up to fine-tuning their permissions or removing them when they are no longer needed.
API Key Permissions
Each API key can be configured with different permission levels for various transaction types:
| Transaction Type | Available Permissions |
|---|---|
| Pay In | None: No access Read: Access to retrieve Pay In List, Pay In Detail and Pay In Channel status Write: Access to create Pay In transaction |
| Pay Out | None: No access Read: Access to retrieve Pay Out List, Pay Out Detail and Pay Out Channel status Write: Access to create Pay Out transaction |
| Balance | None: No access Read: Access to retrieve Balance information |
Managing API Key
To view, create, edit, or delete an API Key, you must log in to your Xenith account with the "Developer Settings" organisation permission enabled. Without this permission, these actions will not be accessible. Navigate to the "Developer Settings" tab on your dashboard, where the "API Keys" tab will be the default view.
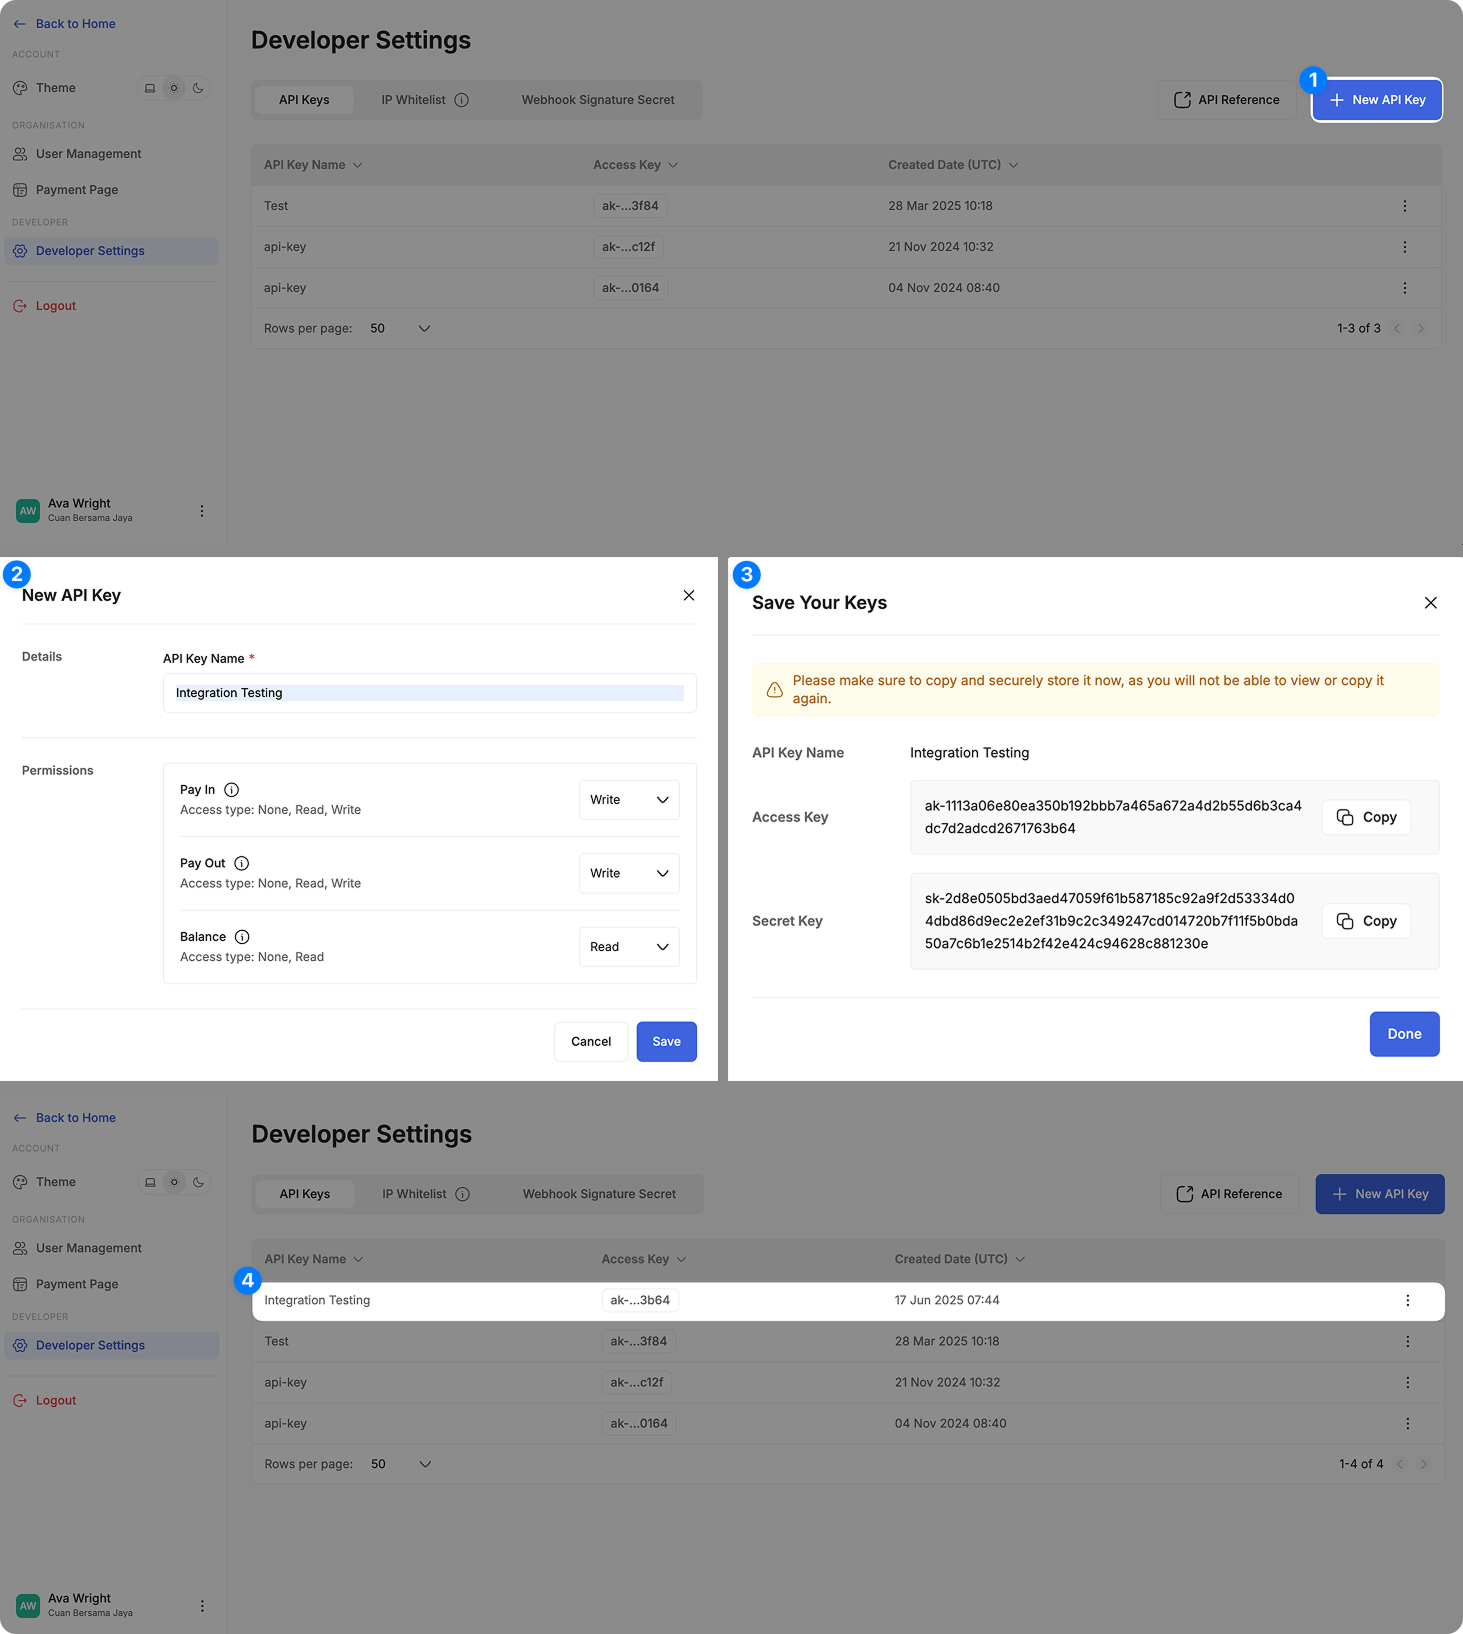
Create a New API Key
Follow these steps to create a new API Key:
- Initiate API Key Creation: Navigate to Settings > Developer Settings. Click the "+ New API Key" button.
- Fill in Required Information: A modal will appear. Enter the desired API Key Name and configure the permissions for the key. Once done, click "Save". You can update this information later if needed.
- Secure Your Keys: Copy and securely store the Access Key and Secret Key, as they will not be visible again after this step. Click "Done" once you have saved the keys.
- Verify Your Keys: After creation, the new key will appear in the API Key listing. To confirm the key, you can view the first 3 and last 4 characters of the Access Key, along with its assigned permissions.
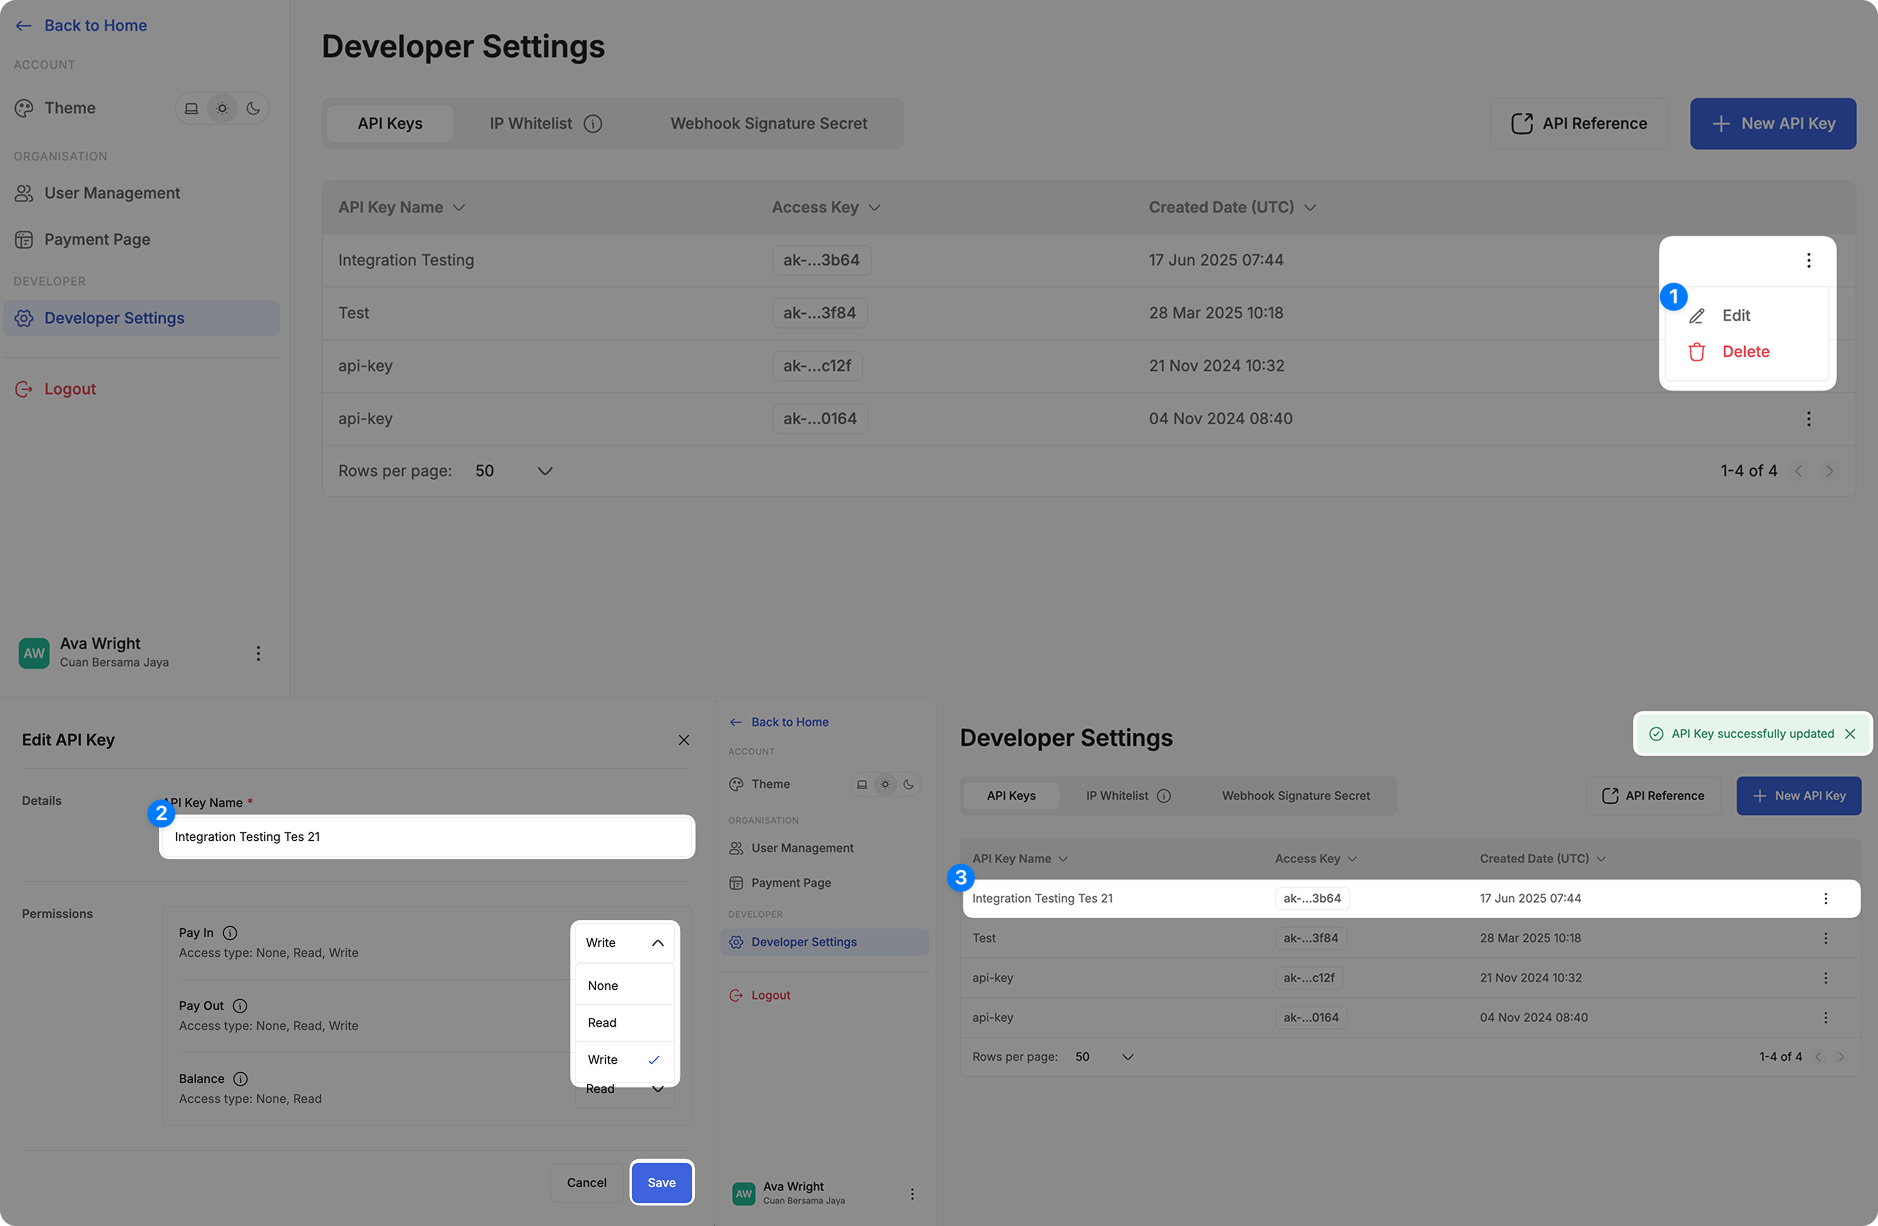
Edit an Existing API Key
Any edits to an existing API Key will take effect immediately. Follow these steps to edit an existing API Key:
- Initiate API Key Edit: Click on the three-dot menu (⋮) next to the API Key you want to edit, and select "Edit".
- Modify Necessary Information or Permission: In the modal that appears, update the API Key Name or modify its permissions as needed. Once you've made the changes, click "Save".
- Verify Your Edit: Verify the updated details by checking the first 3 and last 4 characters of the Access Key, along with the key name and permissions.
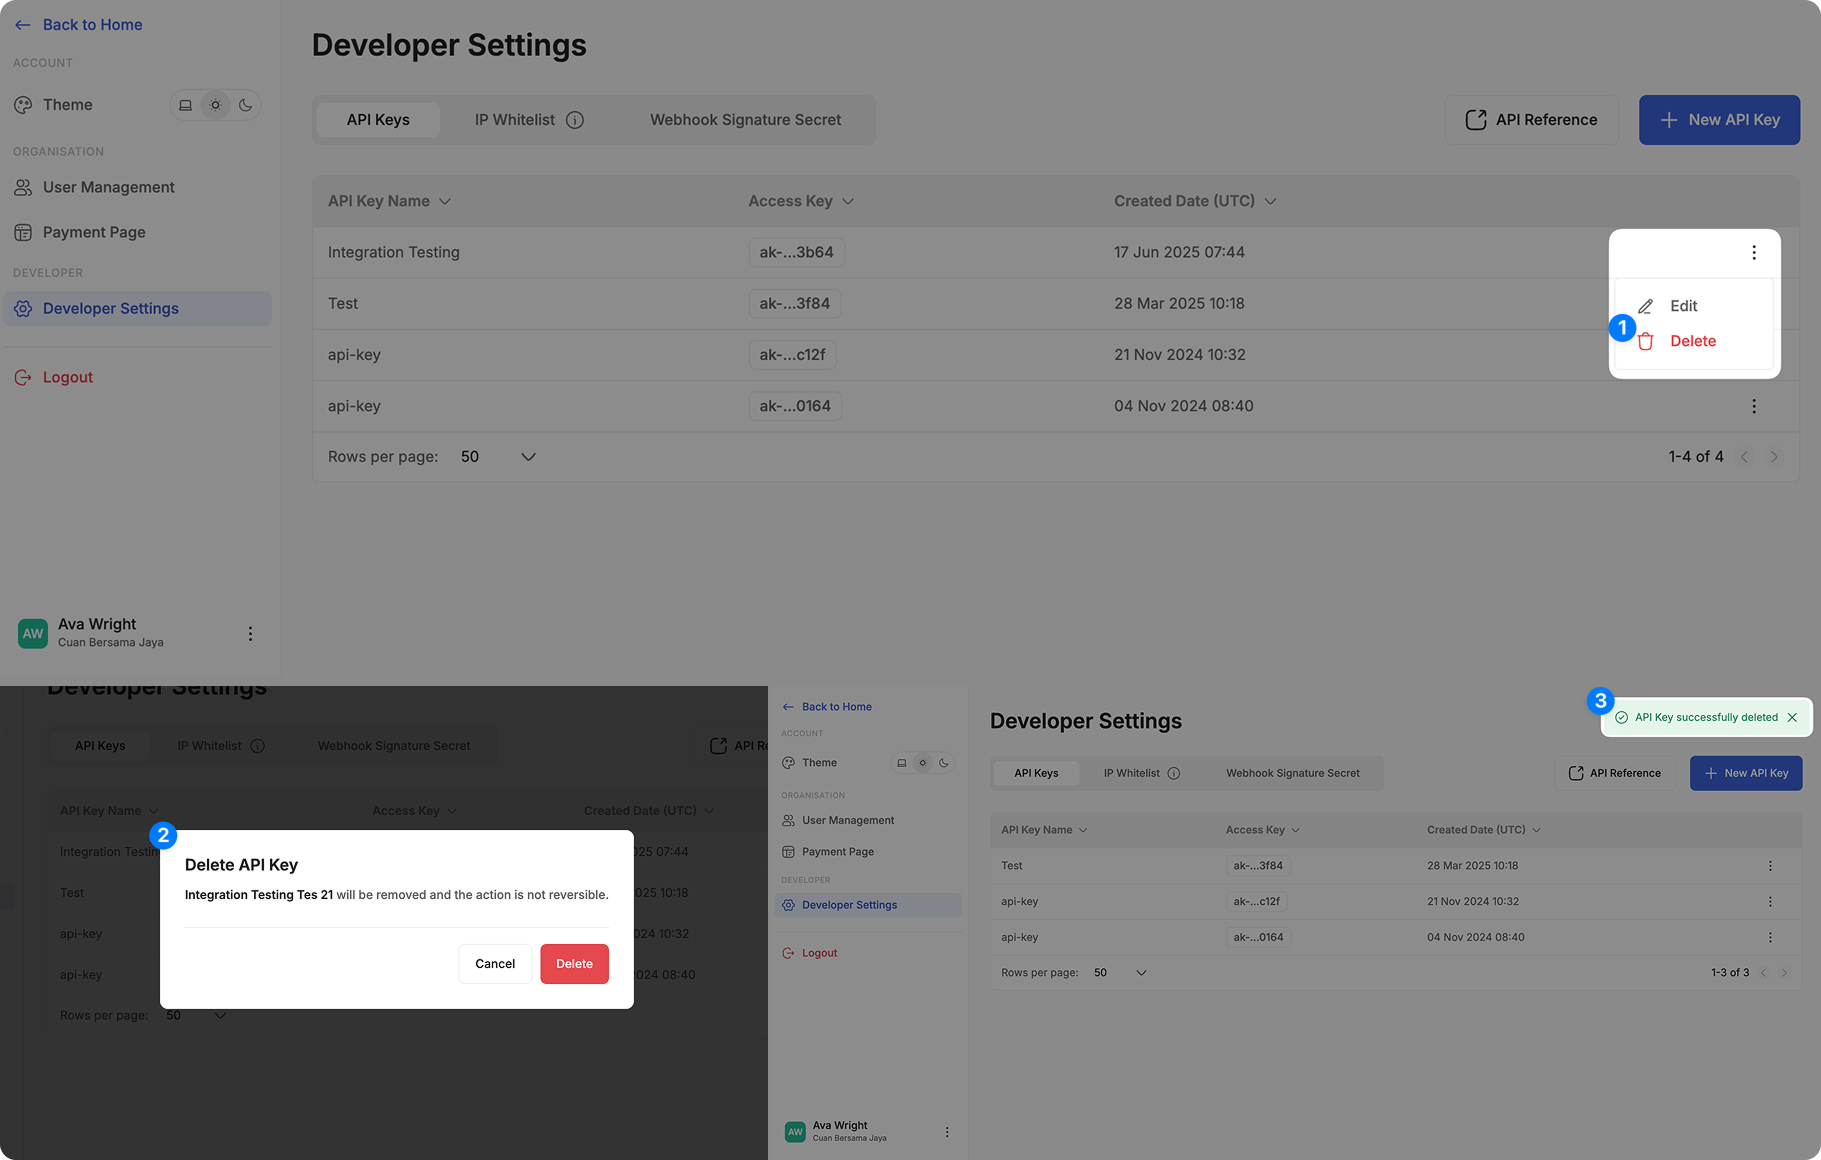
Delete an Existing API Key
Once an API key is deleted, all requests using that key’s credentials will fail. Follow these steps to delete an existing API Key:
- Initiate API Key Deletion: Click on the three-dot menu (⋮) next to the API Key you want to delete, and select "Delete".
- Confirm the Action: A confirmation pop-up will appear. To proceed, click the "Delete" button. Note that this action is permanent and cannot be undone.
- Verify Your Deletion: Check the API Key listing to confirm that the key has been successfully removed.