
Managing Users
The User Management section allows you to add, edit, and remove users within your organisation on the Xenith platform. Proper user management ensures secure access control and maintains operational oversight of your organisation’s account.
Note: For security best practices, each individual user should have their own account and login credentials. Account sharing is strongly discouraged, as it can compromise system integrity, audit trails, and user accountability.
Adding a New User
Follow these steps to add a new user to your organisation:
- Log In: Log in to your Xenith account.
- Navigate to User Management: Go to the "Settings" then "User Management" section.
- Add New User: Click the “+ New User” button. The process includes two steps:
-
Add User Details:
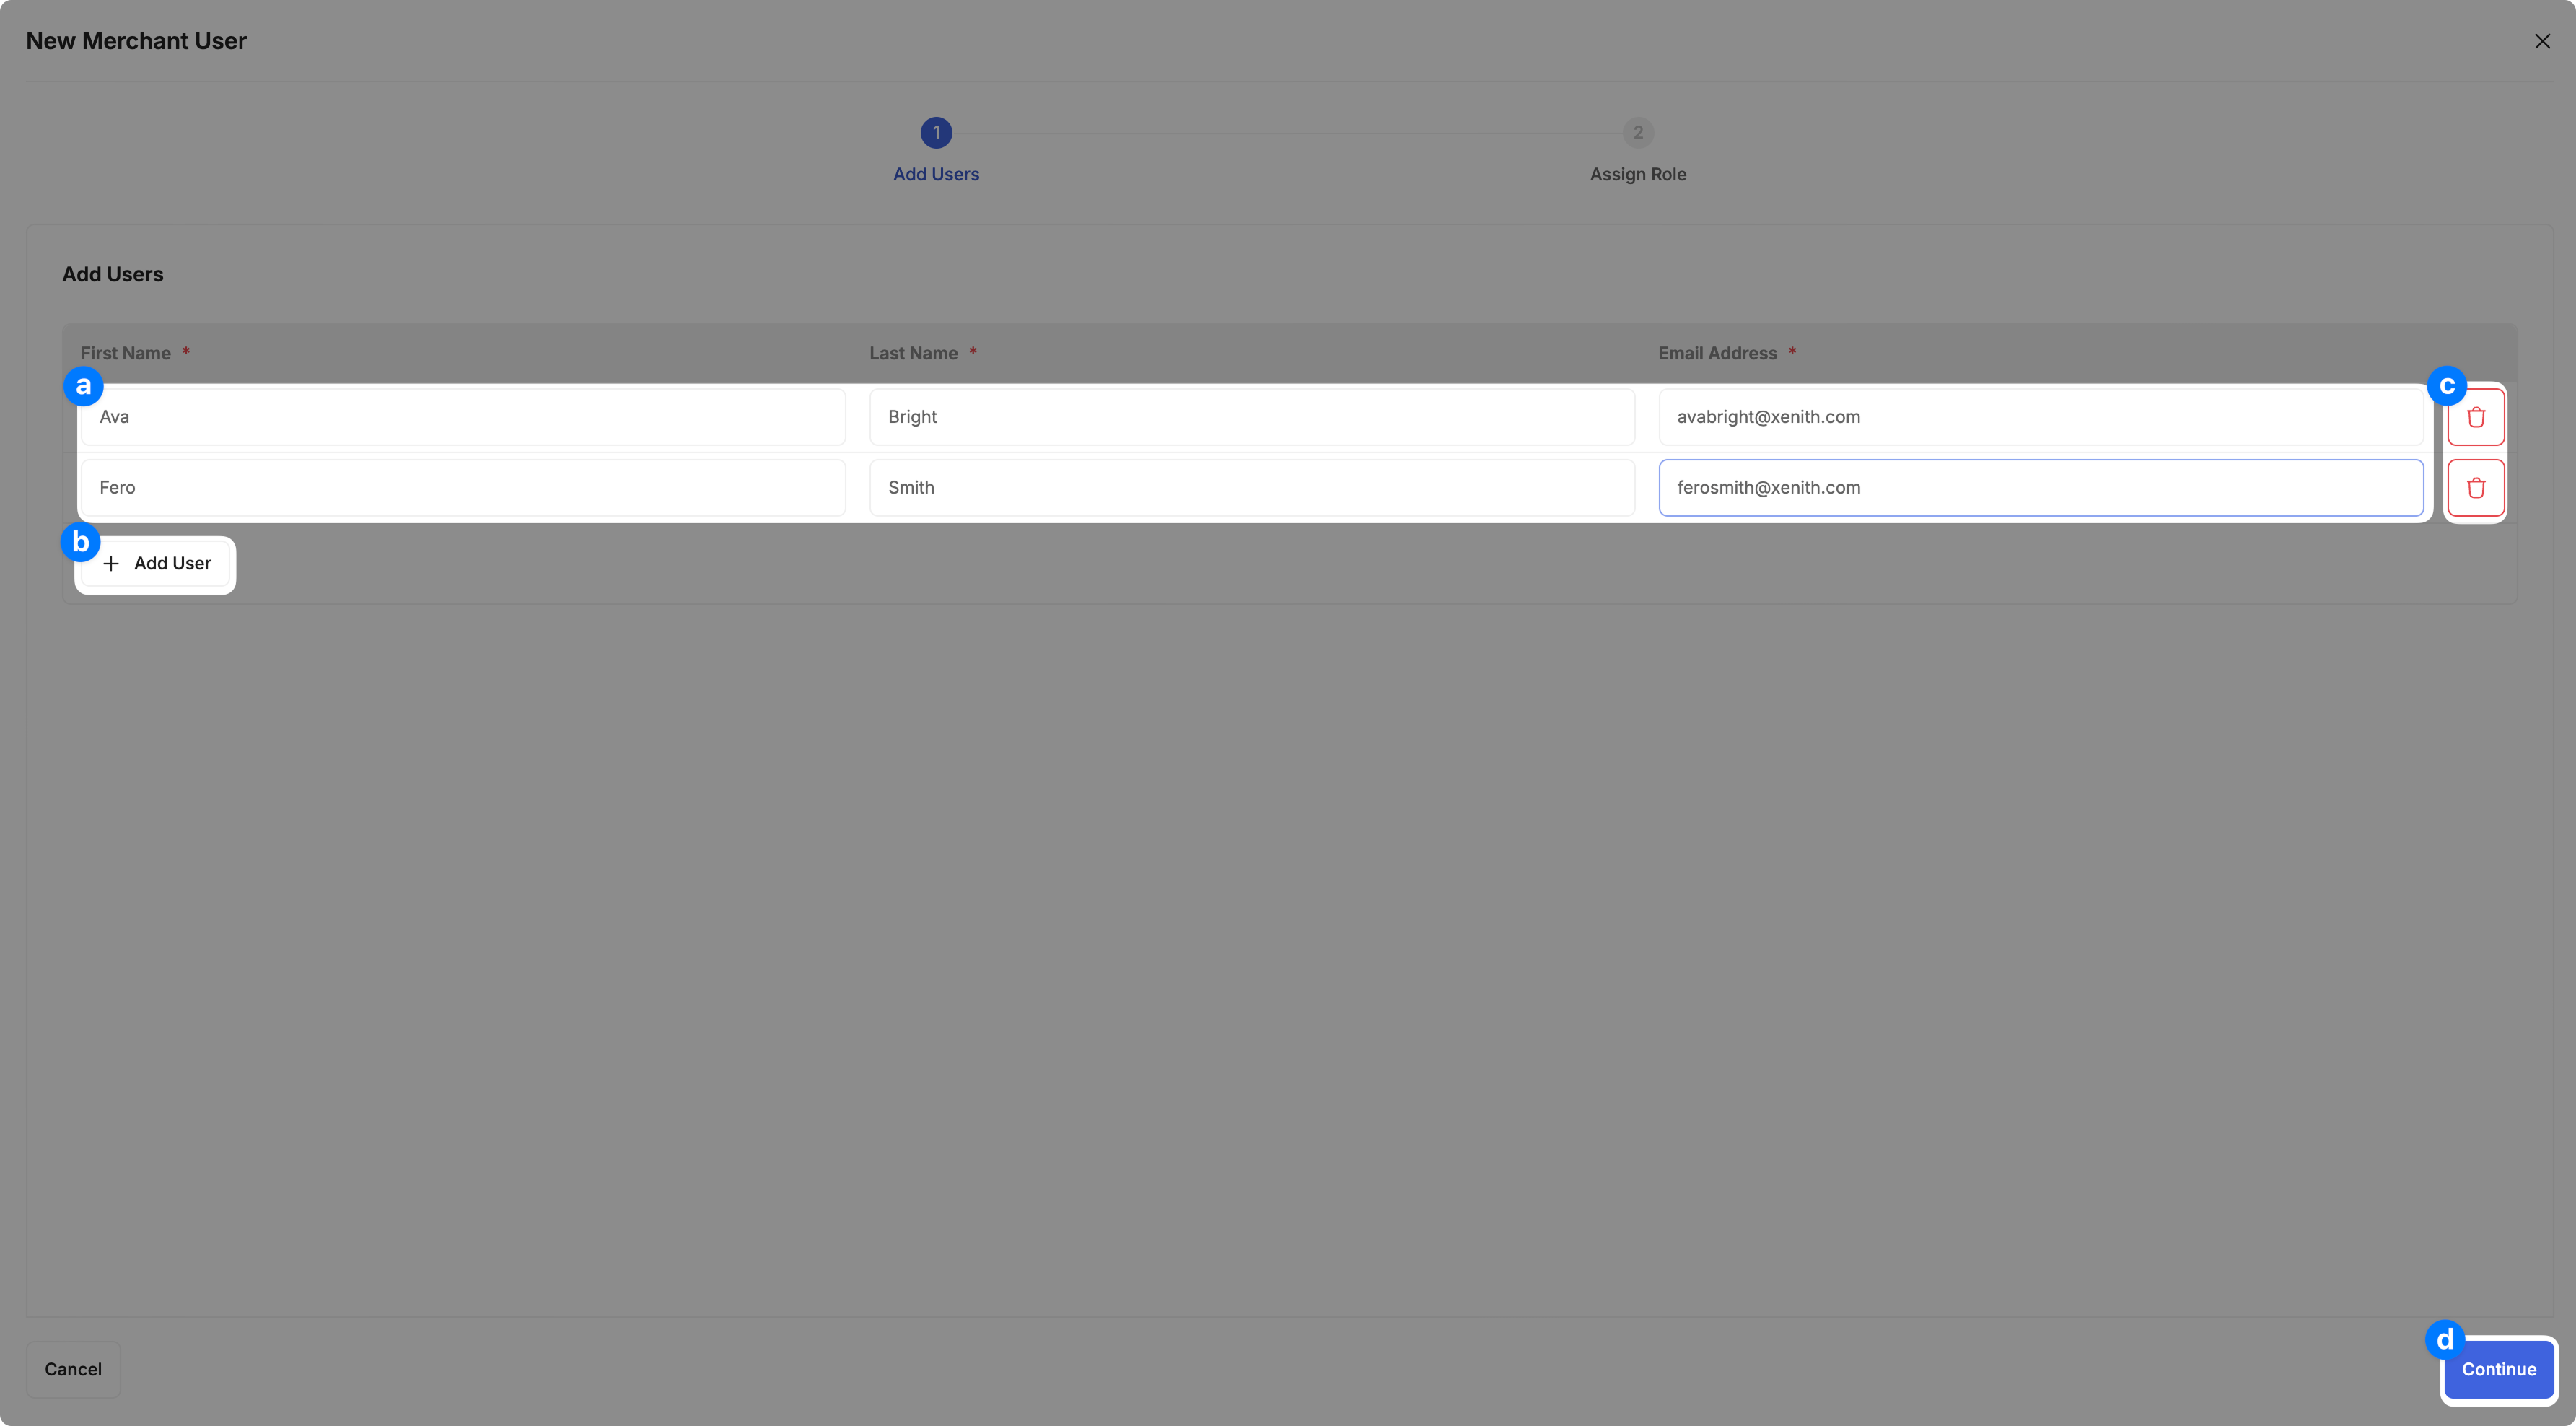
- Enter First Name, Last Name, and Email Address.
- To add multiple users, click "+ Add User".
- To remove an entry, click the trash icon next to the user row.
- Once you filled up the information correctly, click "Continue" to move to the next step.
-
Assign Role:

- Select the user(s) via the checkbox.
- Choose a role, you may select "Custom" to configure organisation and module permissions manually. Read more about user role here.
- Click "Assign Role".
-
- Save: Click the "Save" button. The new user will receive an email invitation to set up their account.
Editing User Permissions
To make permission changes to an existing user:
-
Log In: Log in to your Xenith account.
-
Navigate to User Management: Go to the "Settings" then "User Management" section.
-
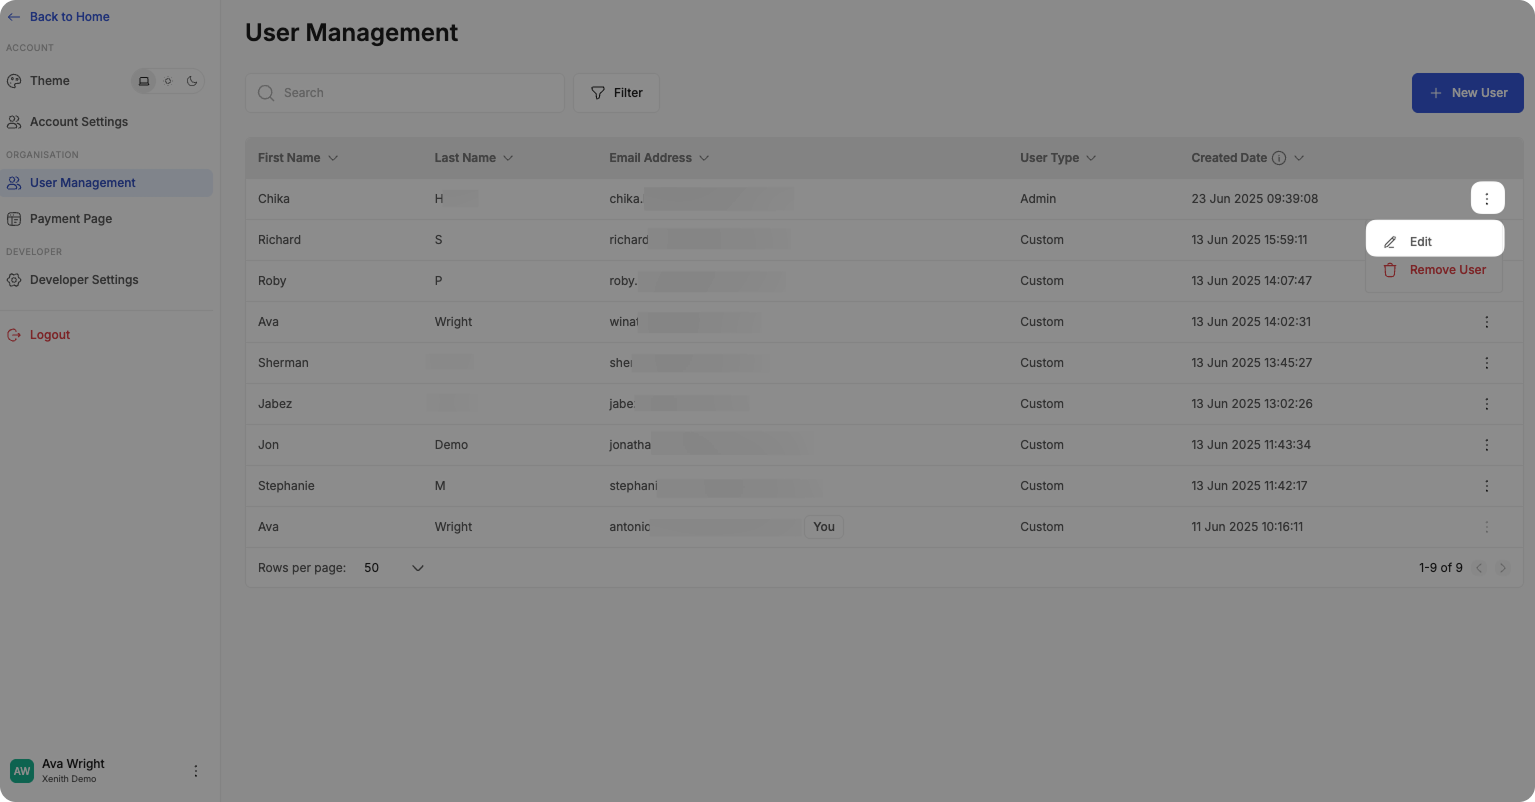
Select Account to Edit: Locate the account you wish to modify.
-
Access Edit Menu: Click on the three dots menu (⋮) next to the account and select "Edit".
Removing a User
If you need to remove a user from your organisation:
-
Log In: Log in to your Xenith account.
-
Navigate to User Management: Go to the "Settings" then "User Management" section.
-
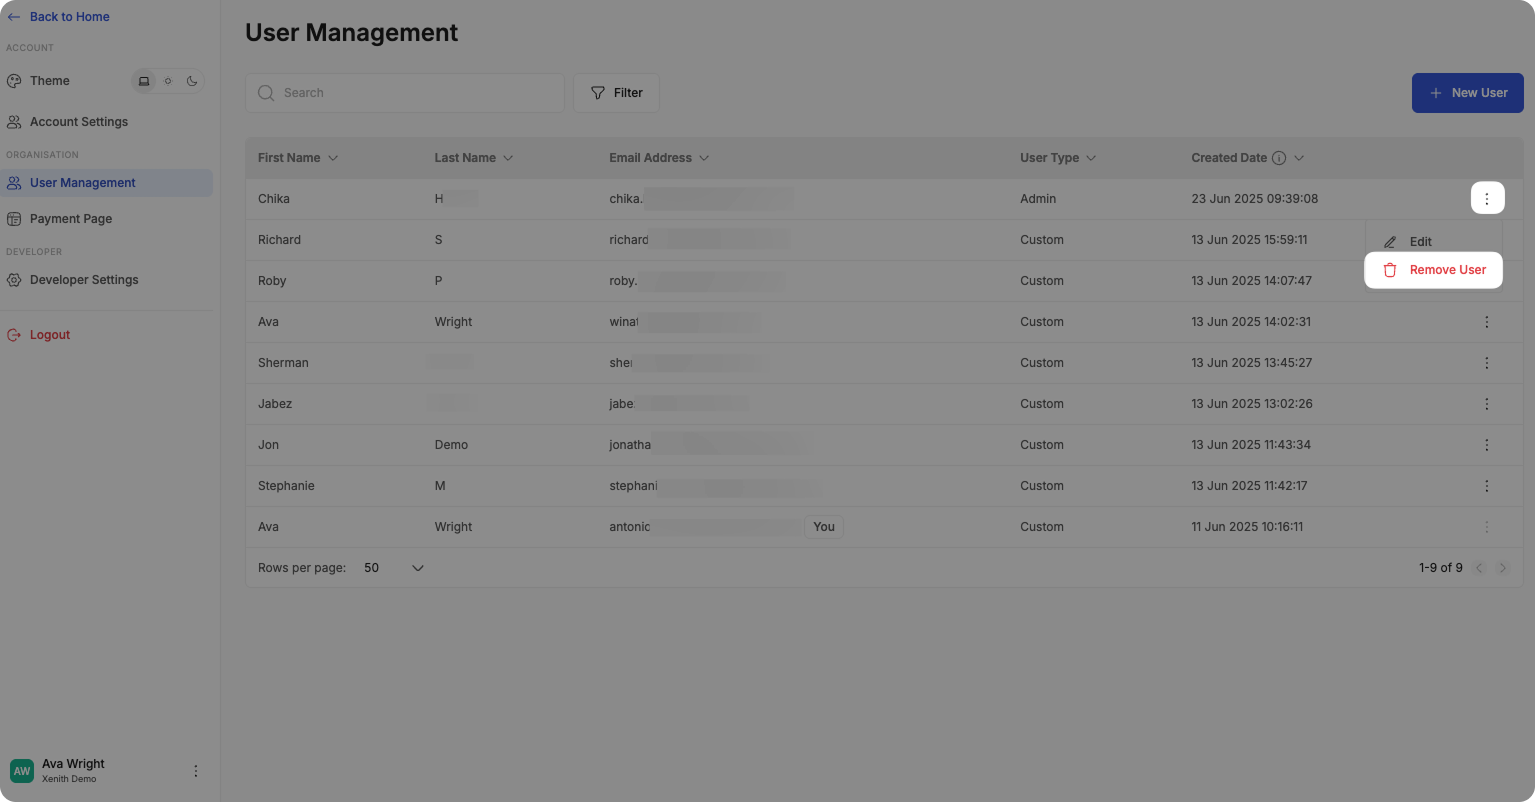
Select Account to Remove: Locate the account you wish to remove.
-
Access Remove Menu: Click on the three dots menu (⋮) next to the account and select "Remove User".
To edit or remove the email address or user with "ADMIN" type, please reach out to [email protected].
Updated about 2 months ago