

IP Whitelist
Overview
An IP Whitelist is a critical security feature that restricts access to your APIs by allowing only approved IP addresses to interact with your platform. This ensures that unauthorized or potentially malicious users are blocked, providing a robust safeguard for sensitive data and operations. By defining a list of trusted IP addresses, you can maintain tighter control over who can access your resources, reducing the risk of unauthorized activity.
On the Xenith platform, IP Whitelists are configured by specifying individual IP addresses (e.g., 192.168.50.252). This straightforward approach allows you to precisely define which devices or networks can connect to your APIs. Managing IP Whitelists is seamless and user-friendly, with options to view, create, edit, and delete entries via the Developer Settings tab on your dashboard. Proper configuration of your IP Whitelist is essential to maintain the security and reliability of your API integrations.
Managing IP Whitelist
To view, create, edit, or delete an IP Whitelist, you must log in to your Xenith account with the "Developer Settings" organisation permission enabled. Without this permission, these actions will not be accessible. Navigate to the "Developer Settings" tab on your dashboard, and choose "IP Whitelist" tab in the page.
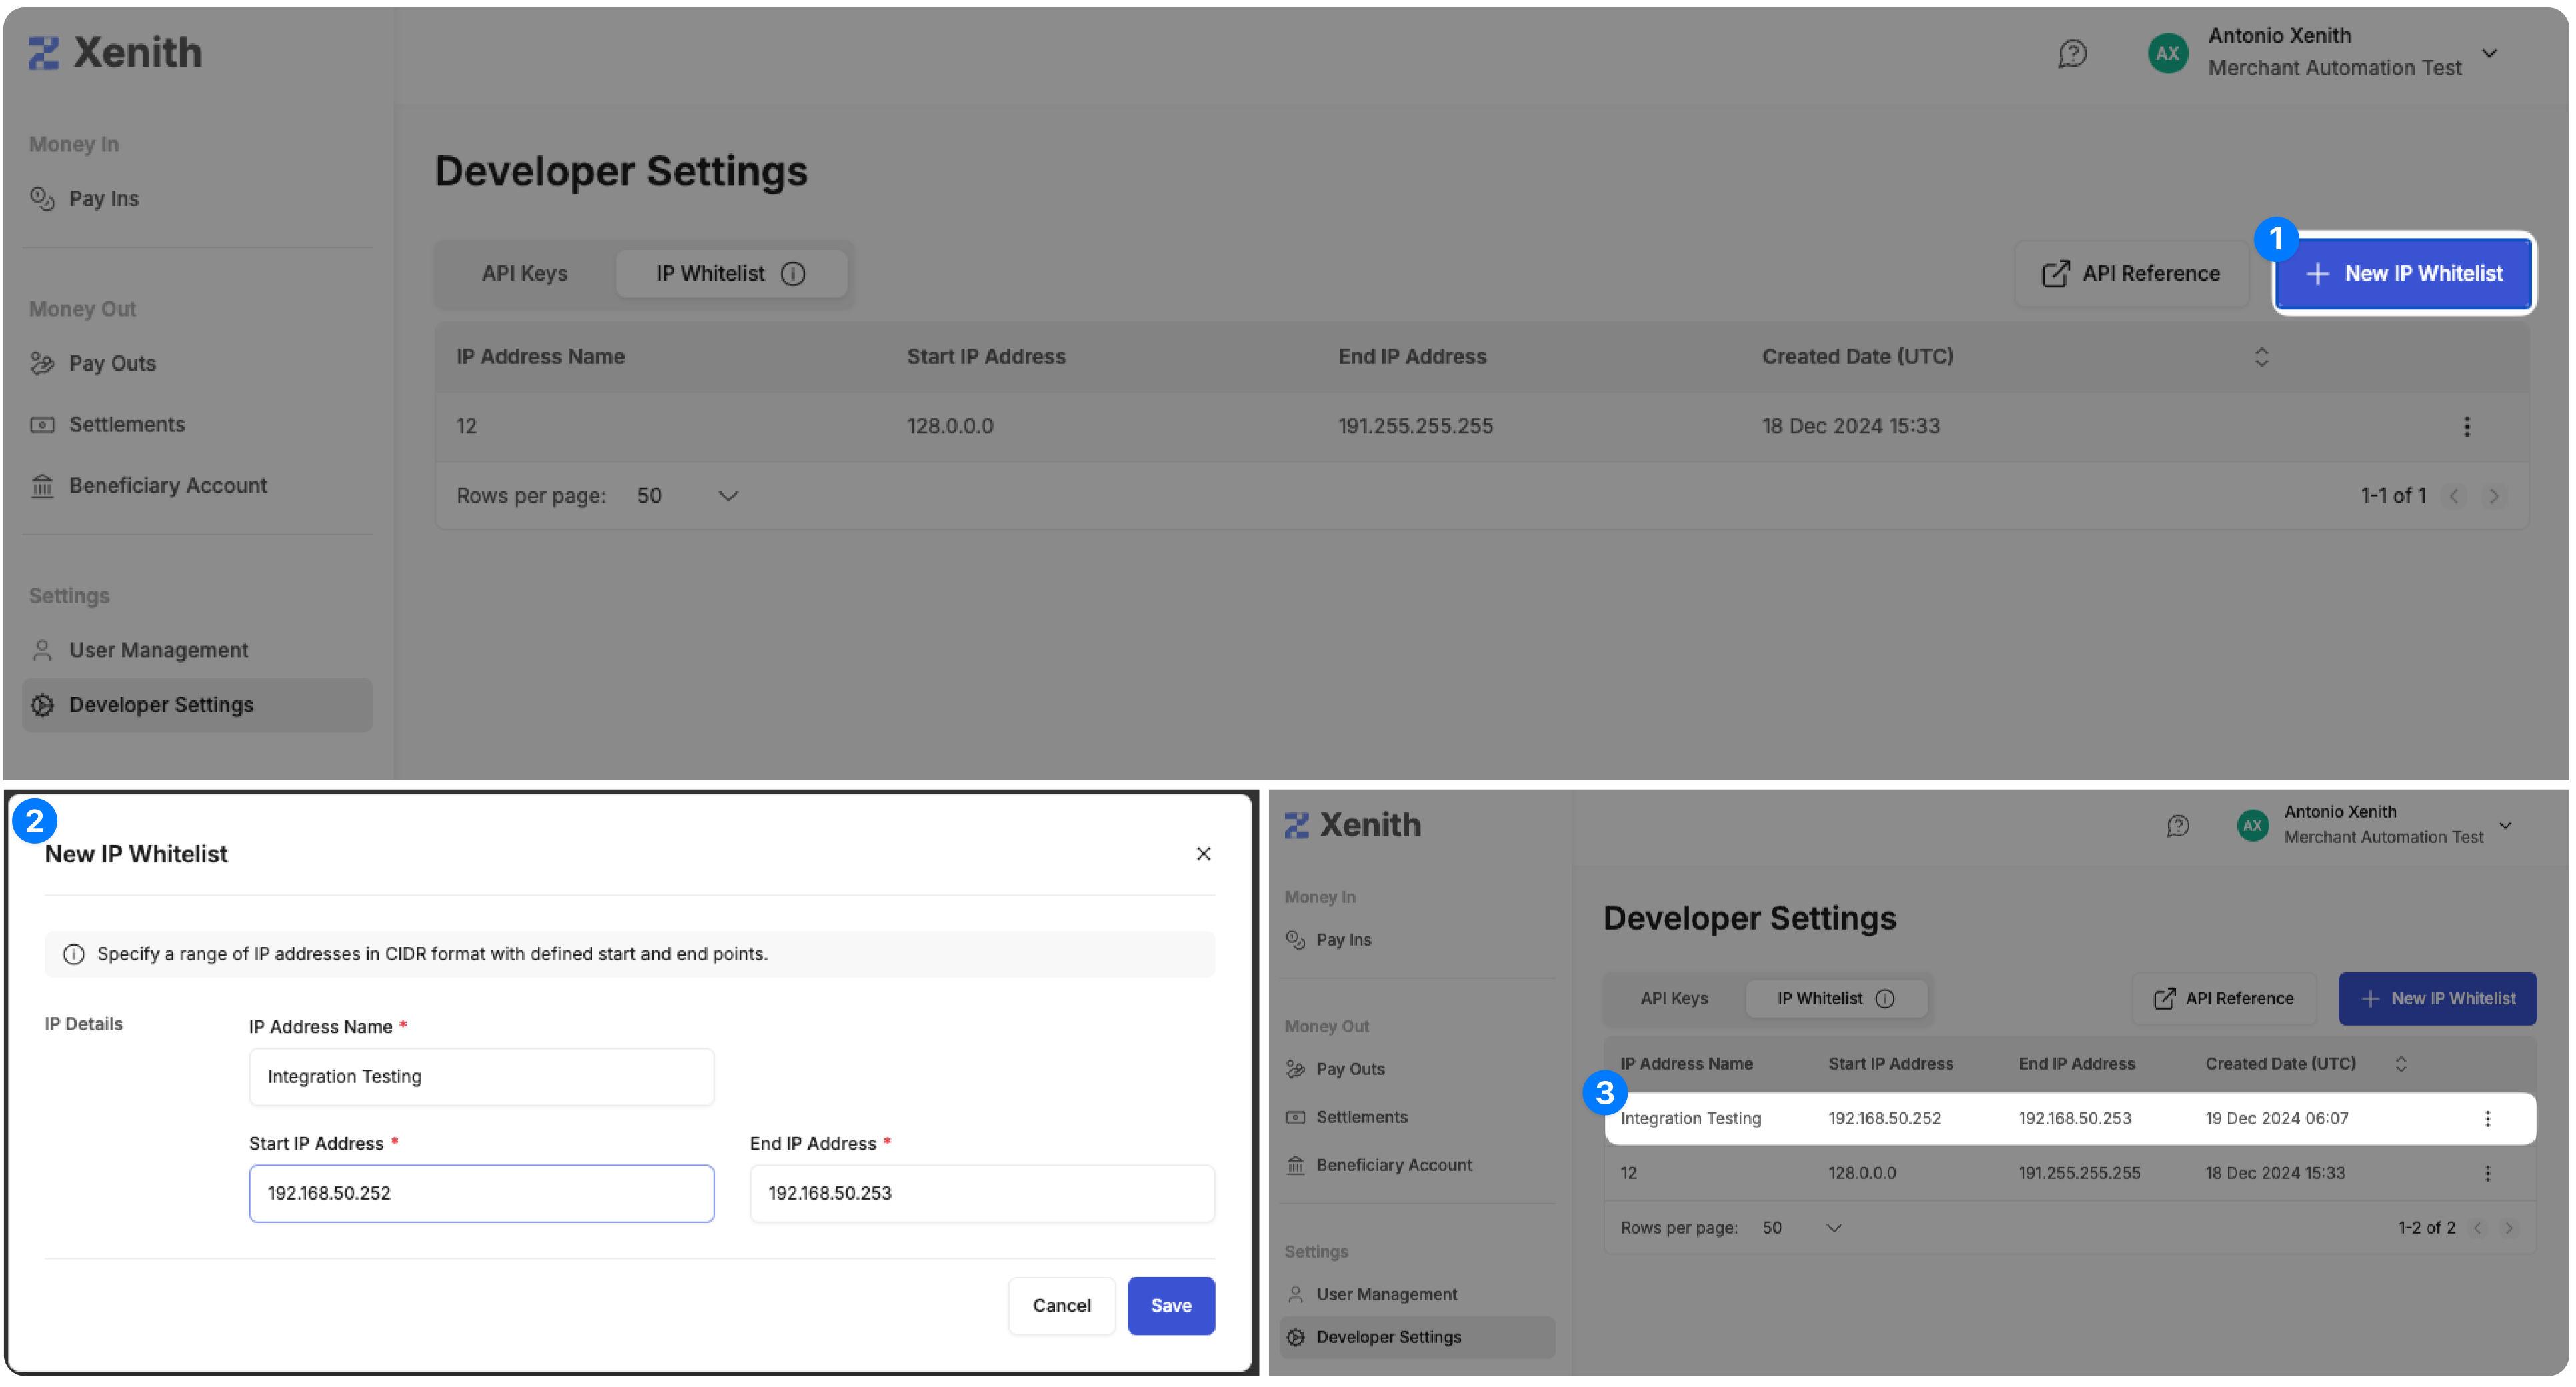
Create a New IP Whitelist
Follow these steps to create a new IP Whitelist:
- Initiate IP Whitelist Creation: Click the "+ New IP Whitelist" button.
- Fill in Required Information: A modal will appear. Enter the IP Address Name, Start and End IP Address in CIDR Format. Once done, click "Save". You can update this information later if needed.
- Verify Your IP Whitelist: After creation, it will appear in the IP Whitelist listing so you can confirm if the IP Address is correct or not.
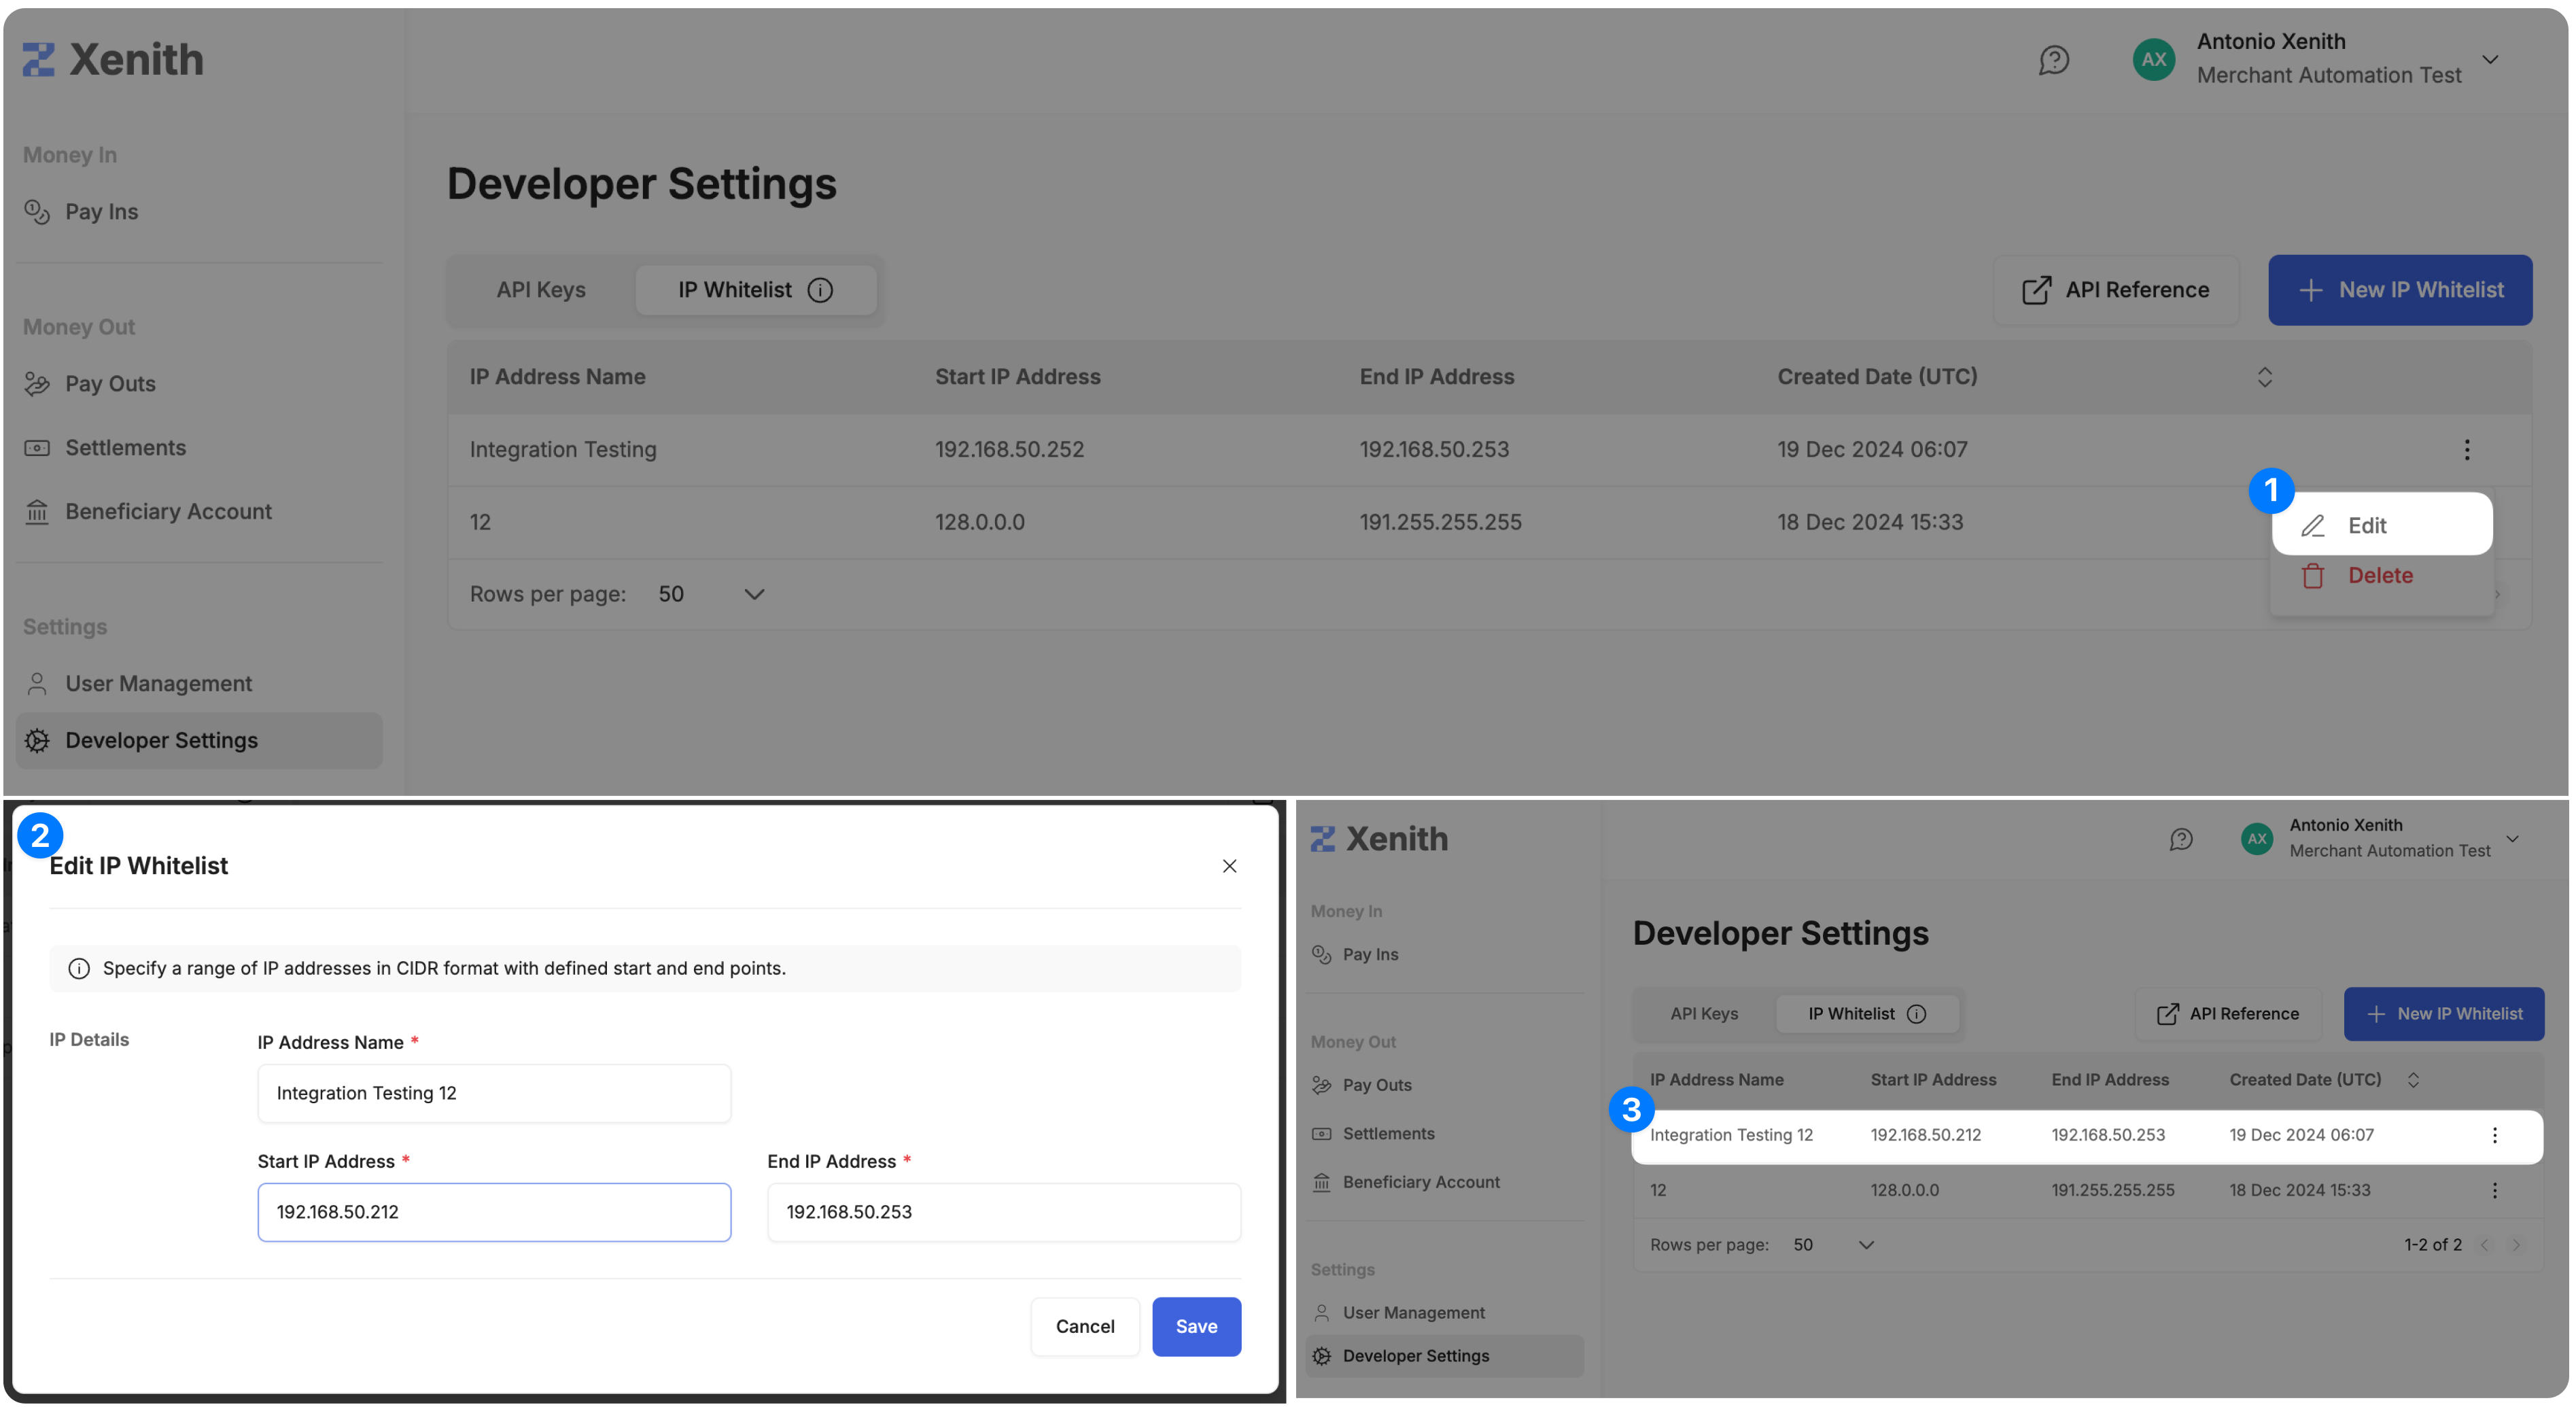
Edit an Existing IP Whitelist
Follow these steps to edit an existing IP Whitelist:
- Initiate IP Whitelist Edit: Click on the three-dot menu (⋮) next to the IP Address you want to edit, and select "Edit".
- Modify Information: In the modal that appears, update the IP Address Name, Start and End IP Address in CIDR Format as needed. Once you've made the changes, click "Save".
- Verify Your Edit: Verify the updated details by checking the name and IP Address.
Delete an Existing IP Whitelist
Follow these steps to delete an existing IP Whitelist:
- Initiate IP Whitelist Deletion: Click on the three-dot menu (⋮) next to the IP Address you want to edit, and select "Delete".
- Confirm the Action: A confirmation pop-up will appear. To proceed, click the "Delete" button. Note that this action is permanent and cannot be undone.
- Verify Your Deletion: Check the IP Whitelist listing to confirm that the key has been successfully removed.
