

No Code Pay Out
Overview
No Code Pay Out (Manual Pay Out) is a feature that allows you to initiate payout transactions directly from the merchant dashboard—no API integration required. It is a no-code solution designed for convenience and flexibility. To enhance security and governance, a Maker-Checker approval model is implemented: every No Code Pay Out initiated by a user with Maker access must be approved by a Checker before processing.
This feature is ideal for a variety of use cases, including one-off or ad-hoc payments (such as refunds, incentives, or reimbursements), fallback payouts when API systems are unavailable, and disbursements handled by non-technical teams like finance or operations. It’s also well-suited for merchants with low transaction volumes that don’t warrant API integration, and for testing new currencies or payment channels prior to full rollout.
Getting Started
Creating a No Code Pay Out is easy and doesn’t require any API integration. Your ability to initiate or approve payouts depends on your access level in the Pay Out module:
| Access Level | Permissions |
|---|---|
| View Access | Cannot create or approve No Code Pay Outs. |
| Maker Access | Can create and cancel No Code Pay Outs. |
| Checker Access | Can approve or cancel No Code Pay Outs, but cannot create them. |
| Full Access | Can create, approve, and cancel No Code Pay Outs. |
If you have Maker or Full Access, you can initiate two types of payouts:
- Single No Code Pay Out
- Batch No Code Pay Out
Single No Code Pay Out
Single No Code Pay Out allows you to send individual payments quickly and easily—without needing any API setup. It’s perfect for issuing refunds, one-time reimbursements, incentives, or any ad-hoc disbursement. Here's how:
-
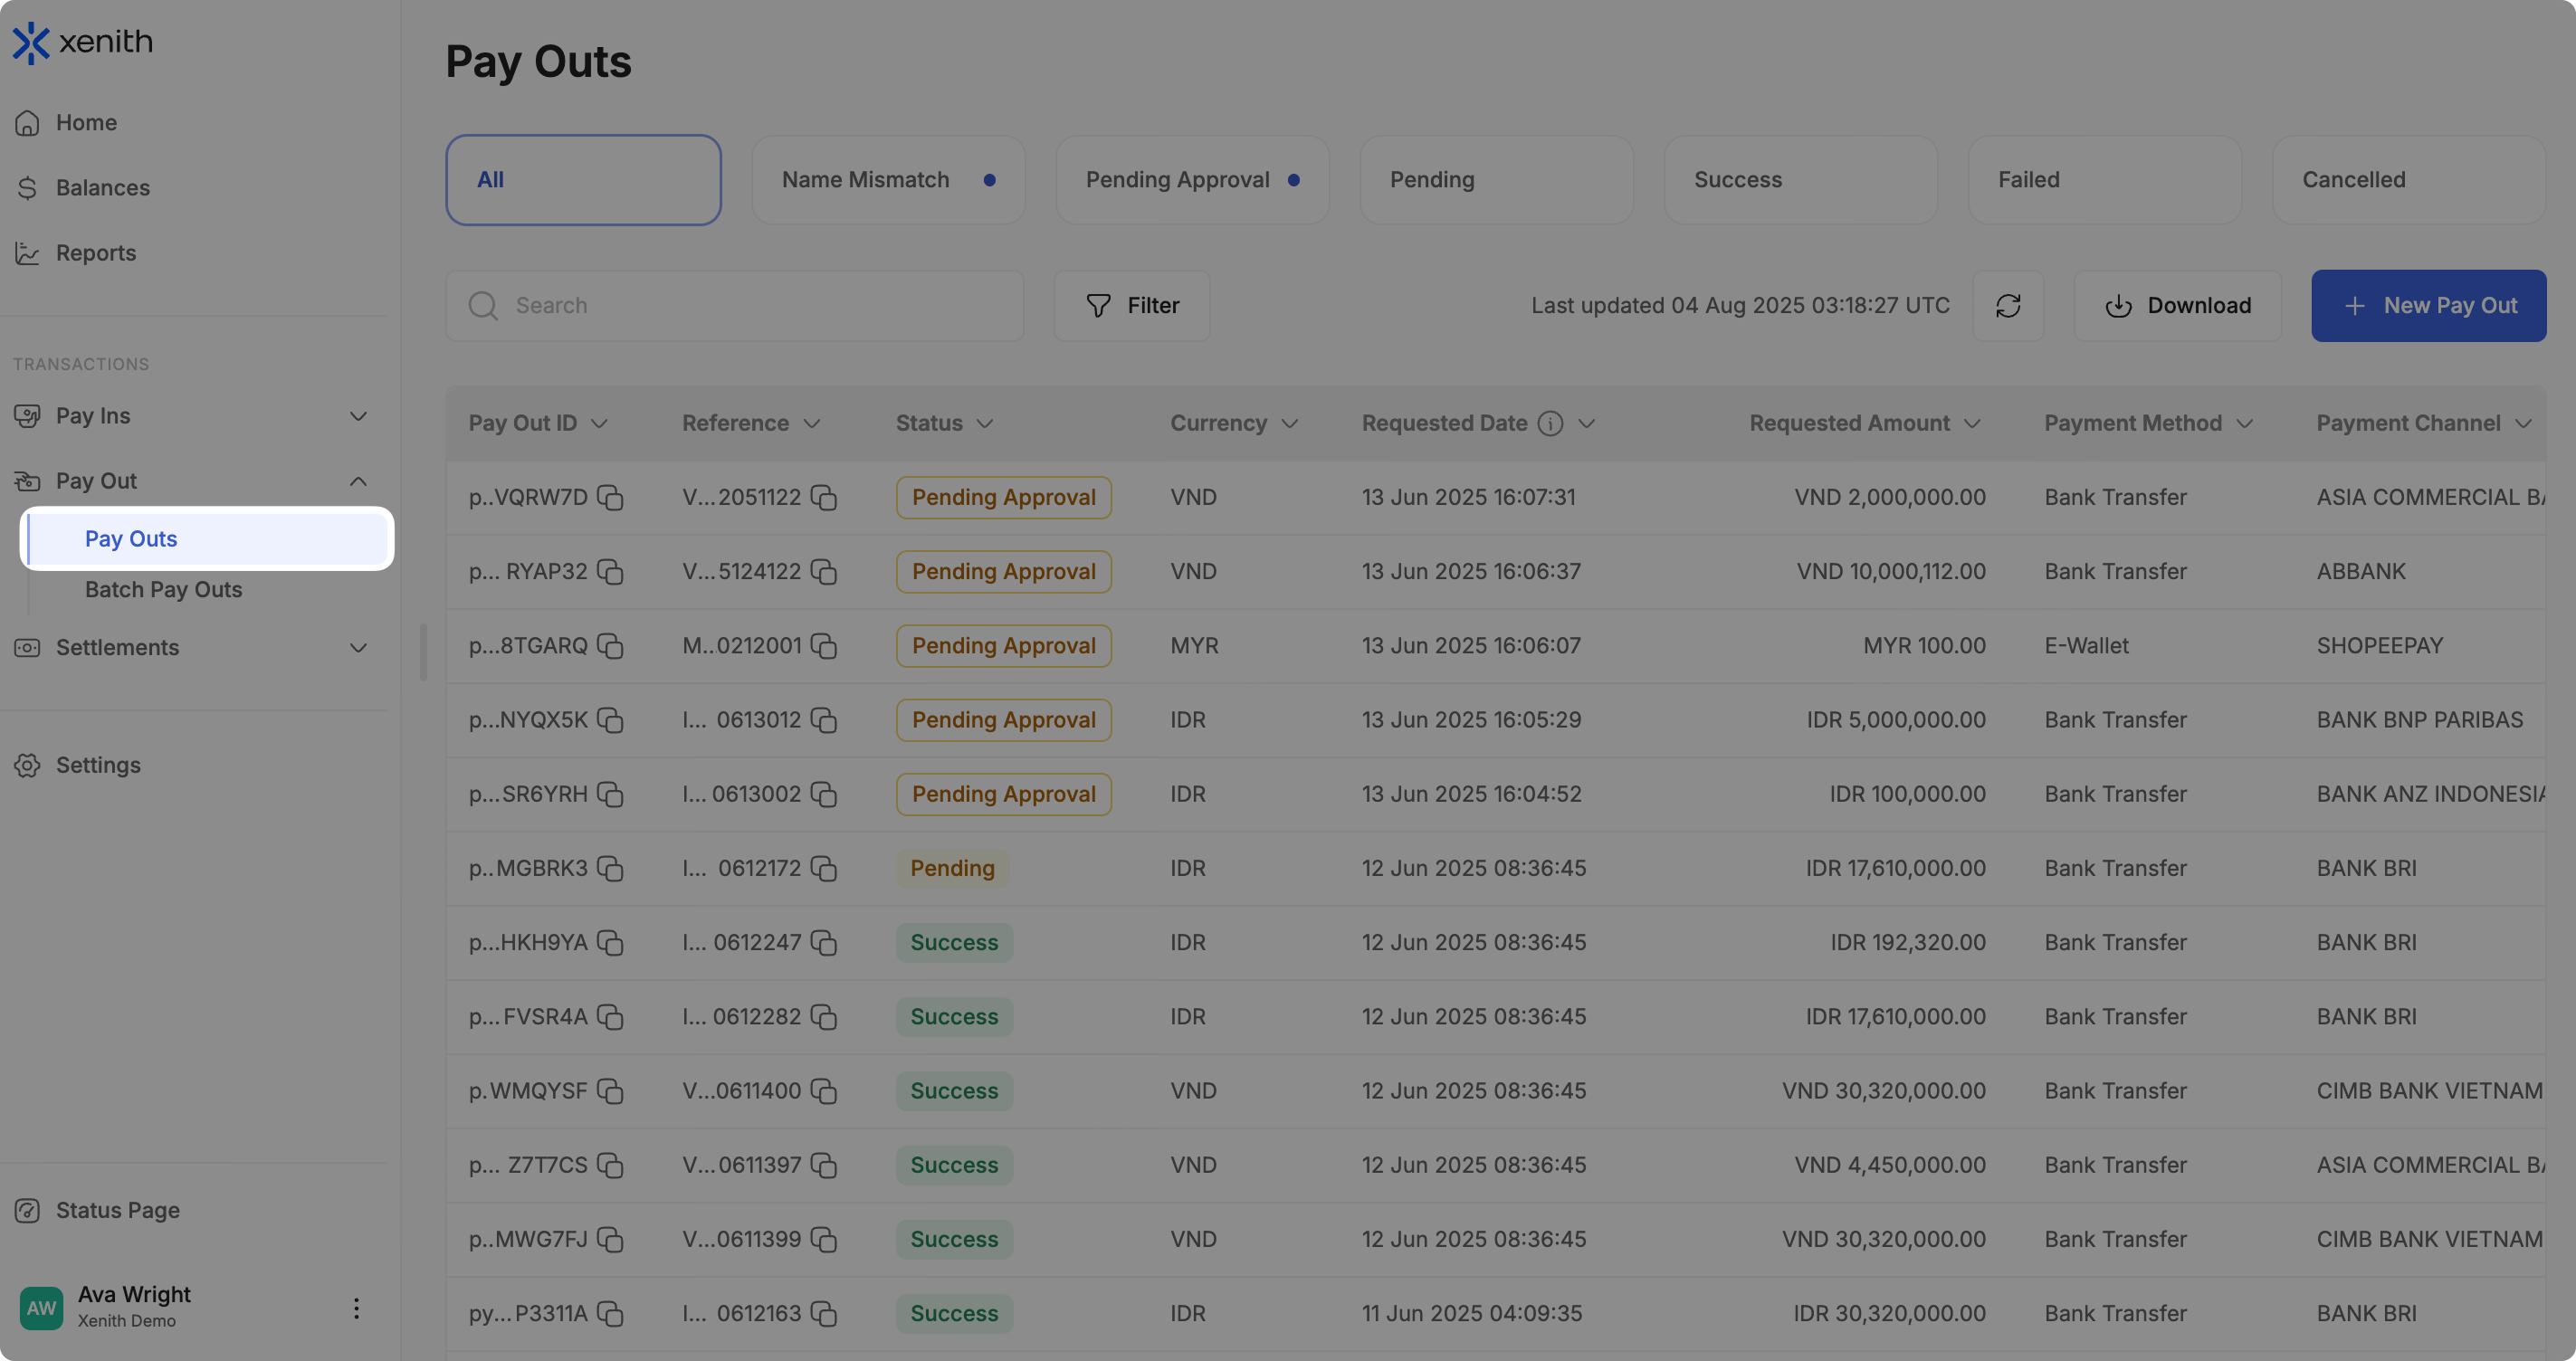
Navigate to Pay Outs: In the left sidebar, click on “Pay Outs”.
-
Create Single No Code Pay Out: Click the
+ New Pay Outbutton to begin creating a single no code Pay Out.
-
Fill in the Required Details: Complete the required fields
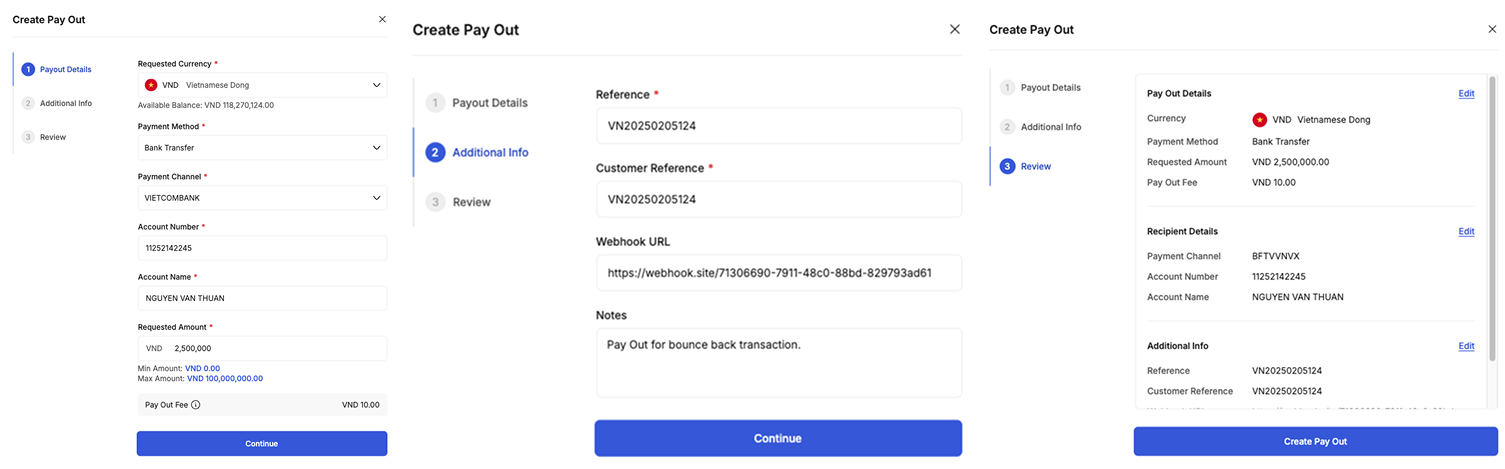
Field Required Description Currency Yes The currency of the payout. Payment Method Yes The payment method available for the selected currency. Payment Channel Yes The payment channel available for the selected currency and payment method. List of supported channels here Account Number Yes The recipient’s account number (bank account or phone number). Account Name Yes The name of the payout recipient. Requested Amount Yes The amount to be sent. Reference Yes Your internal identifier for this transaction. Customer Reference Yes Your internal identifier for the customer related to this transaction. Webhook URL No Optional webhook URL to receive status updates. Description No Optional description or note for the payout. -
Submit the Pay Out: Click “Submit” to create the Pay Out. At this stage, the transaction is not yet processed by Xenith. Instead, the status is changed to “Pending Approval” and need to be approved before processed.

-
Approve or Cancel: If you are a Maker, you can cancel the transaction. If you are a Checker or have Full Access, you can either approve or cancel it.
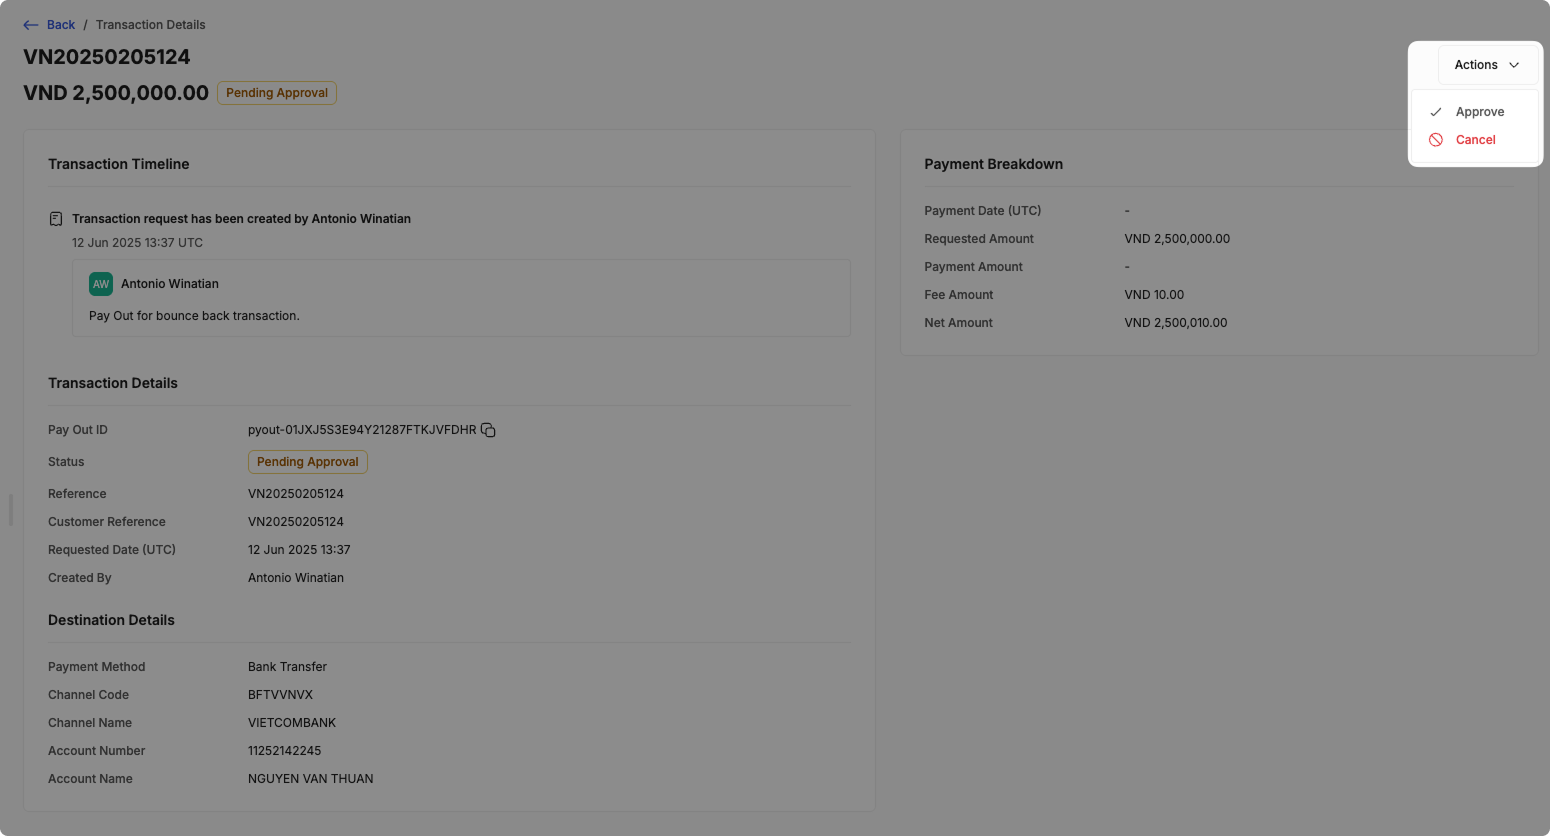
- If canceled, the Pay Out will be marked as “Canceled”, which is a final status—it cannot be reversed. To proceed with the same payout, you’ll need to submit a new request.
- If approved, the Pay Out will move to “Pending” and will be automatically processed by Xenith.
Batch No Code Pay Out
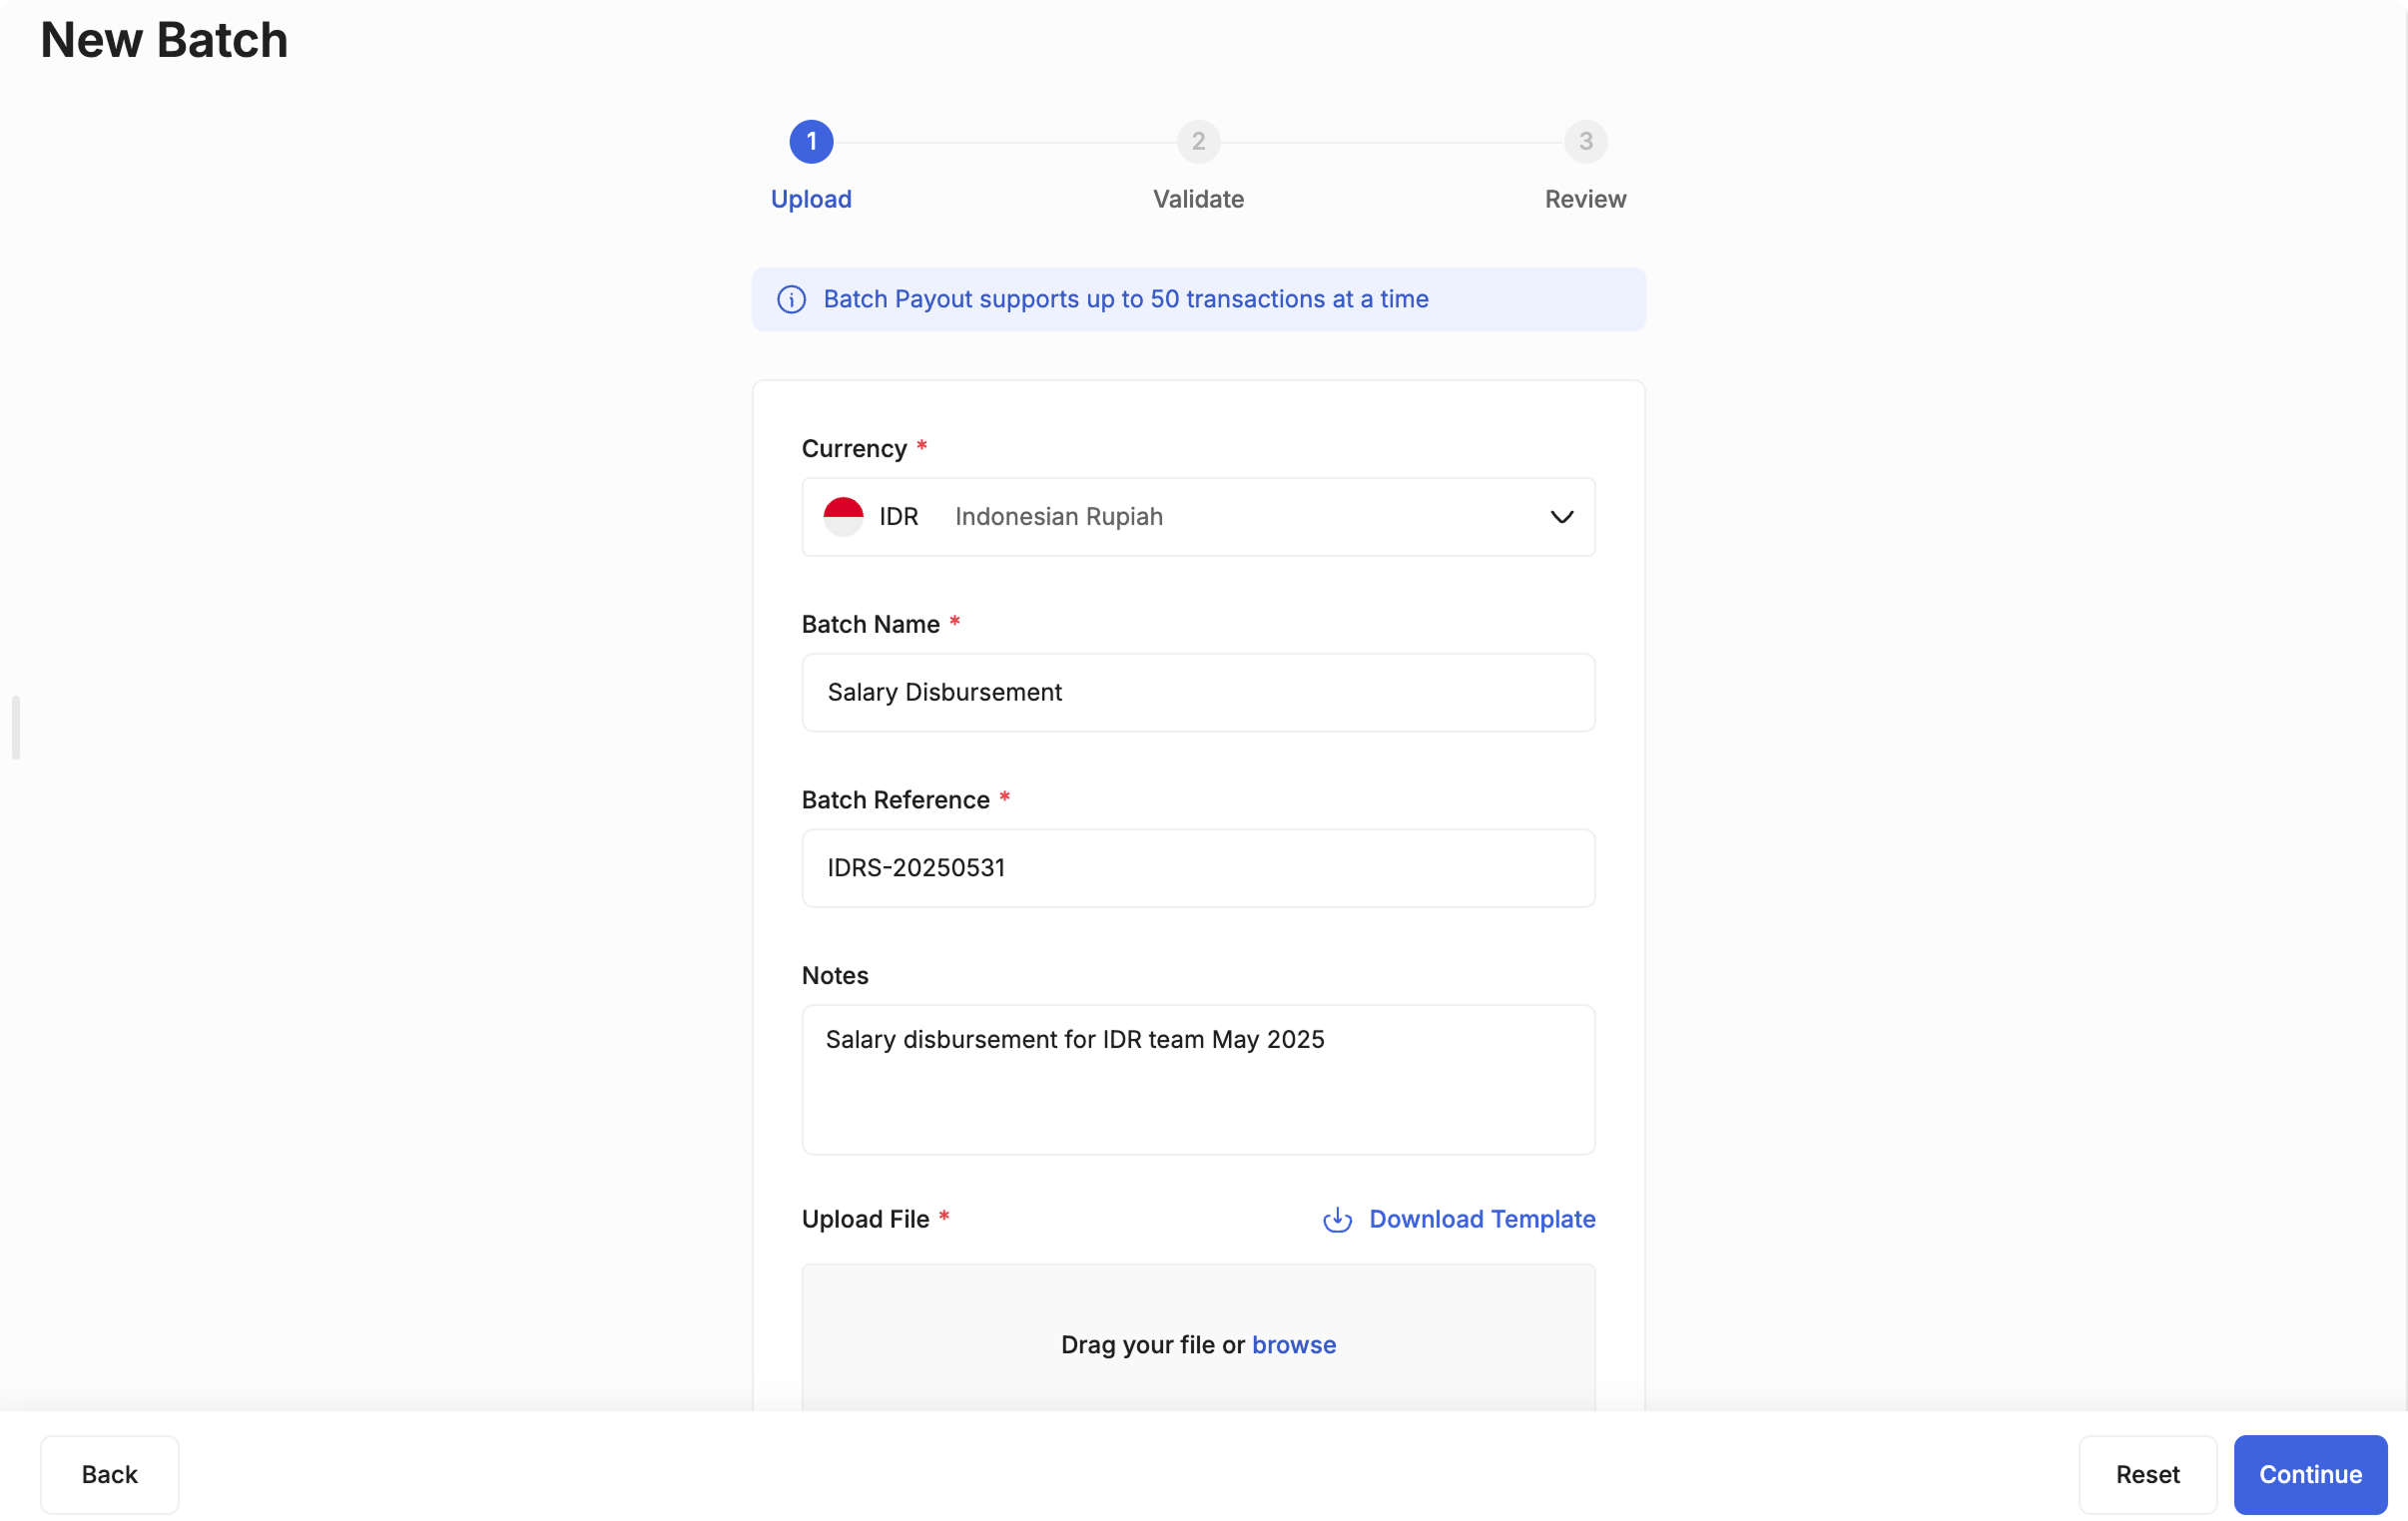
Batch No Code Pay Out allows you to upload and process multiple payouts at once (currently maximum 50 transactions per batch)—perfect for handling disbursements at scale without API integration. Whether you're paying out partners, issuing bulk refunds, or processing payroll, you can prepare your transactions in a spreadsheet and submit them in a few quick steps. Here's how:
-
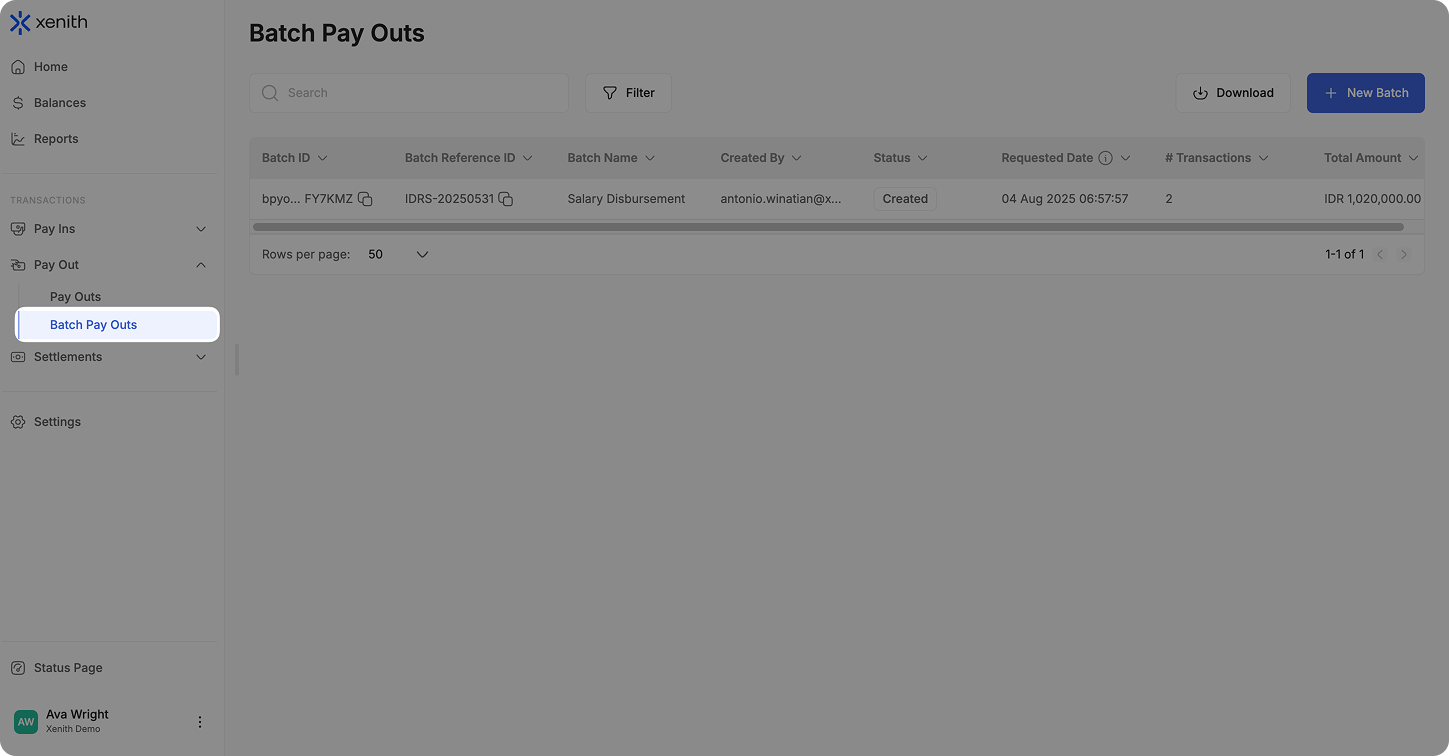
Navigate to Batch Pay Outs: In the left sidebar, click on “Batch Pay Outs”.
-
Create Batch No Code Pay Out: Click the
+ New Batchbutton to begin creating a batch Pay Out.
-
Fill in the Required Details and Upload the File: Fill in the Currency, Batch Name, Batch Reference, and optional Notes. Then upload your batch Pay Out file using the latest template. Note: Always download the latest template from the platform, and follow the formatting instructions in the guideline to ensure compatibility and prevent errors.
-
Validate the Upload: After uploading, review the transactions. You can edit any rows that contain issues.
You must resolve all errors before continuing. Once everything is valid, click “Continue”.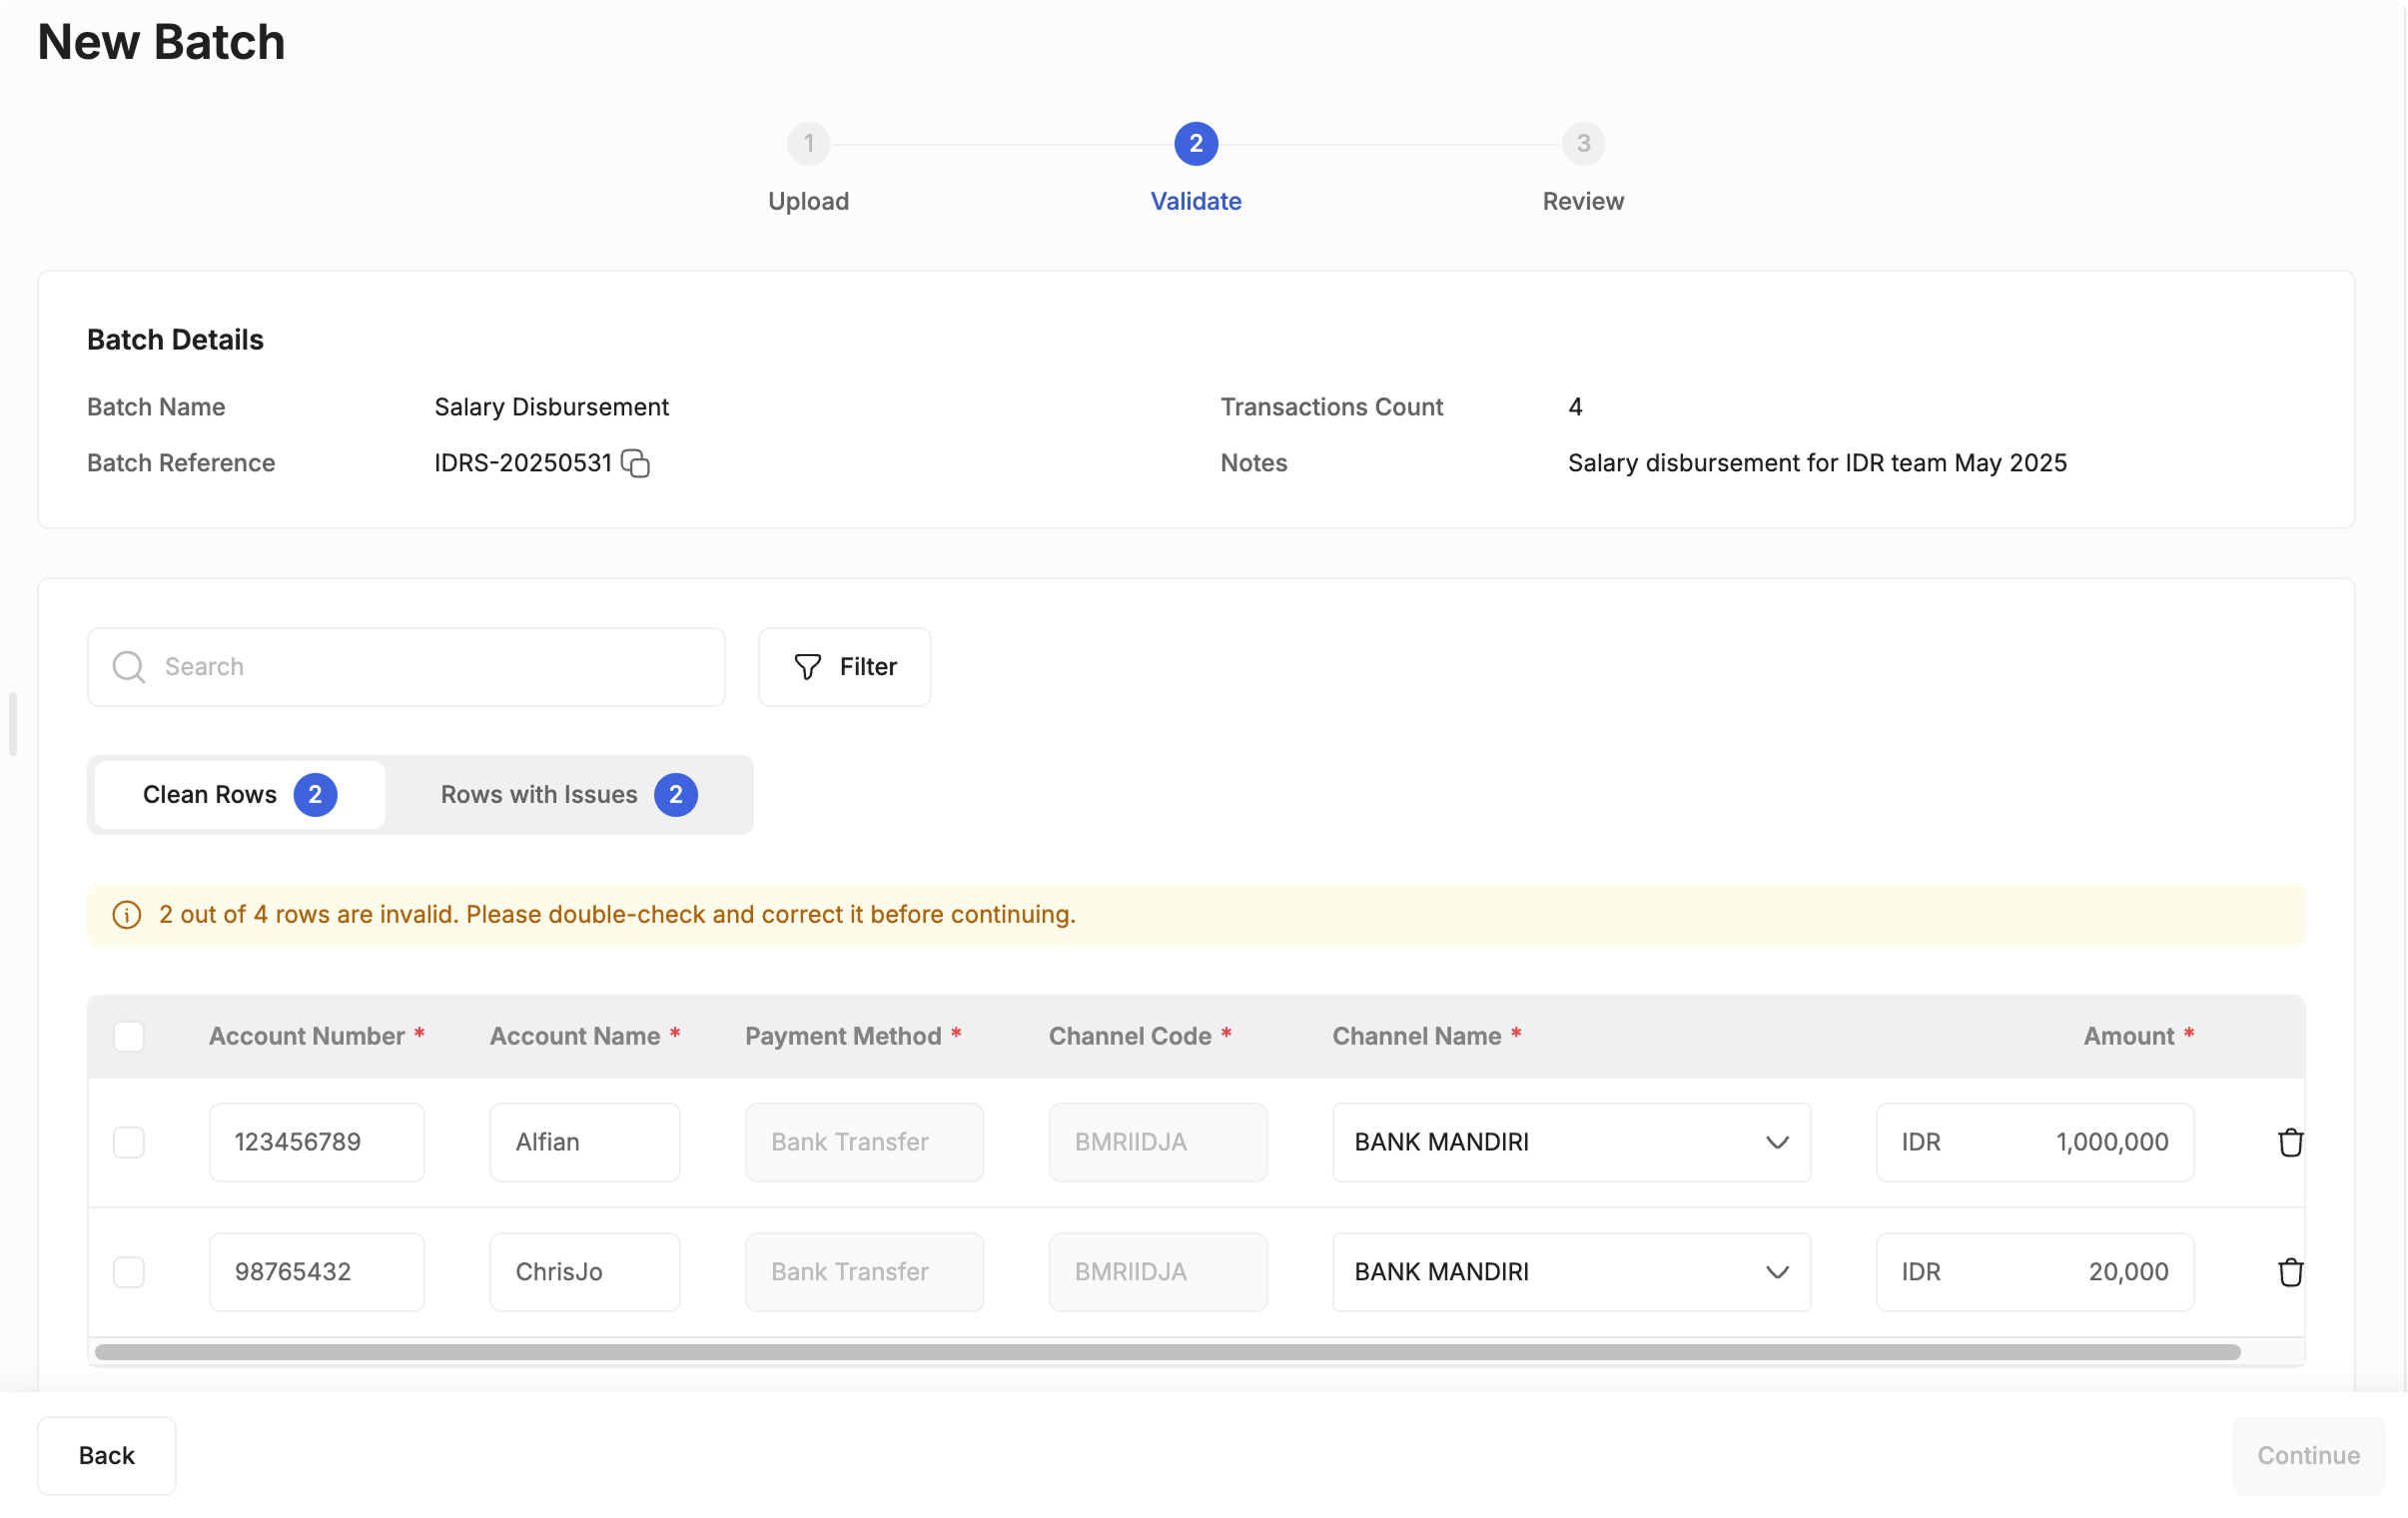
-
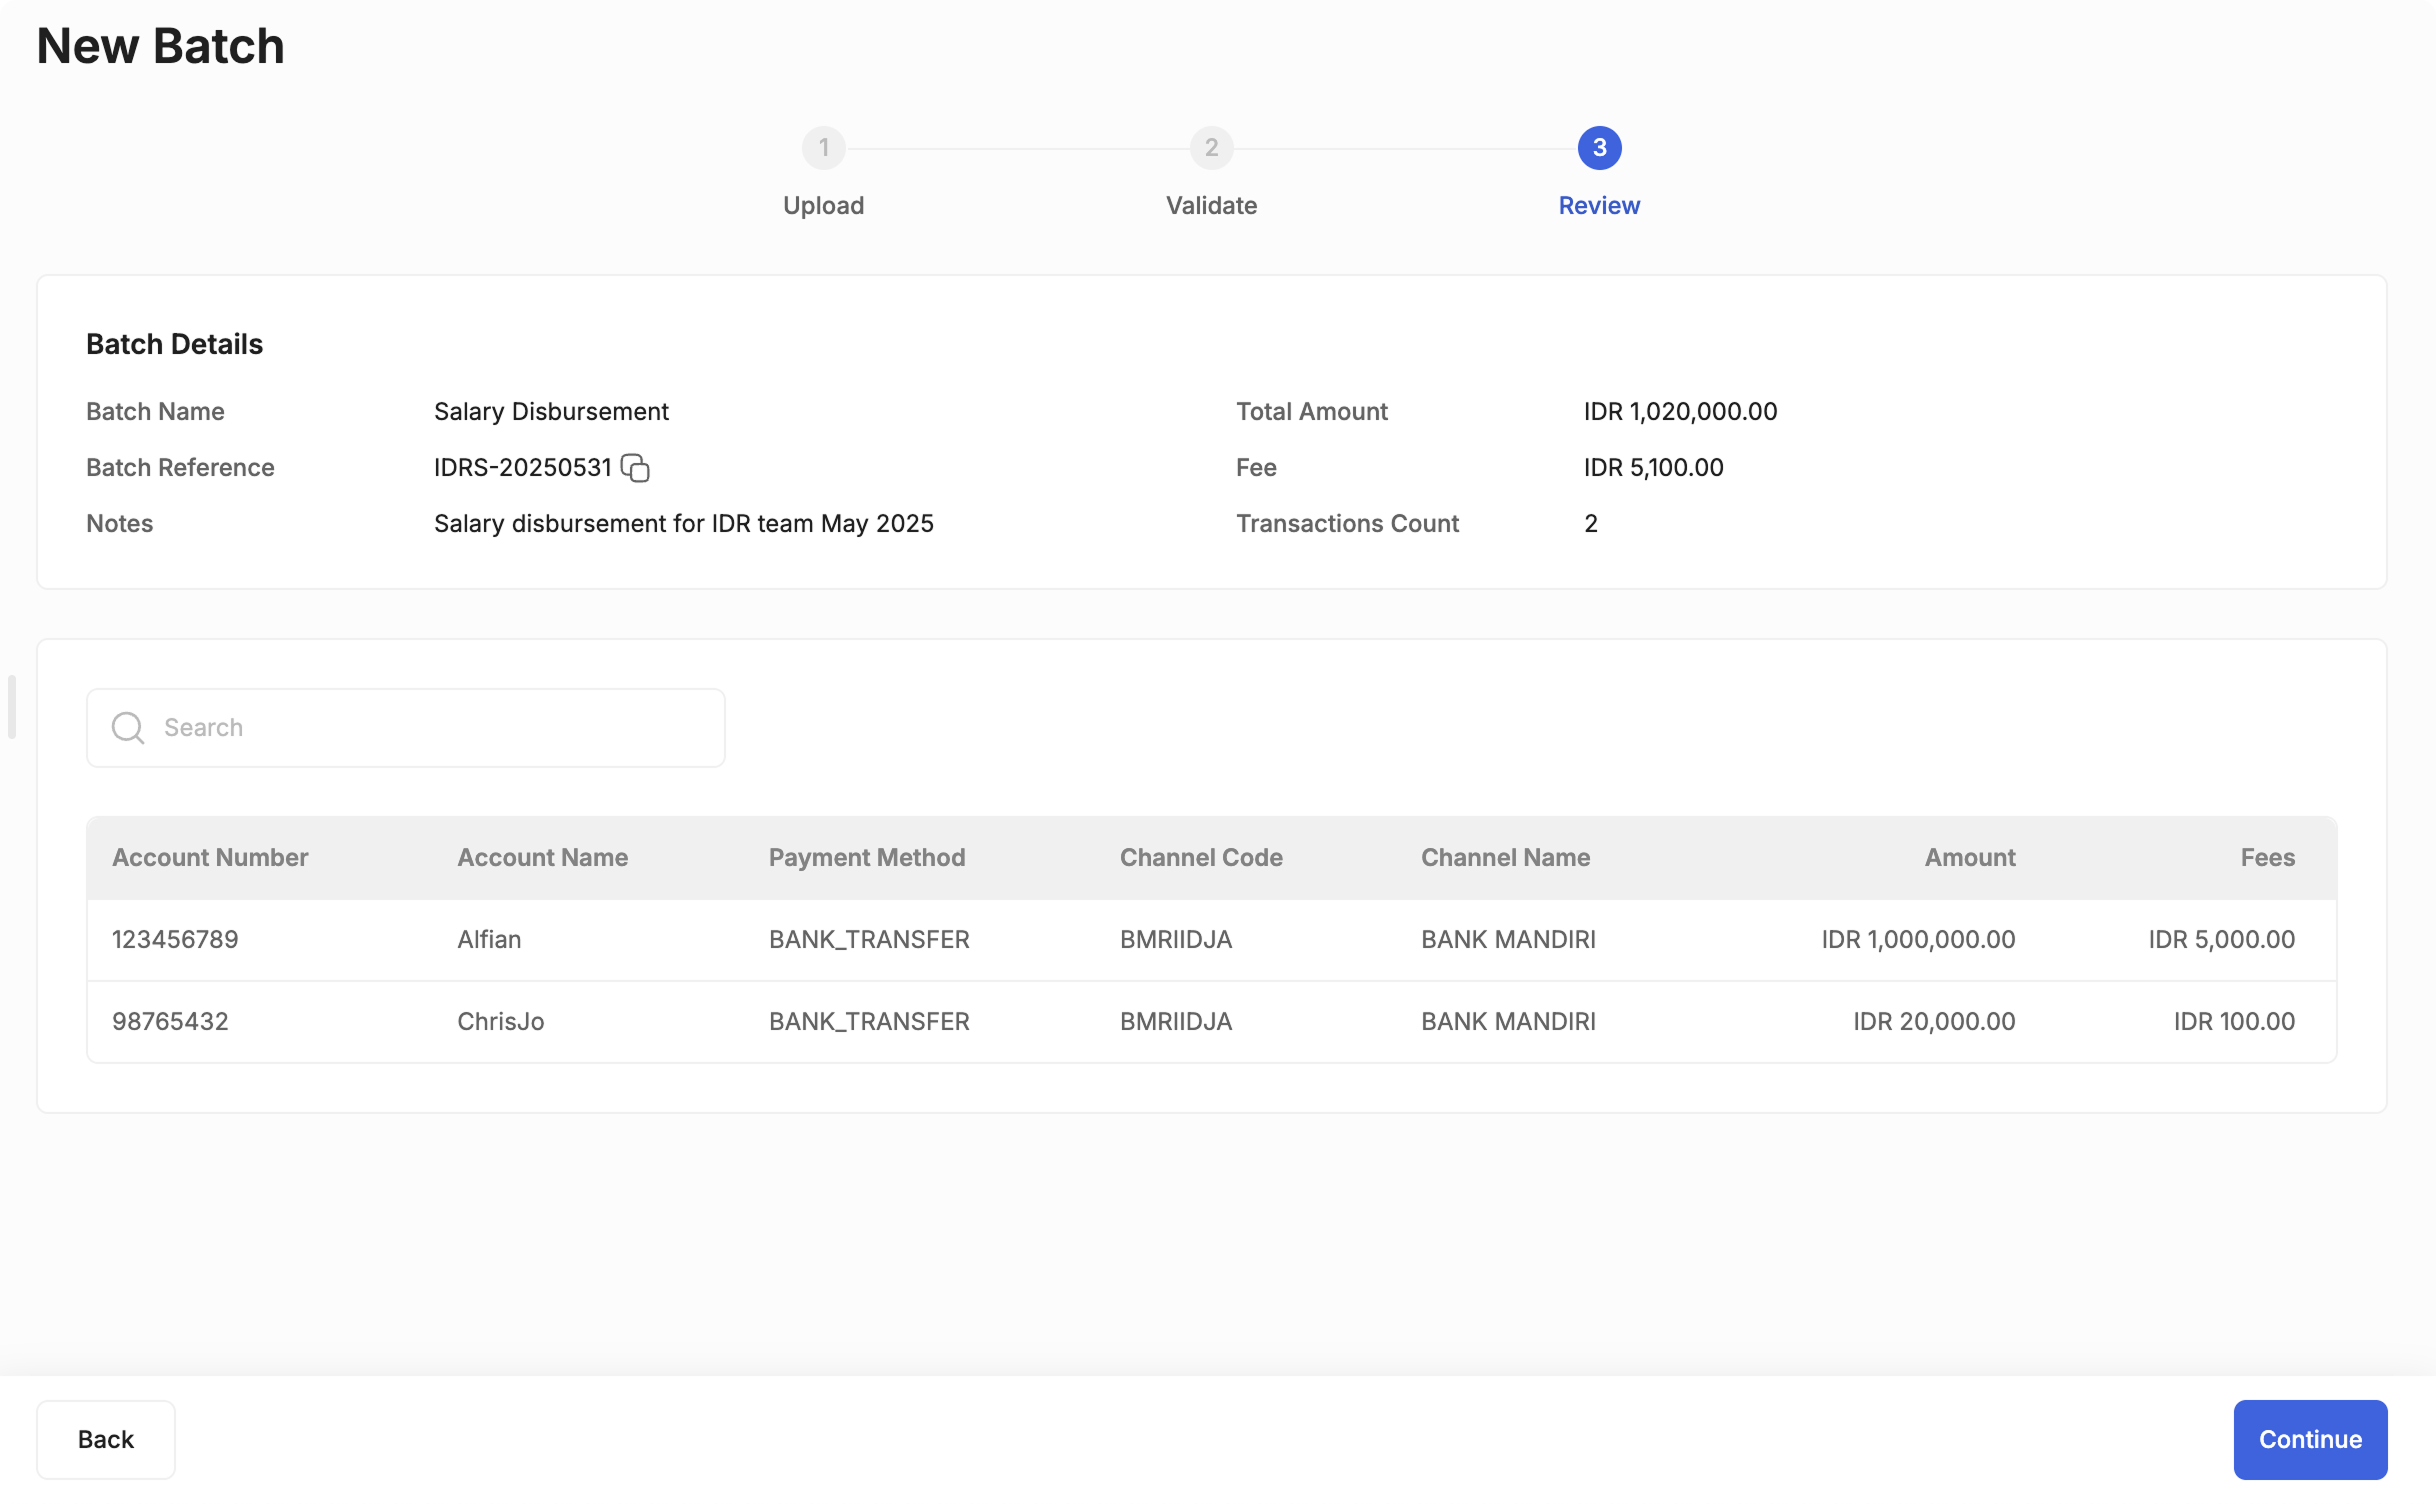
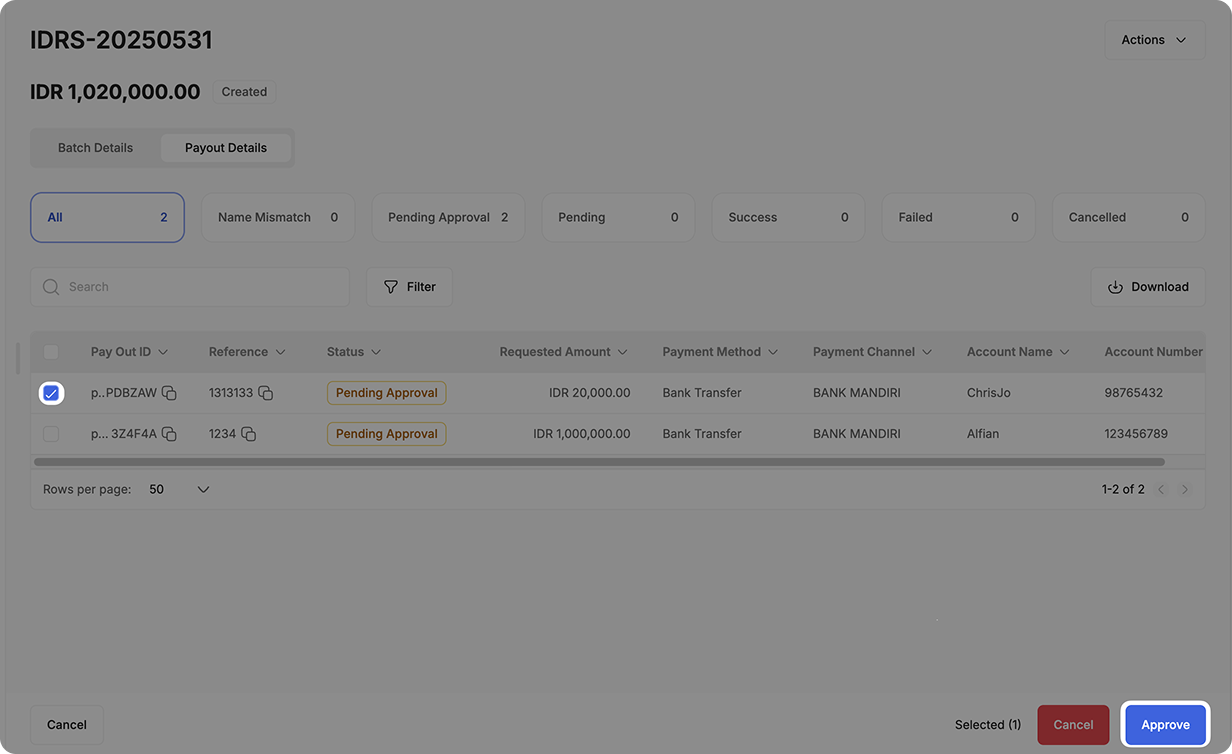
Review Batch Details: Confirm all batch-level information and transactions. Once reviewed, click “Continue” to create the batch. At this point, the Pay Out is not yet processed. The Pay Out in the batch will enter “Pending Approval” status.
-
Approve or Cancel: If you are a Maker, you can cancel the transaction. If you are a Checker or have Full Access, you can either approve or cancel it. If you have Checker or Full Access, you can take action on the batch using one of two methods:
-
Batch Action: Approve or cancel all transactions at once.
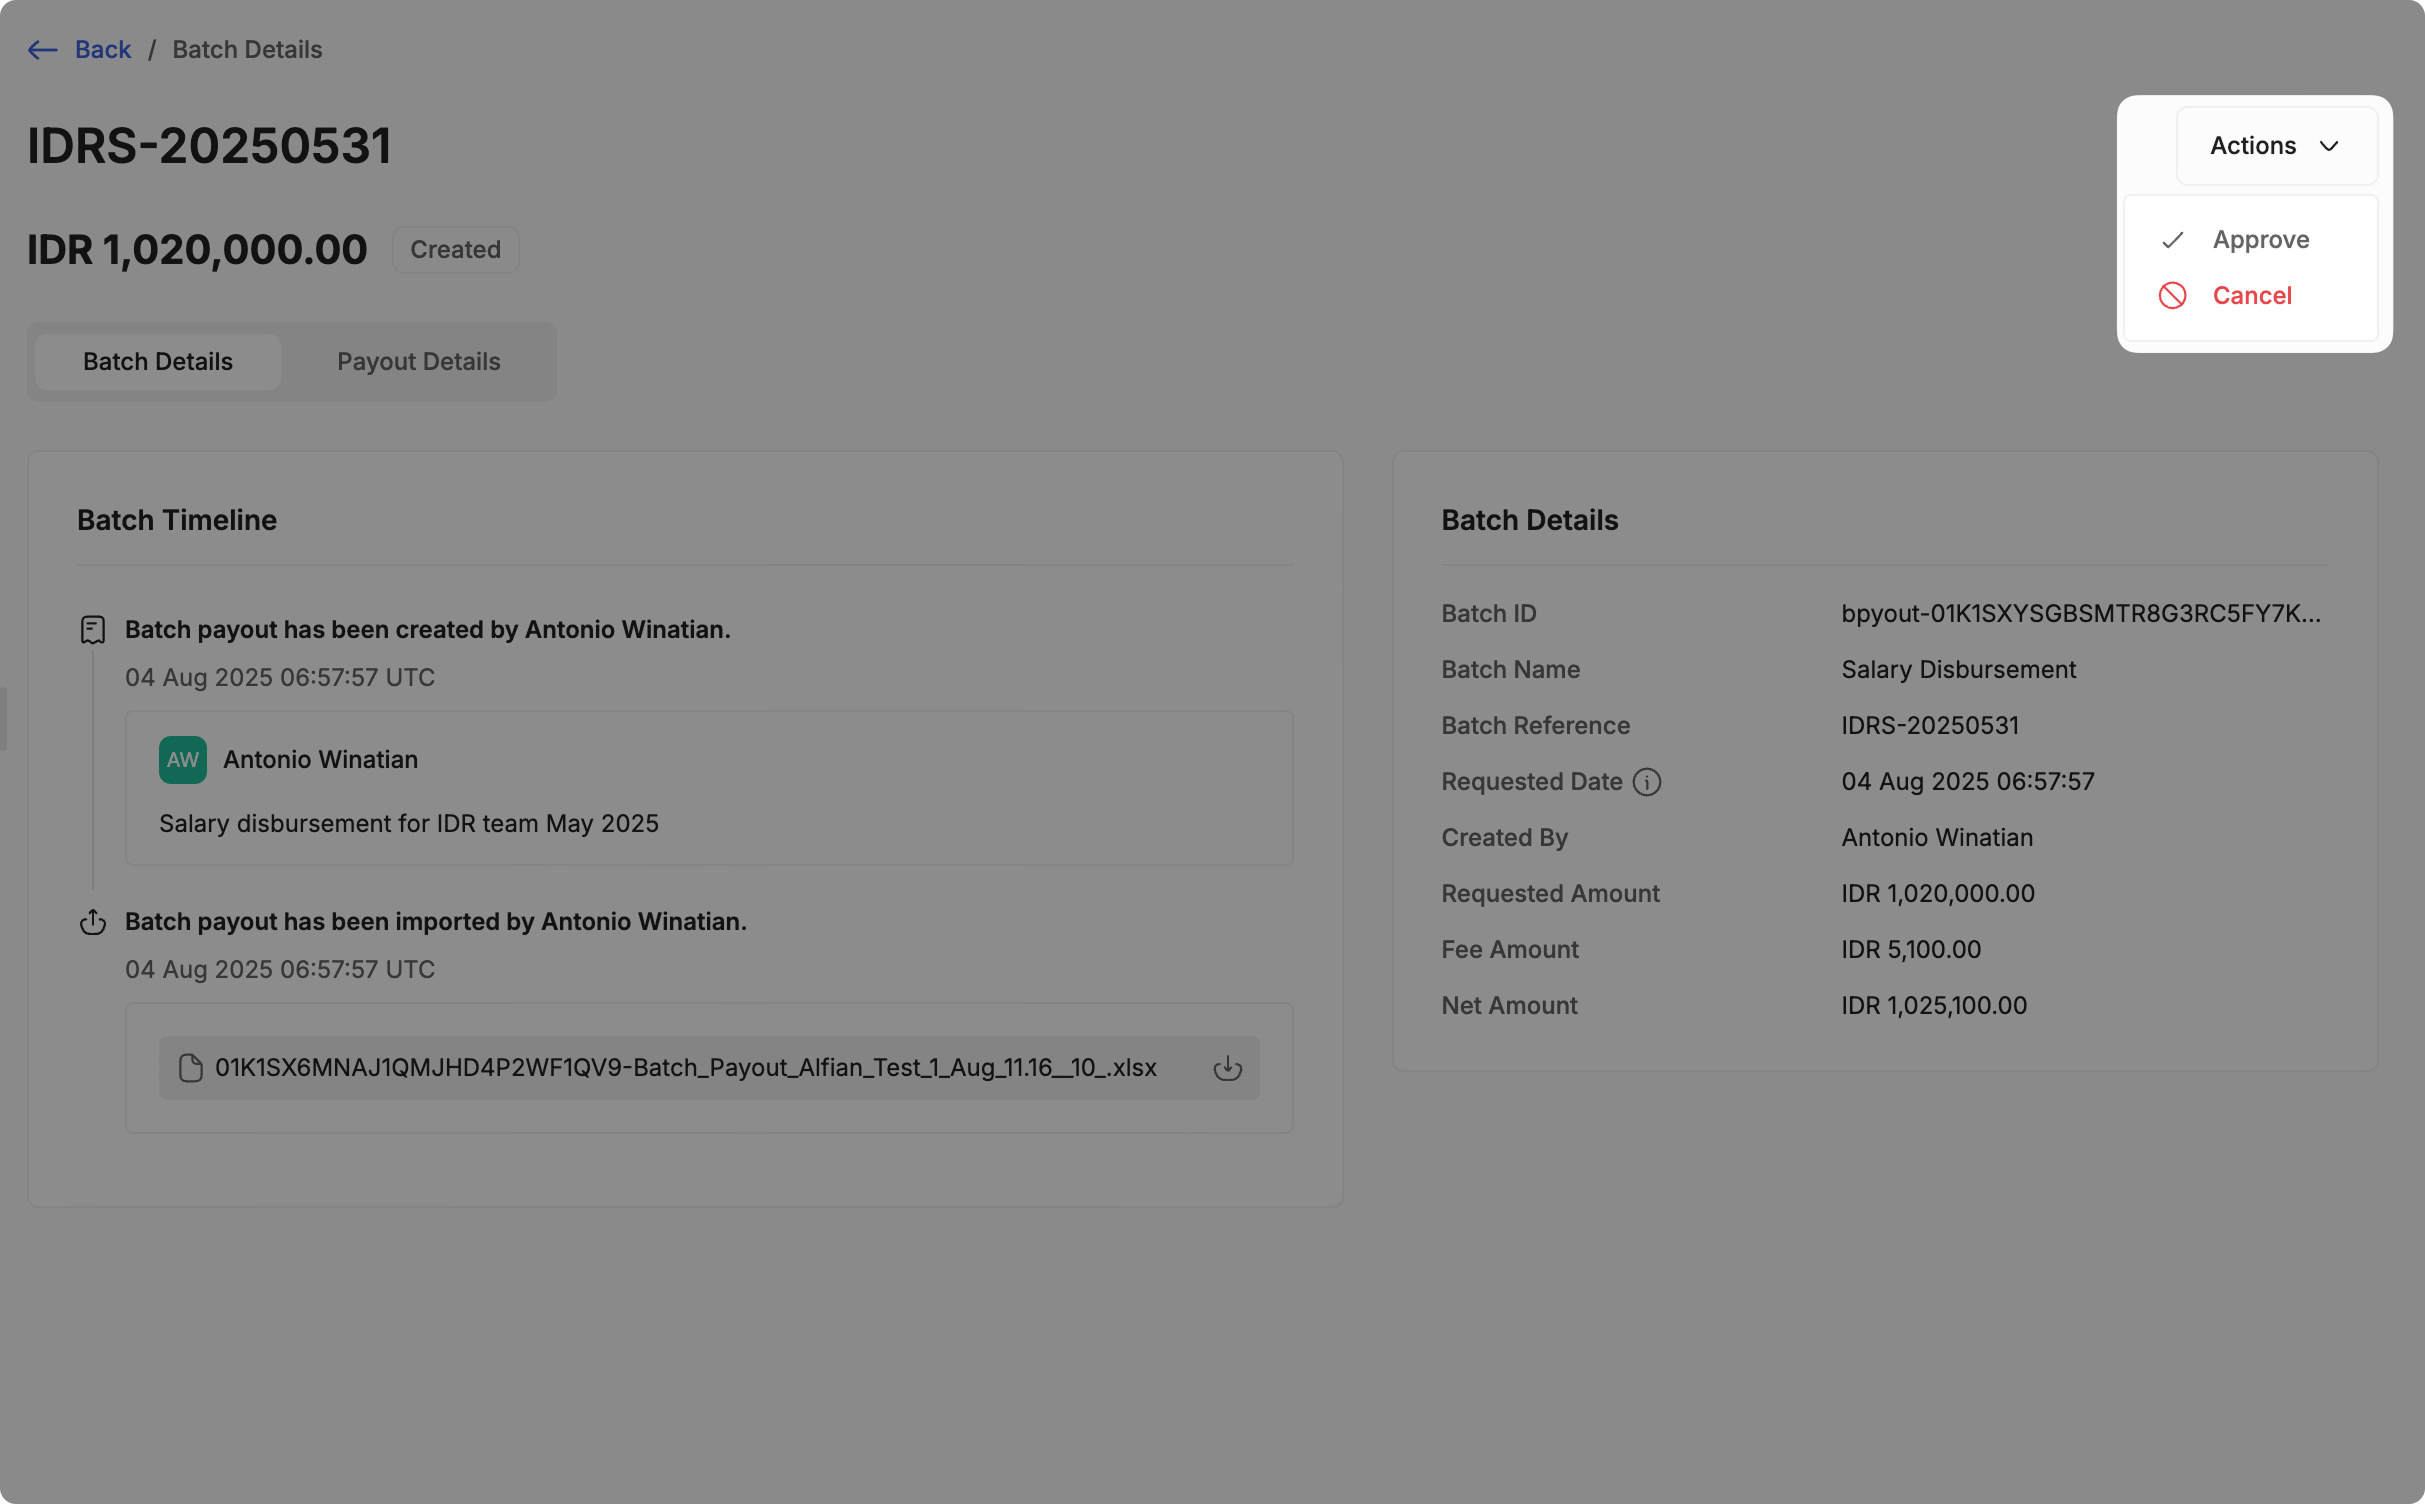
-
Individual Action: Go to the “Payout Details” tab and approve or cancel specific transactions.
-
-
Review and Authenticate Action: When approving, you’ll be prompted to review the details one more time. Once reviewed and proceed, you will be prompted to authenticate the action (in the example, by inputting OTP sent to your email). After completing this step, the Pay Outs will be processed by Xenith and the transaction status will change to "Pending". You can monitor the status of each transaction in both the Pay Outs and Batch Pay Outs modules.