
Overview
Pay Ins refer to money-in transactions where your customers deposit funds into your account. Our pay-in system currently supports bank transfers, QR-based payments, and eWallet payments. View the full list of supported channels here.
Process Flow
Understanding the lifecycle of a Pay In helps you manage and track your transactions effectively. The diagram illustrates the state transitions of a Pay In transaction, from creation to completion or failure.
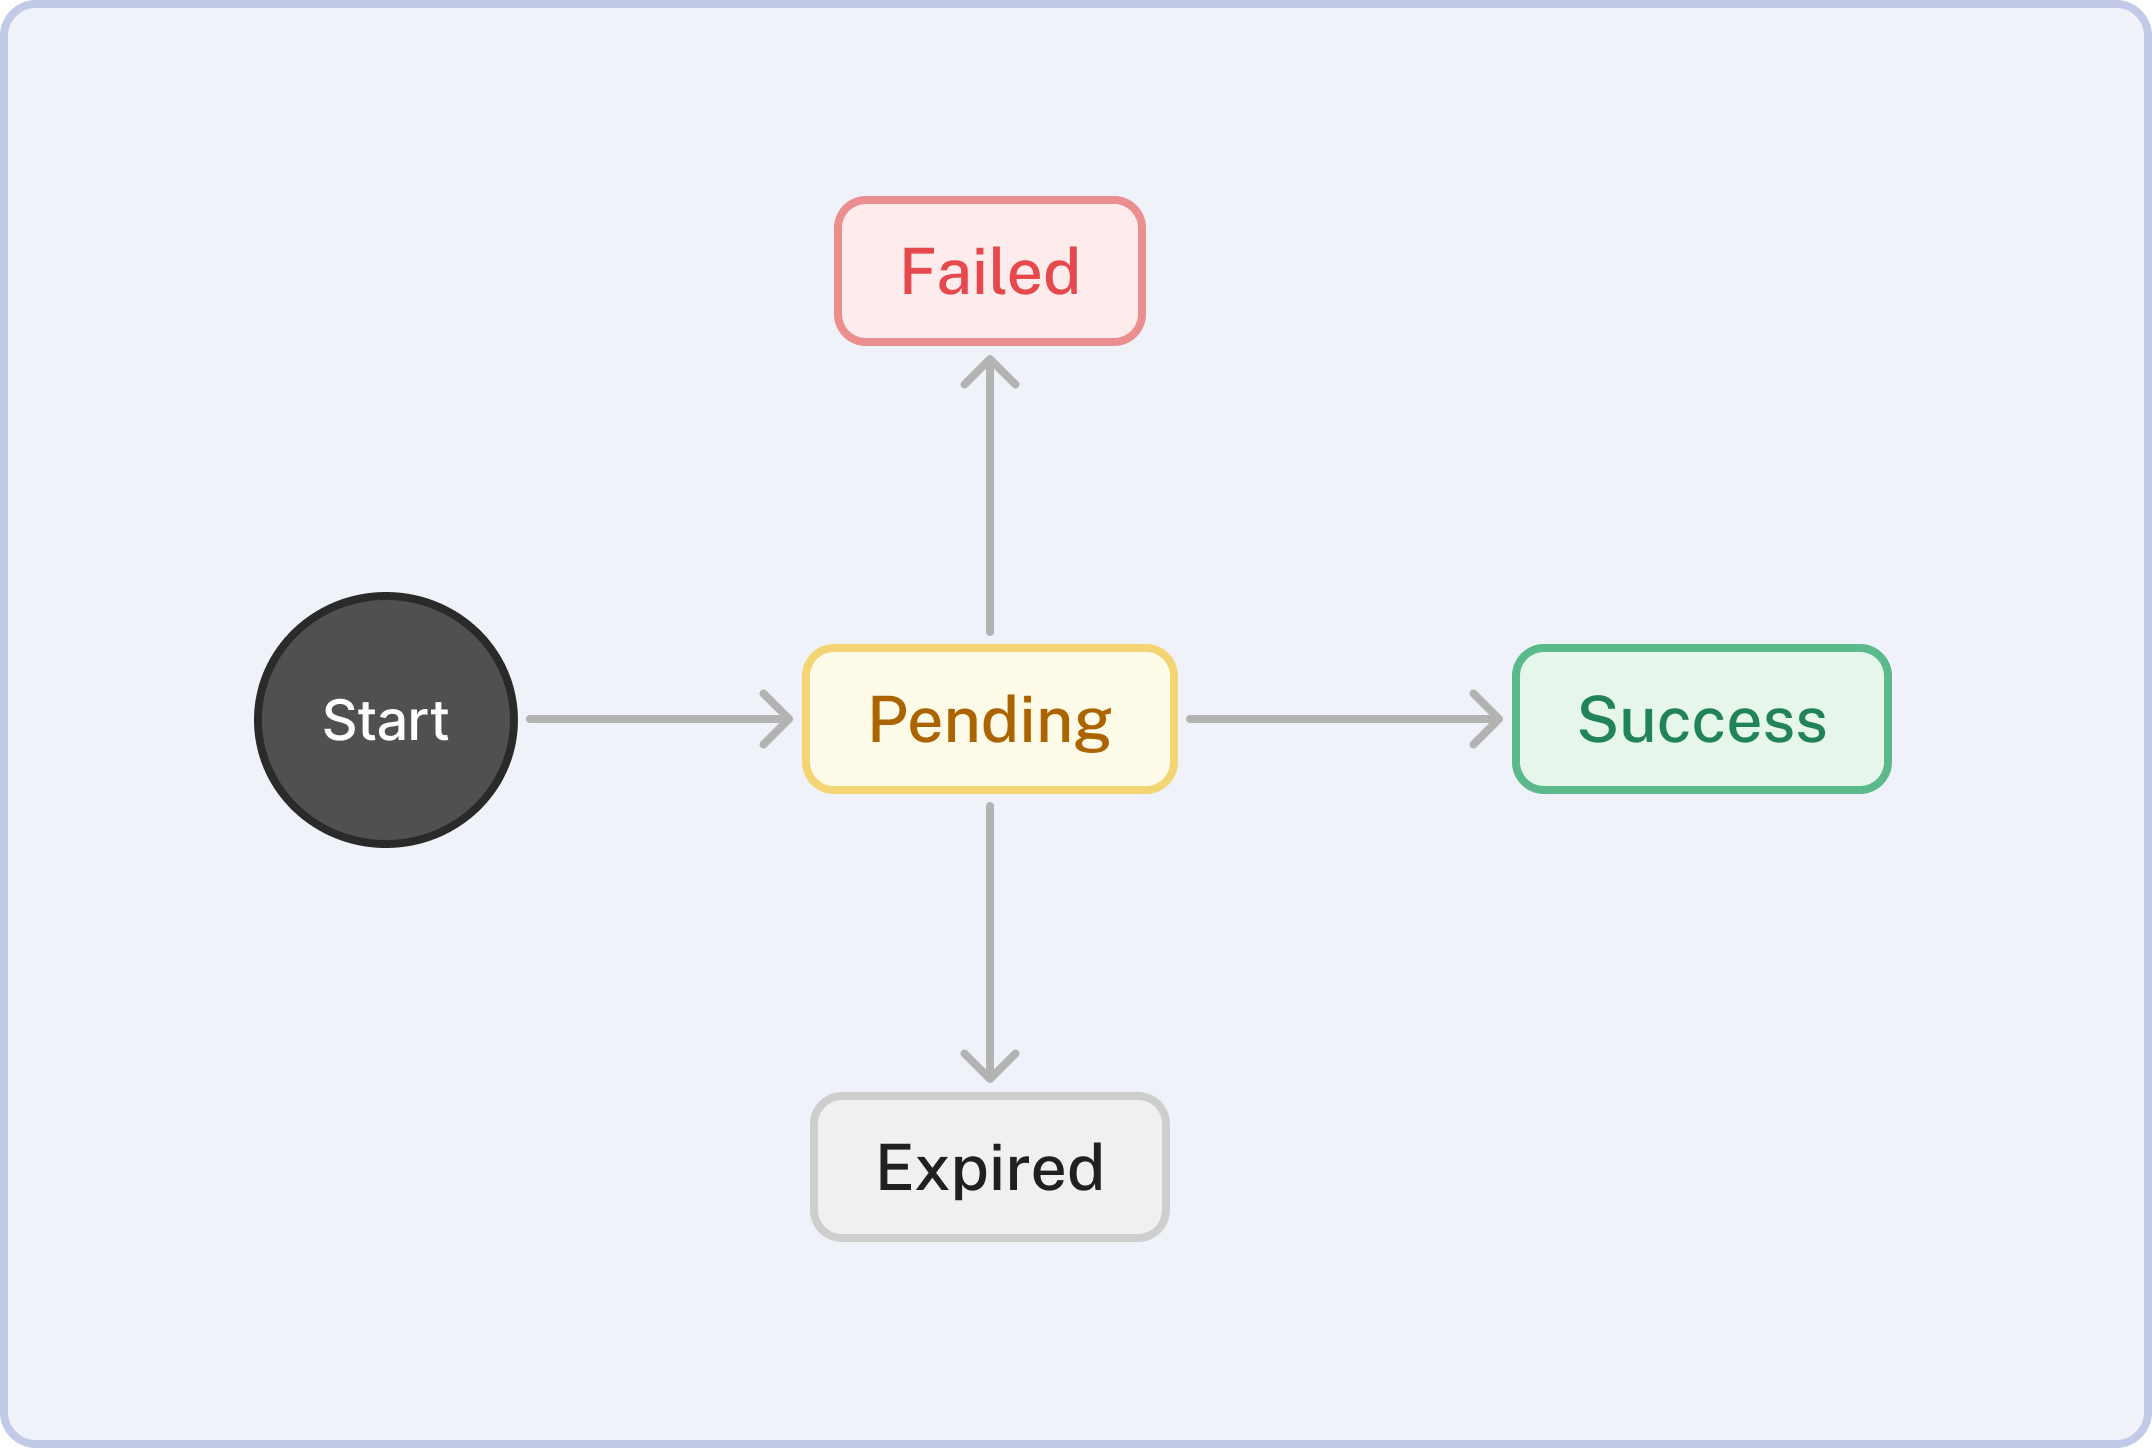
| Status | When does this status occur? |
|---|---|
| Pending | The Pay In has been created via APIs and is awaiting payment. The customer has initiated the payment but hasn’t completed it yet. |
| Success | The Pay In has been successfully paid. Funds have been received, and the transaction is complete. |
| Failed | The Pay In has failed. This could be due to issues like payment declines or network errors. |
| Expired | The Pay In has expired. This occurs if the customer initiated the payment but didn’t complete it before the payment deadline or if the transaction is manually flagged as expired. |
Getting Started
To create and track Pay In transactions, refer to the API Reference. The documentation includes code samples, request parameters, and response examples for each state transition.
Key Features
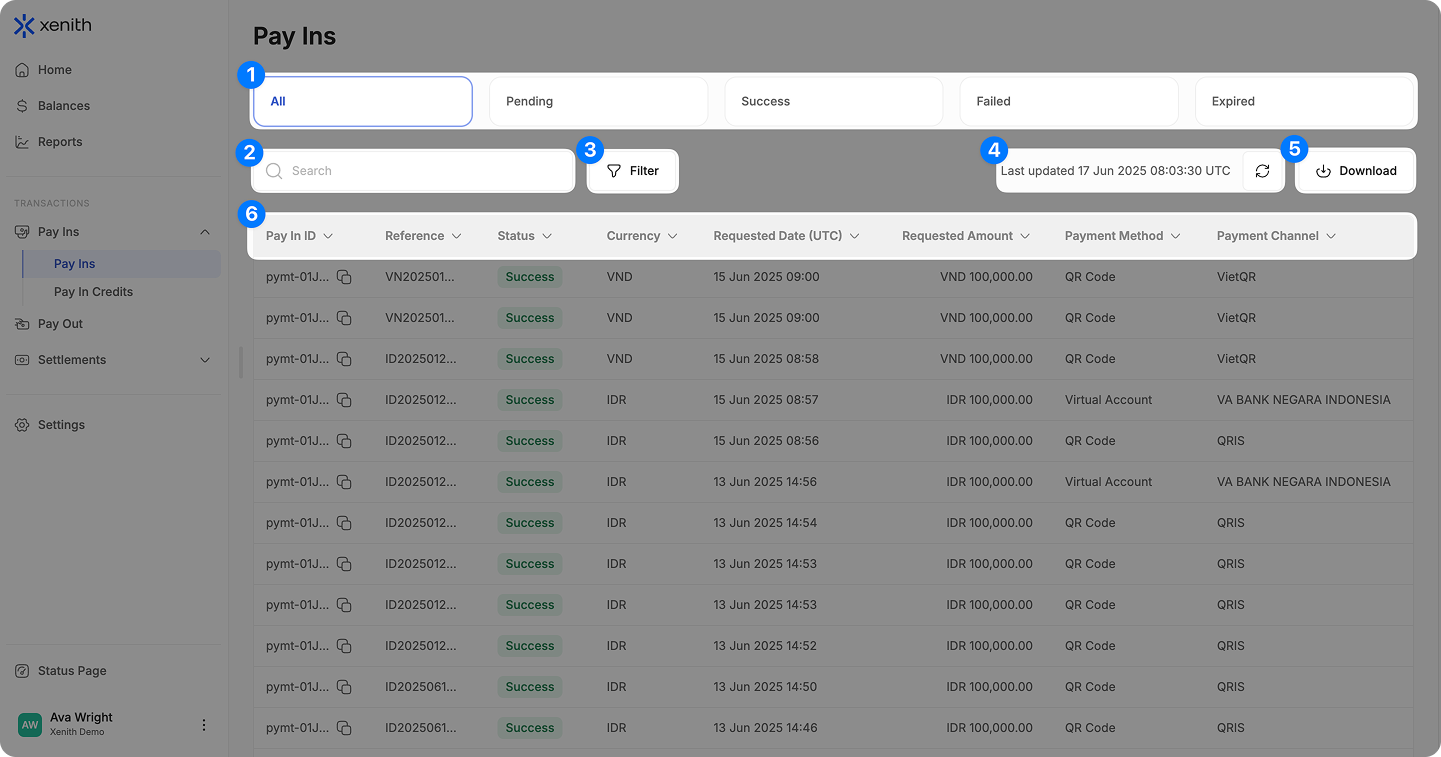
The Pay Ins section in the Xenith Dashboard provides tools for managing and analyzing your incoming transactions:
-
Quick Status Filter: Instantly filter transactions by status — All, Pending, Success, Failed, or Expired — to quickly find what you need.
-
Search: Locate specific transactions using Pay In ID, Reference, Payment Method, and Payment Channel.
-
Filter: Narrow down results based on Currency, Requested Amount, Requested Date, Payment Method, Payment Channel, Payment Date, Payment Amount, and Status.
-
Real Time Updates: Data auto-refreshes every 5 seconds, or click 'Refresh' icon to update manually.
-
Download Transaction Data: Easily download transaction data file for custom reporting and analysis (up to 6 months per export). Follow the steps below to export your data:
- Initiate Download: Click the "Download" button located in the top-right corner. If you've applied any filters, they will automatically be applied to your download.
- Select Date Range: If you haven’t specified a date range yet in the filter, it will default to "Today". You can choose from preset ranges such as: "Today", "This Week", "This Month", "Last Month", "Last 3 Months", or "Last 6 Months". Alternatively, select a Custom Date Range to define a specific date and time frame (up to 6 months max per download).
- Choose Recipient Email: Select who will receive the report. Your email is prefilled by default, but you can select other users within your organization. Note: If the selected user has restricted access (e.g., cannot view customer information), the report will be sent without the restricted data.
- Select Columns: By default, all columns are selected. If you prefer a more concise report, you can manually select only the columns you need.
- Download and Check Email: Click the "Download" button. The file will be sent to the selected email—please check your inbox (and spam folder) for the file. Files with up to 5,000 rows will also be downloaded directly from the browser.
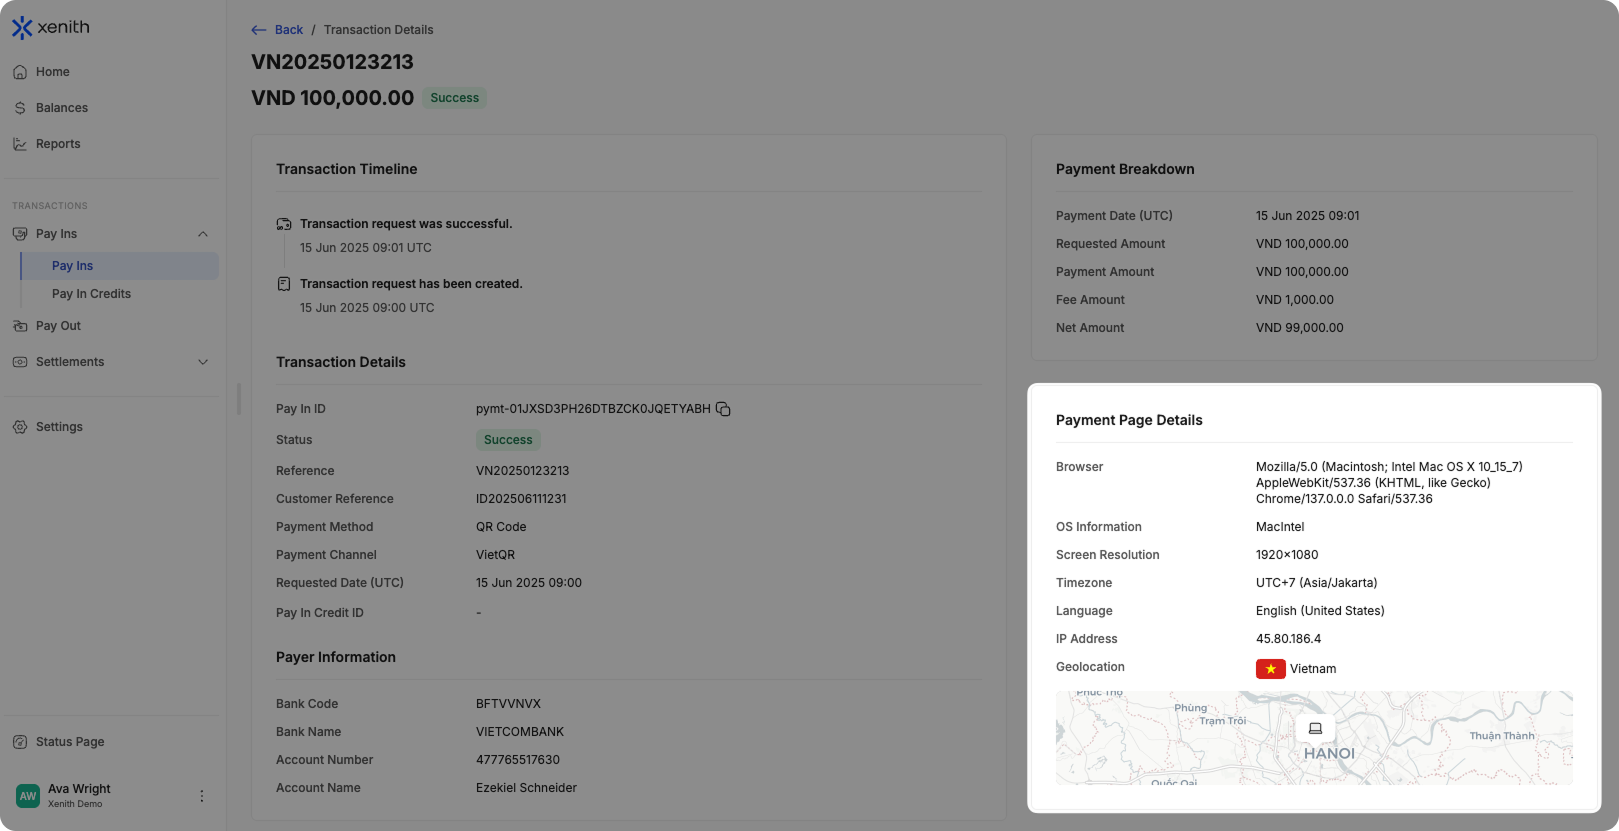
Note: If Payment Links is enabled, you can obtain your customer’s information — including browser, operating system, screen resolution, timezone, language, IP address, and geolocation — on both the Pay In details page and in the Transaction Data file.
-
Sort: Organize transactions in ASC or DESC value.
Updated about 7 hours ago