Notifications
Overview
The Notifications module allows you to subscribe to platform notifications and receive updates directly via email to your registered address(es). This helps you stay informed of important events that may impact your operations without needing to actively monitor the dashboard.
Notifications are available for the following events:
- Maintenance Email: Maintenance Starts, Maintenance Completed
- Name Mismatch Email: Pay Out Name Mismatch
If you prefer to receive events programmatically via webhook, please refer to the Webhook Events documentation here.
Managing Notifications
To view, create, edit, or delete notifications, you must log in to your Xenith account with the Notifications organisation permission enabled. Without this permission, these actions will not be available. Navigate to the Notifications tab on your dashboard to get started.
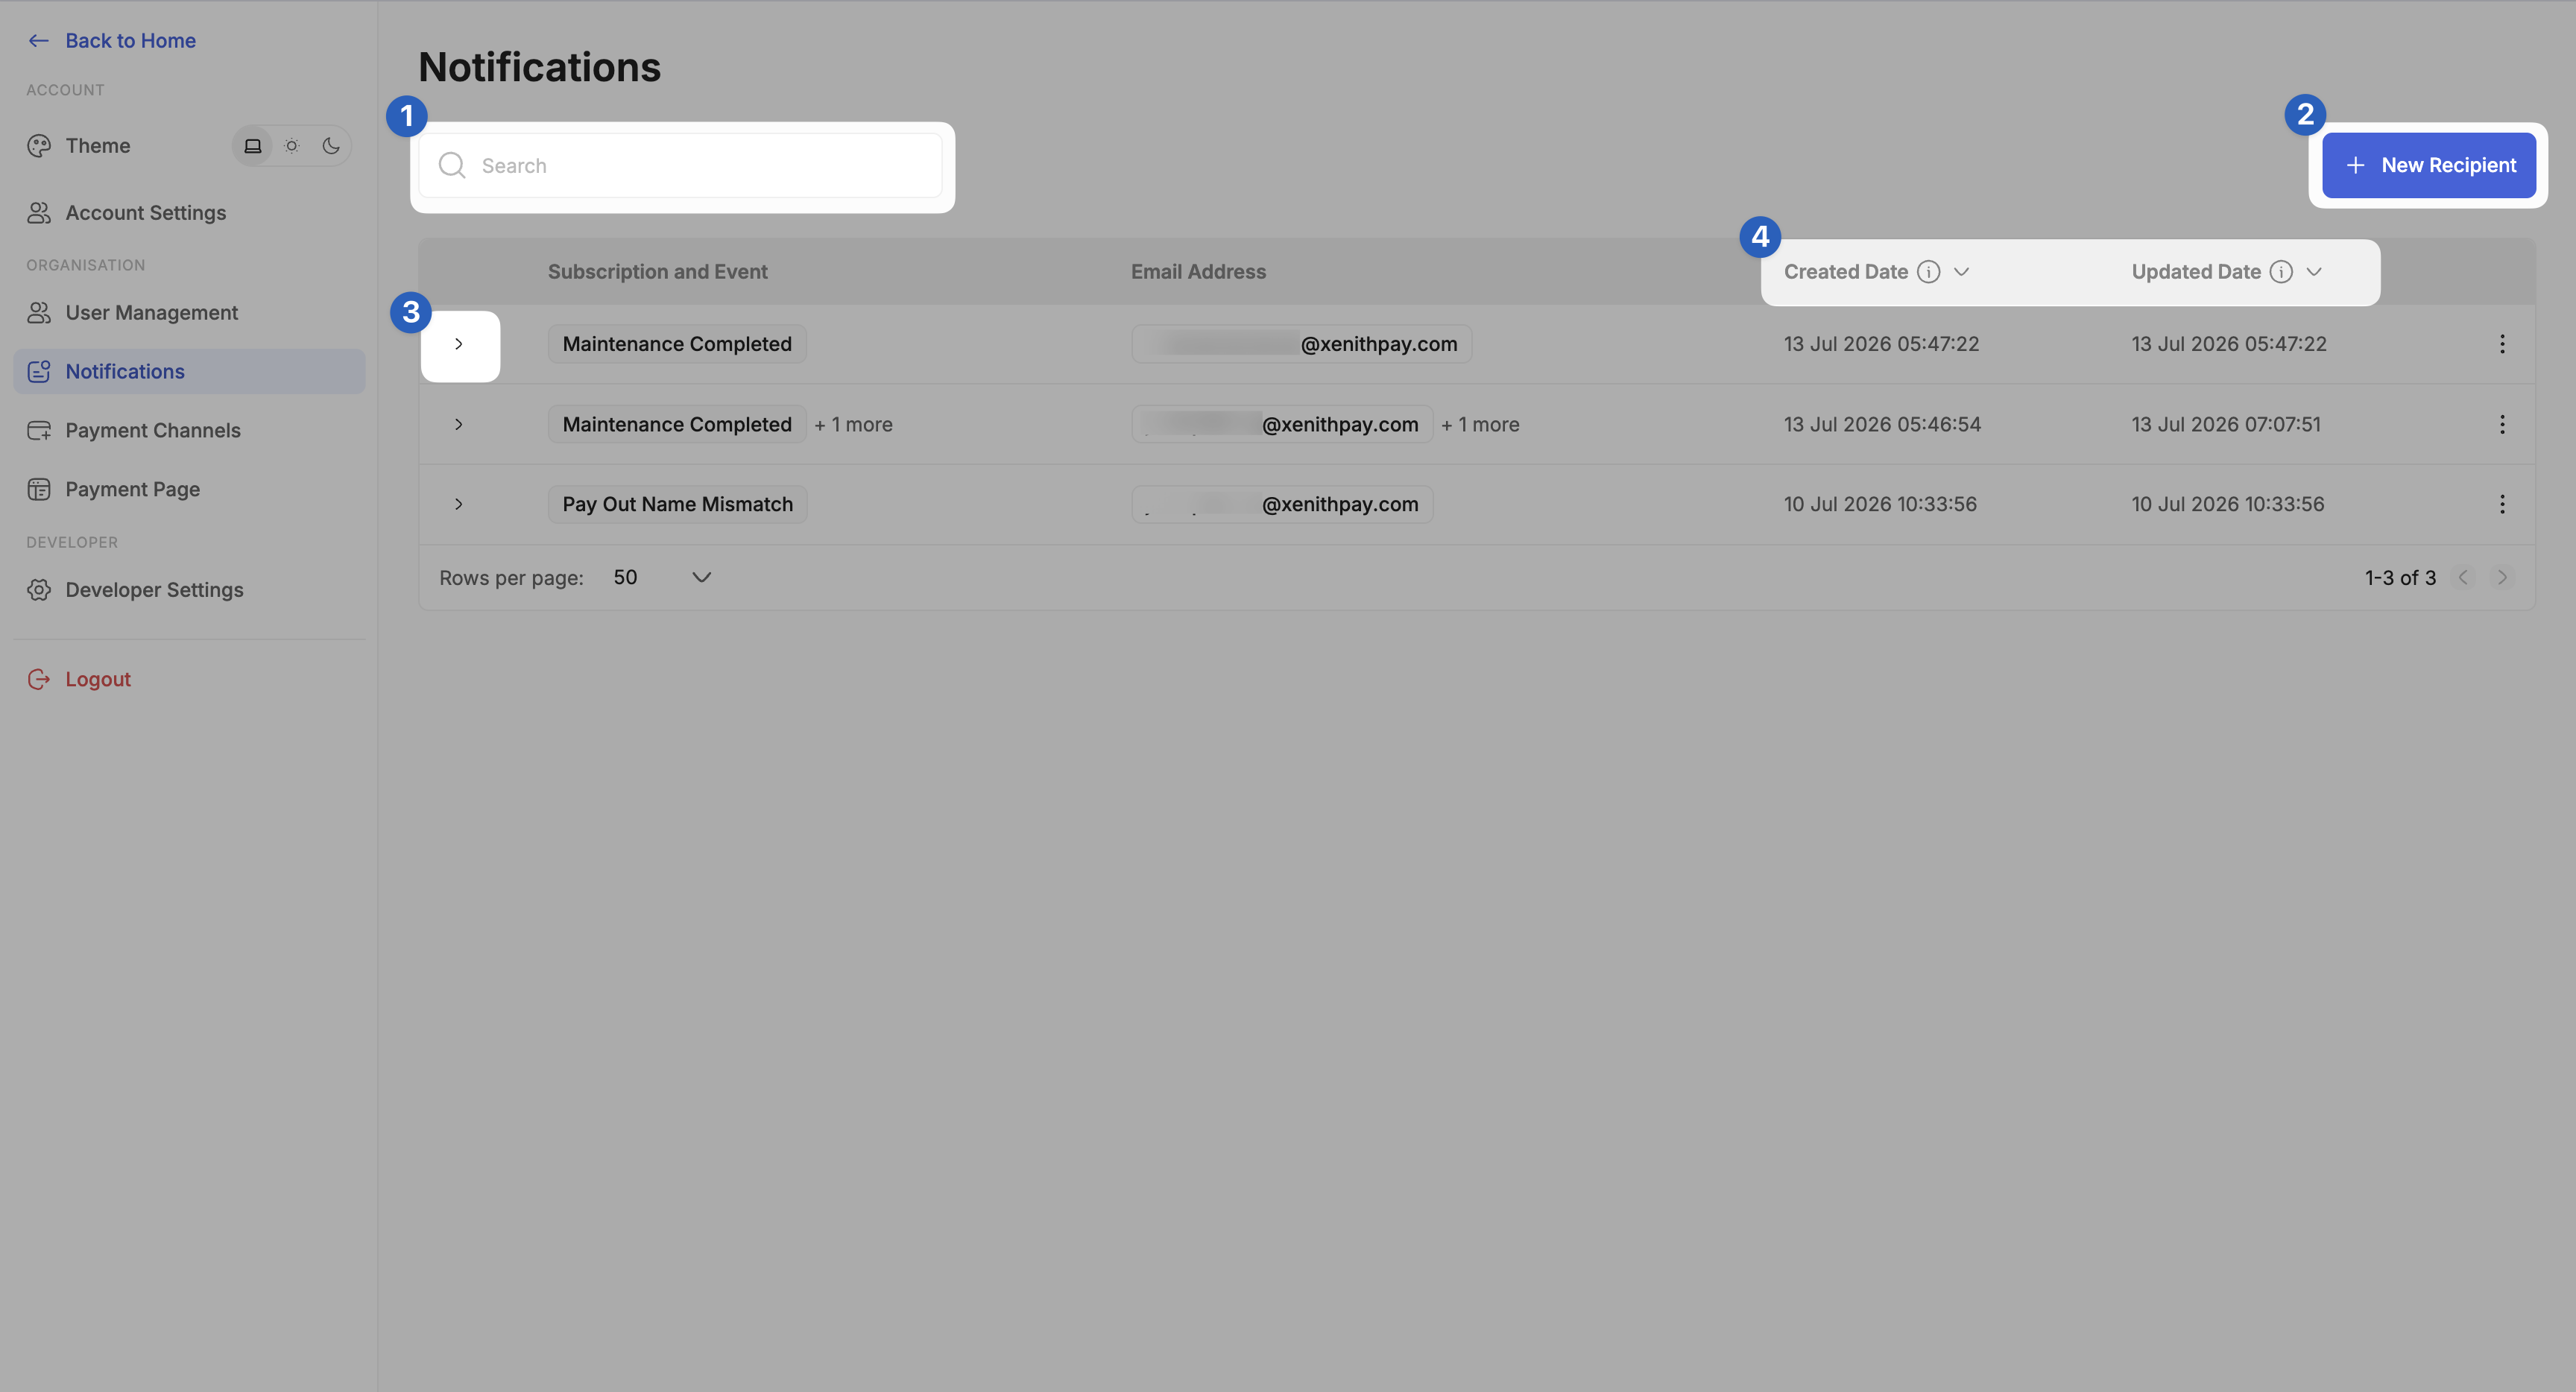
- Search: Locate a specific entry by email address.
- New Recipient: Click to add and configure new entry.
- Expand Row: Click the arrow icon of each entry view the complete details of each entry.
- Subscription and Event: Displays each entry subscription or event — Maintenance Starts, Maintenance Completed, or Pay Out Name Mismatch.
- Email Address: Shows email address(es) registered in the entry.
- Sort: Organize entries in ASC or DESC value by Updated Date (default) or Created Date.
Create a New Notification Entry
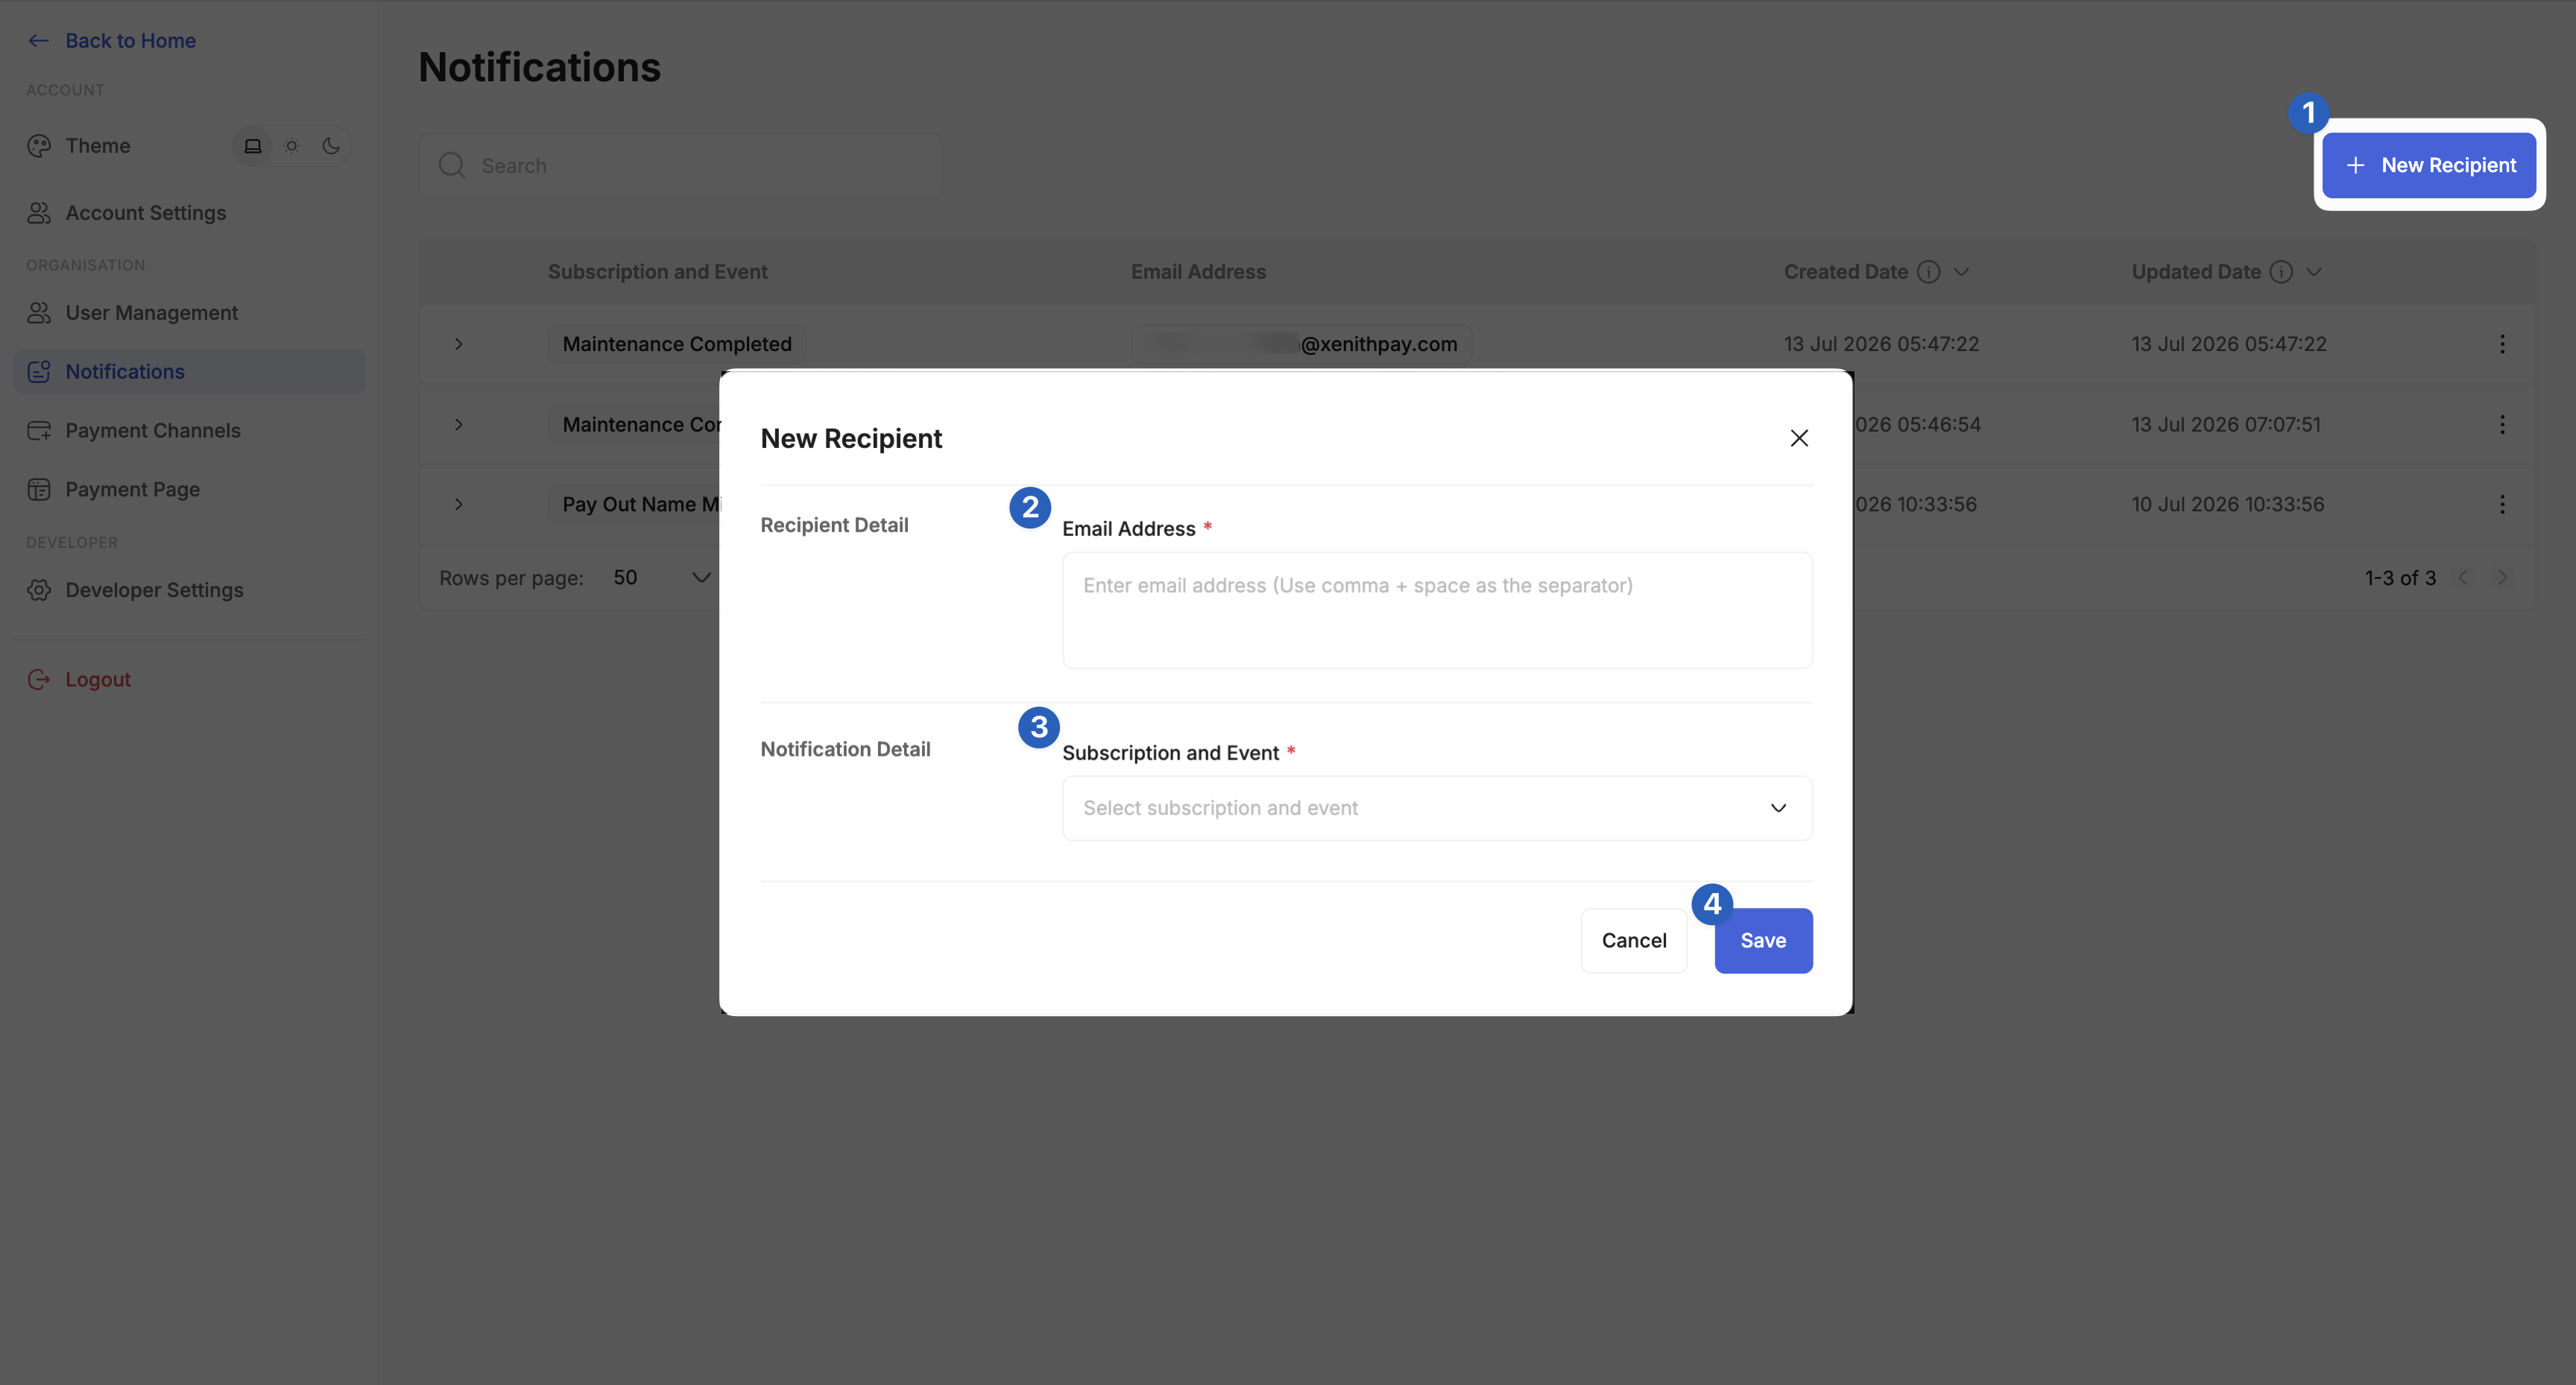
Follow these steps to create a new Notification entry:
- Initiate Notification Creation: Click the "+ New Recipient" button.
- Enter Recipient Detail:
- Email Address (required) — Enter the recipient email address, then type a comma and space to add more. You can add up to 1,000 email addresses per entry.
- Select Notification Detail:
- Subscription and Event (required) — choose from:
- Maintenance Email: Maintenance Start or Completed
- Name Mismatch Email: Pay Out Name Mismatch
- Subscription and Event (required) — choose from:
- Save: Click "Save" to complete the subscription.
A successful entry will shows "Recipient successfully created". If the new entry results in a duplicate email address + event combination, you'll see "Recipient has already subscribed to the event" instead.
Edit an Existing Notification Entry
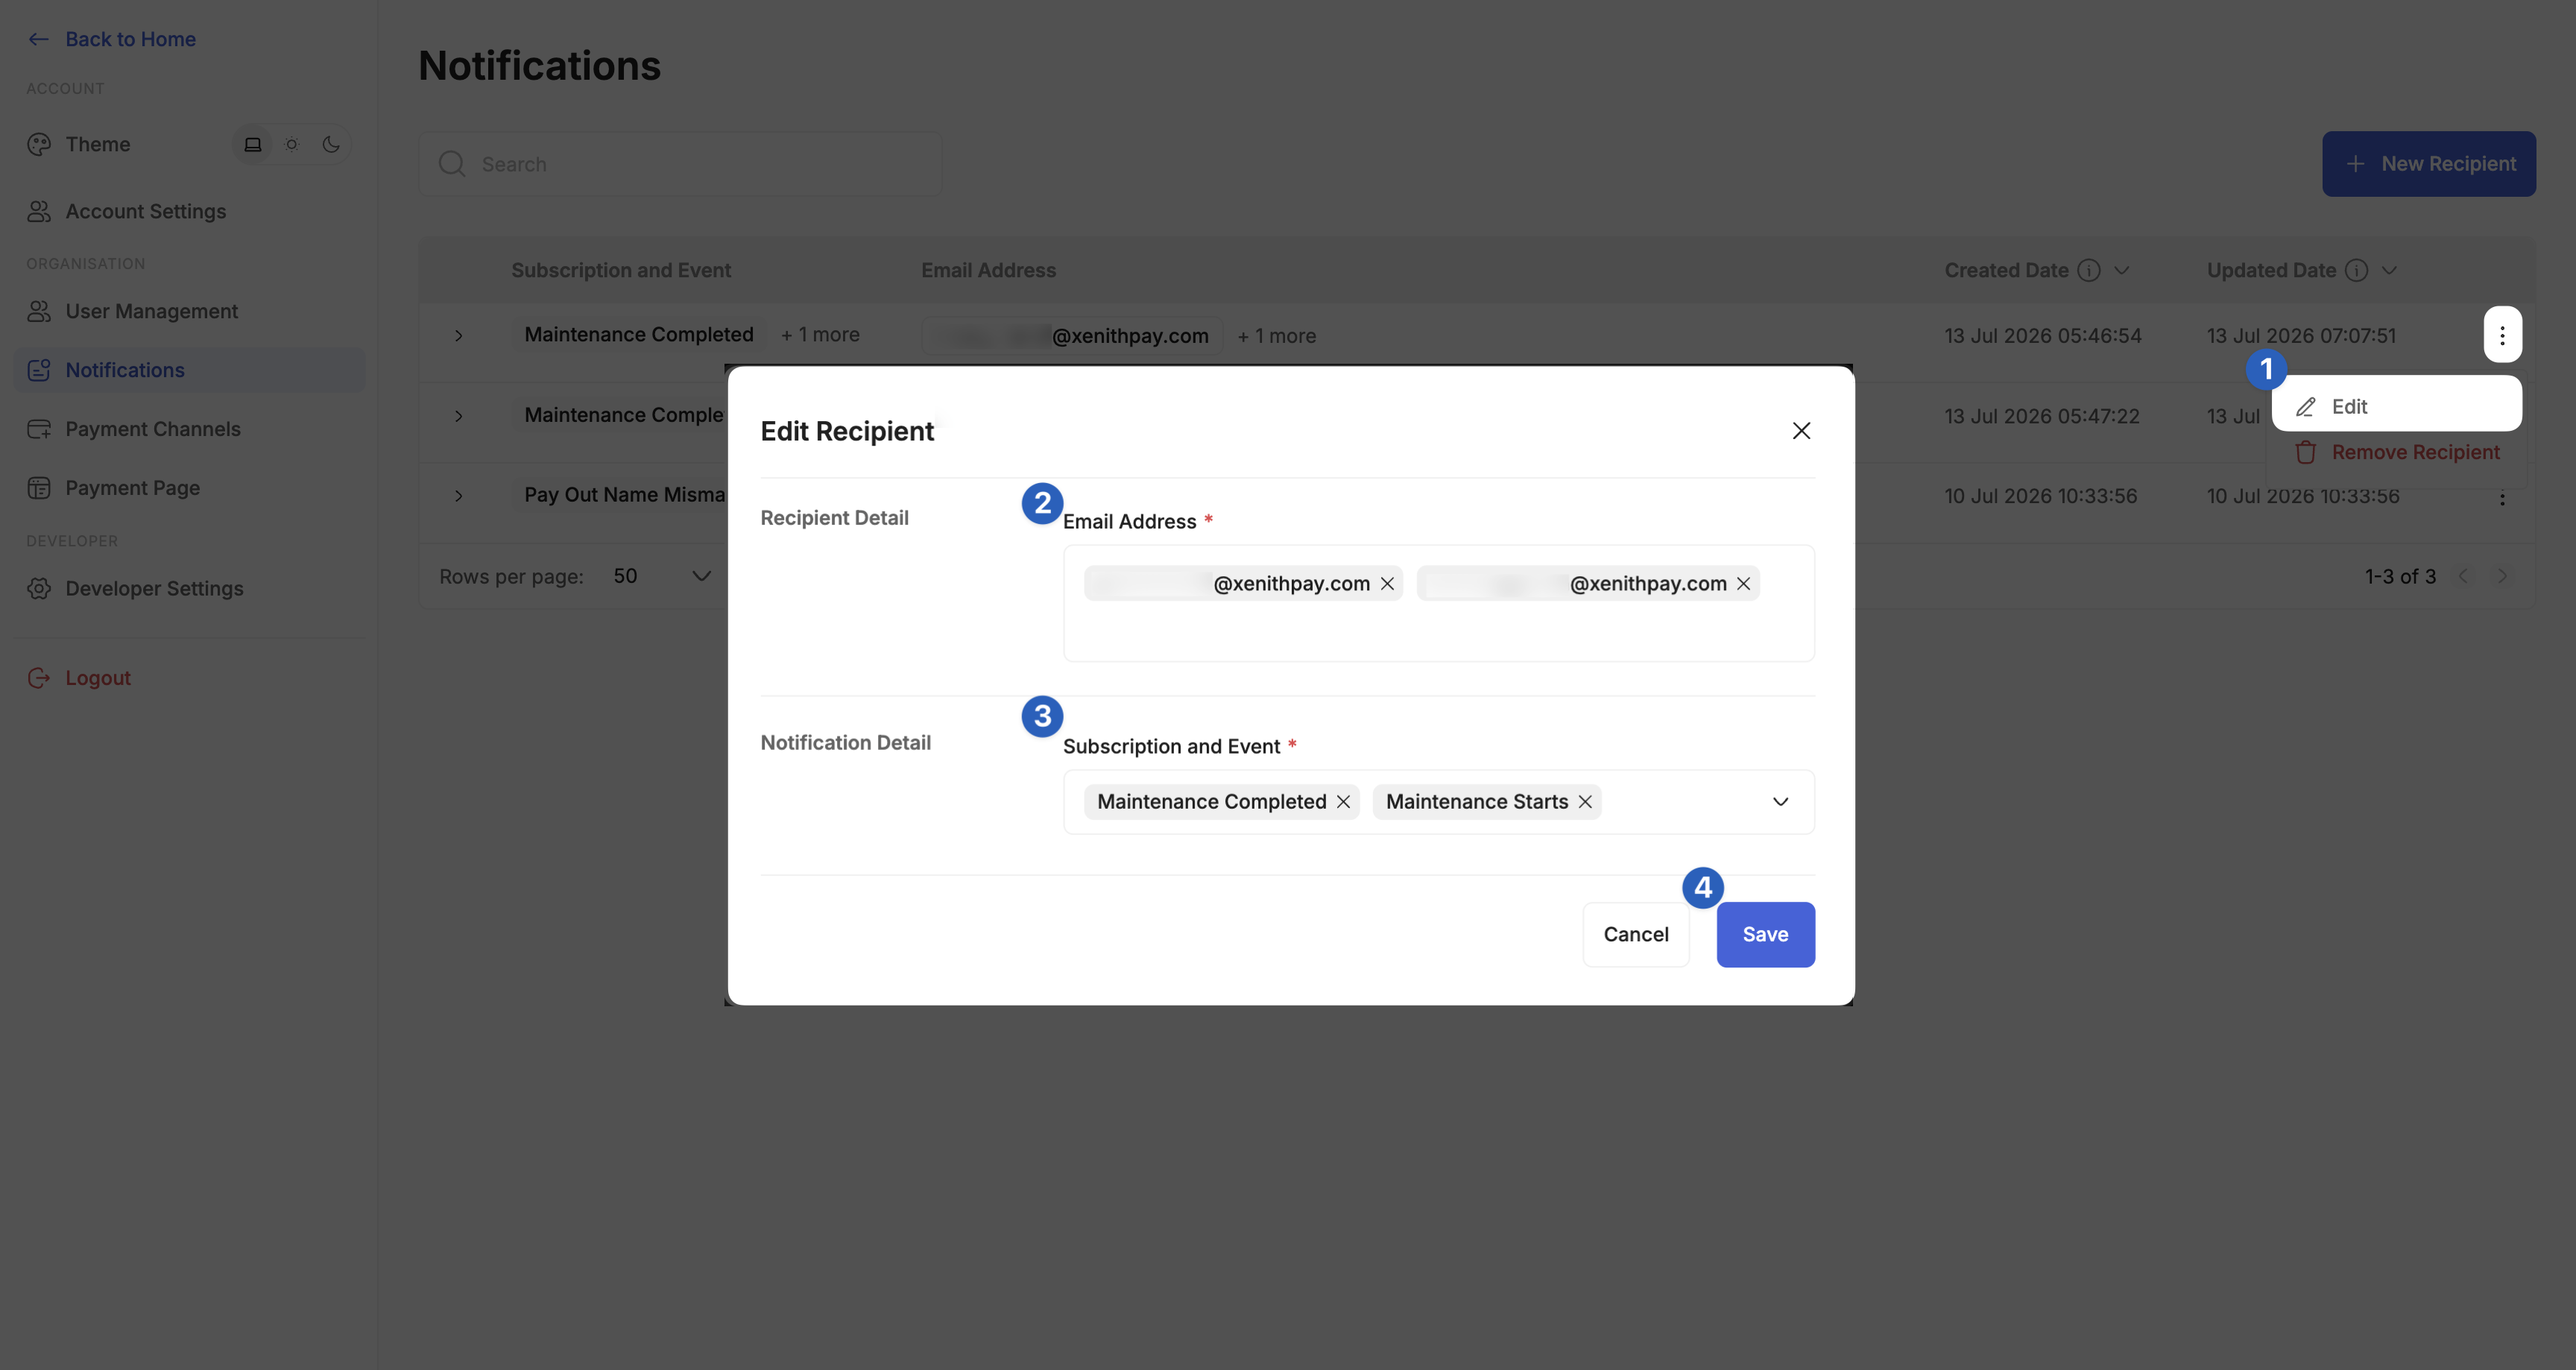
Follow these steps to edit an existing Notifications entry:
- Initiate Edit: Click the three-dot menu (⋮) next to the entry you want to edit, and select "Edit".
- Modify Recipient Detail: The Email Address field is prefilled with the current recipient email address(es). Add or remove emails as needed.
- Modify Notification Detail: The Subscription and Event field is prefilled and editable — open the dropdown to change the event selection.
- Save: Click "Save" to apply your changes.
A successful update shows "Recipient successfully updated". If the change results in a duplicate email address + event combination, you'll see "Recipient has already subscribed to the event" instead.
Delete an Existing Notifications Entry
Deletion is permanent. Please proceed with caution. The same email address can be added again after deletion.
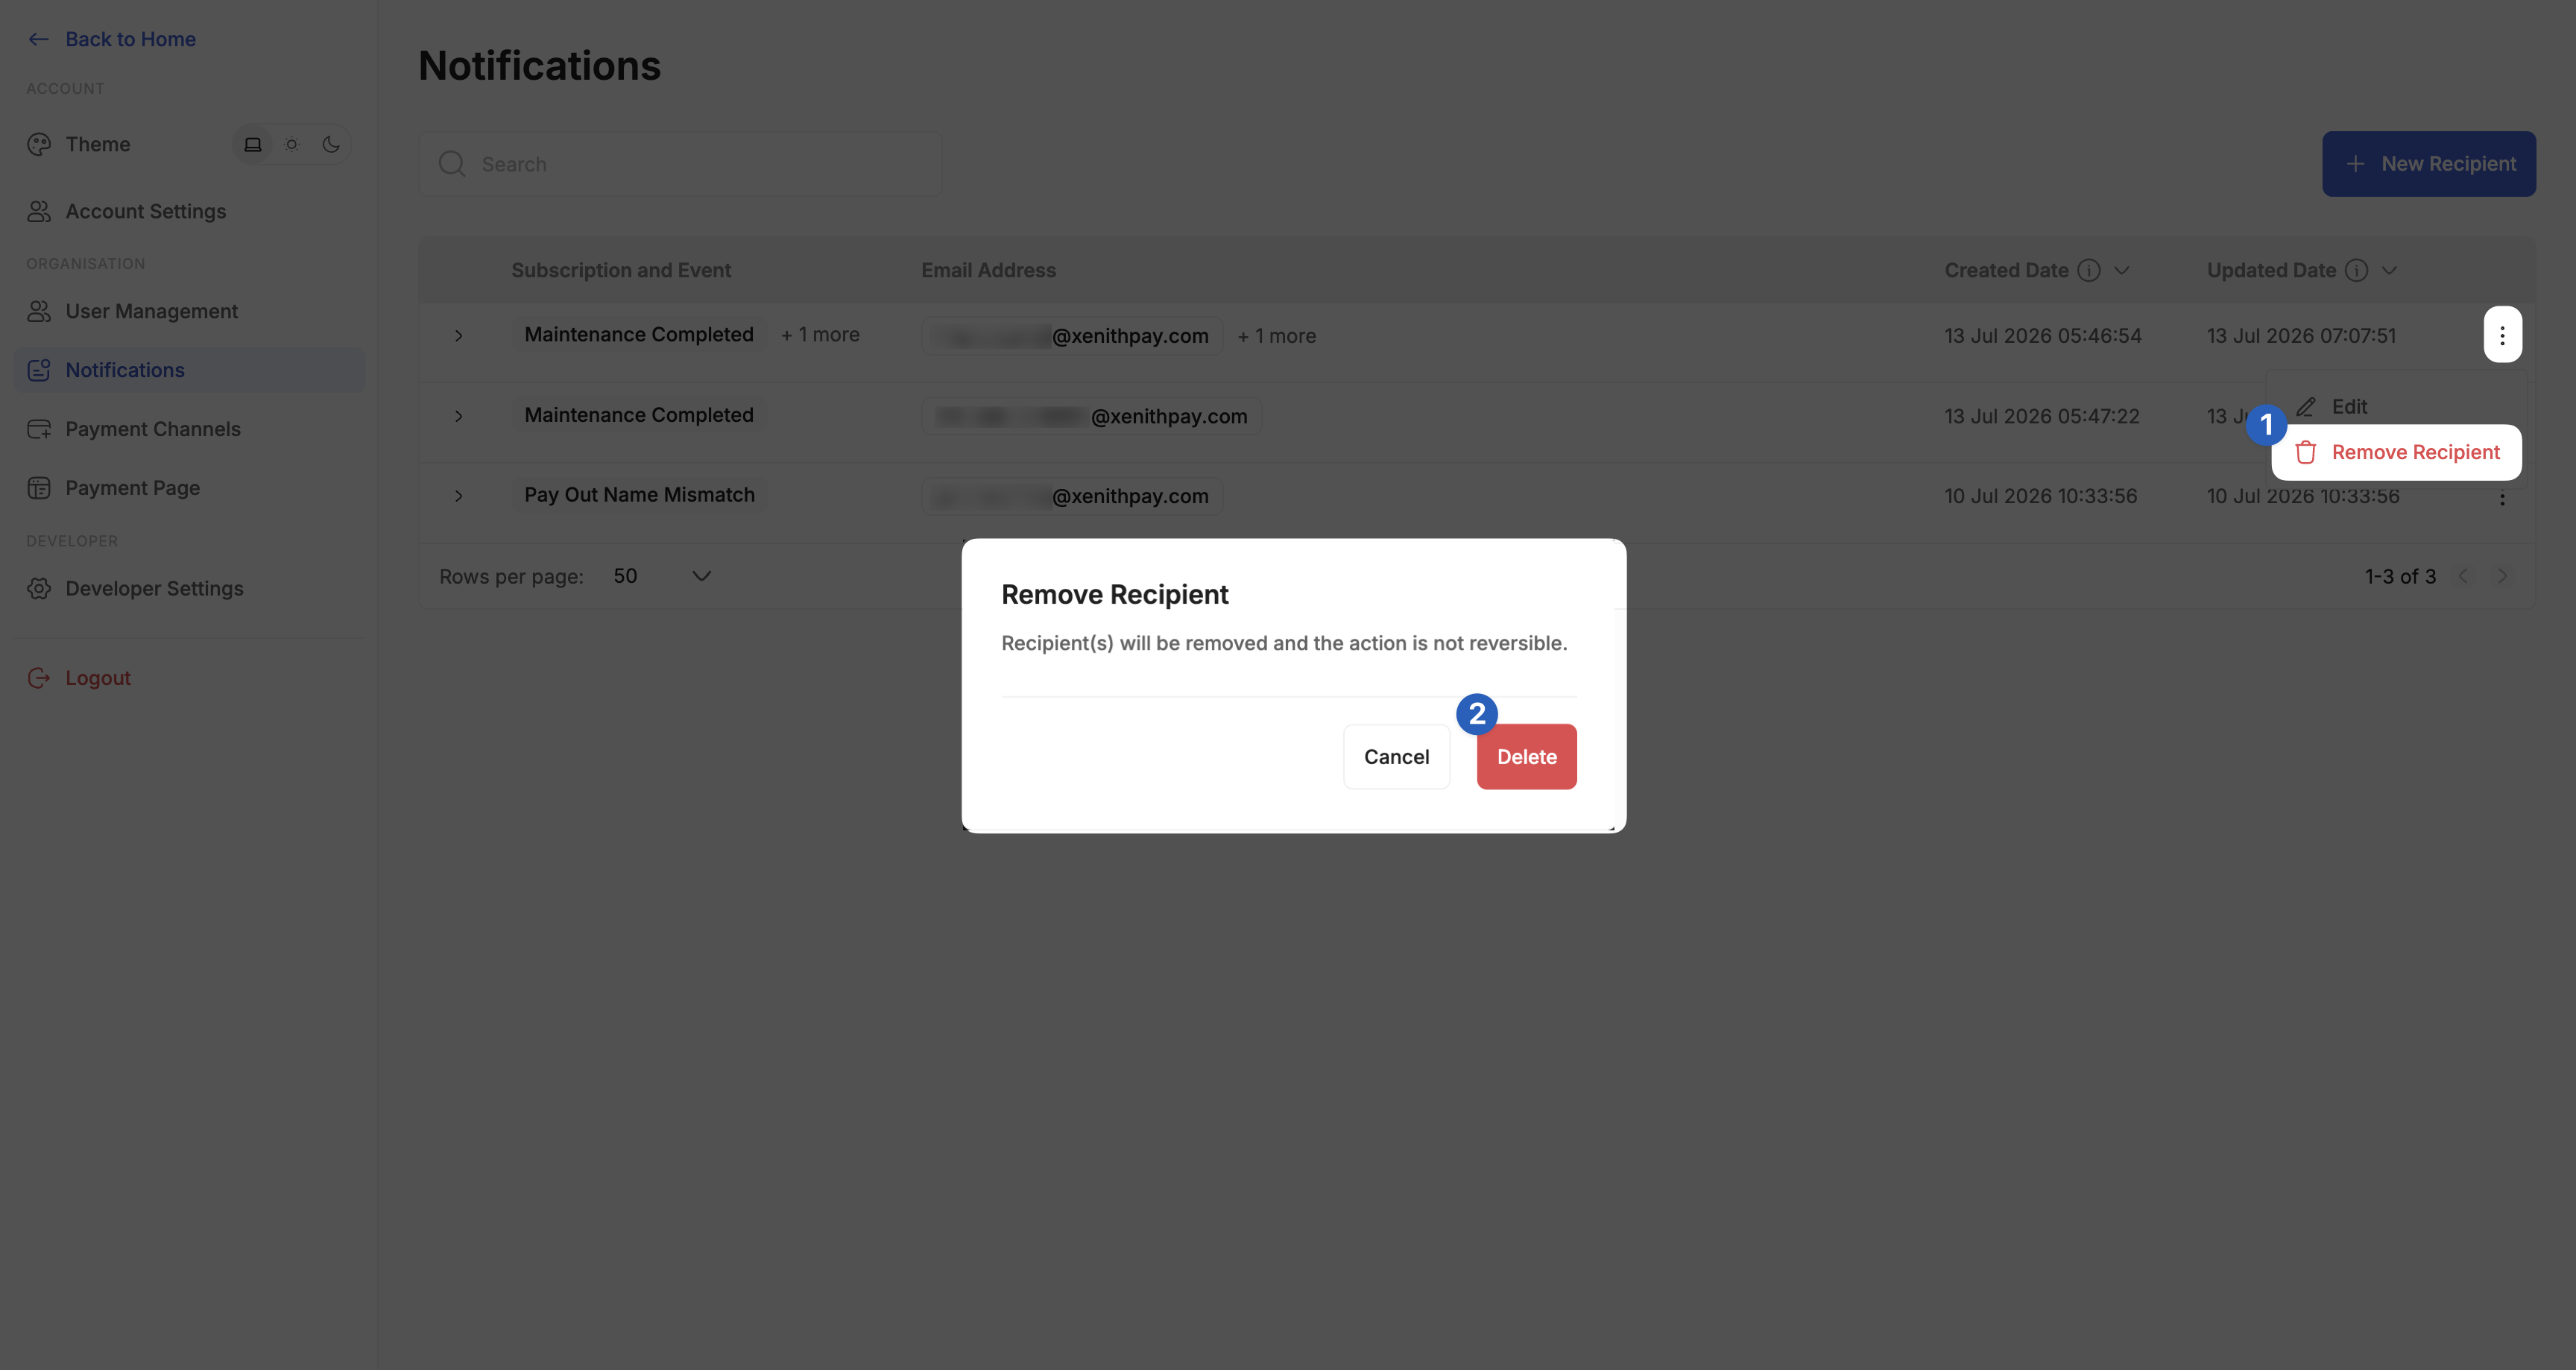
Follow these steps to delete an existing Notifications entry:
- Initiate Deletion: Click the three-dot menu (⋮) next to the entry you want to remove, and select "Delete".
- Confirm Deletion: A confirmation pop-up will appear. Click "Delete" to proceed.
- Verify Removal: Check the Notifications list to confirm the recipient has been removed.
Important: If the last registered email address for Pay Out Name Mismatch notifications is deleted, you will not receive Name Mismatch Detected email notifications until an email address is registered.
Updated 3 months ago