
User Management
This section explains how to manage user permissions and access levels within your organisation on the Xenith platform. By assigning appropriate permissions, you can control what each user can see and do, ensuring security and operational efficiency.
Q1. How can I control different permissions and access levels for the users in my organisation?
You can assign different permissions to users based on their roles within your organization. Permissions are categorised into Organisation Permissions and Module Permissions.
Organisation Permissions:
| Module | Permissions |
|---|---|
| Customer Information | Users with access can view customer details (i.e: account number, account name) in both Pay Ins and Pay Outs. |
| User Management | Users with access can add, remove, or modify user permissions within the organization. |
Module Permissions:
Module | Permissions |
|---|---|
Pay In | •No Access: User cannot view or perform actions in this module. |
Pay Out | •No Access: User cannot view or perform actions in this module. |
Settlements | •No Access: User cannot view or perform actions in this module. |
Beneficiary Accounts | •No Access: User cannot view or perform actions in this module. |
Q2. What are the different user types? And what are the difference between them?
There are two types of users in Xenith:
- Admin Users: Have full access to all Module Permissions. (You can also provide
Organisationpermissions to Admin Users) - Custom Users: Have limited access based on the specific permissions assigned to them.
Permissions on theOrganisationandModulecan be customised to fit their role within the organisation.
Q3. How can I add a new user?
Follow these steps to add a new user to your organisation:
- Sign In: Log in to your Xenith account.
- Navigate to User Management: Go to the "User Management" section.
- Add New User: Click the “+ New User” button and complete the required information and access settings.
- Save: Click the "Save" button. The new user will receive an email invitation to set up their account.

Q4. How can I edit a user’s permission settings?
To make changes to an existing user:
- Sign In: Log in to your Xenith account.
- Navigate to User Management: Go to the "User Management" section in the Dashboard.
- Select Account to Edit: Locate the account you wish to modify.
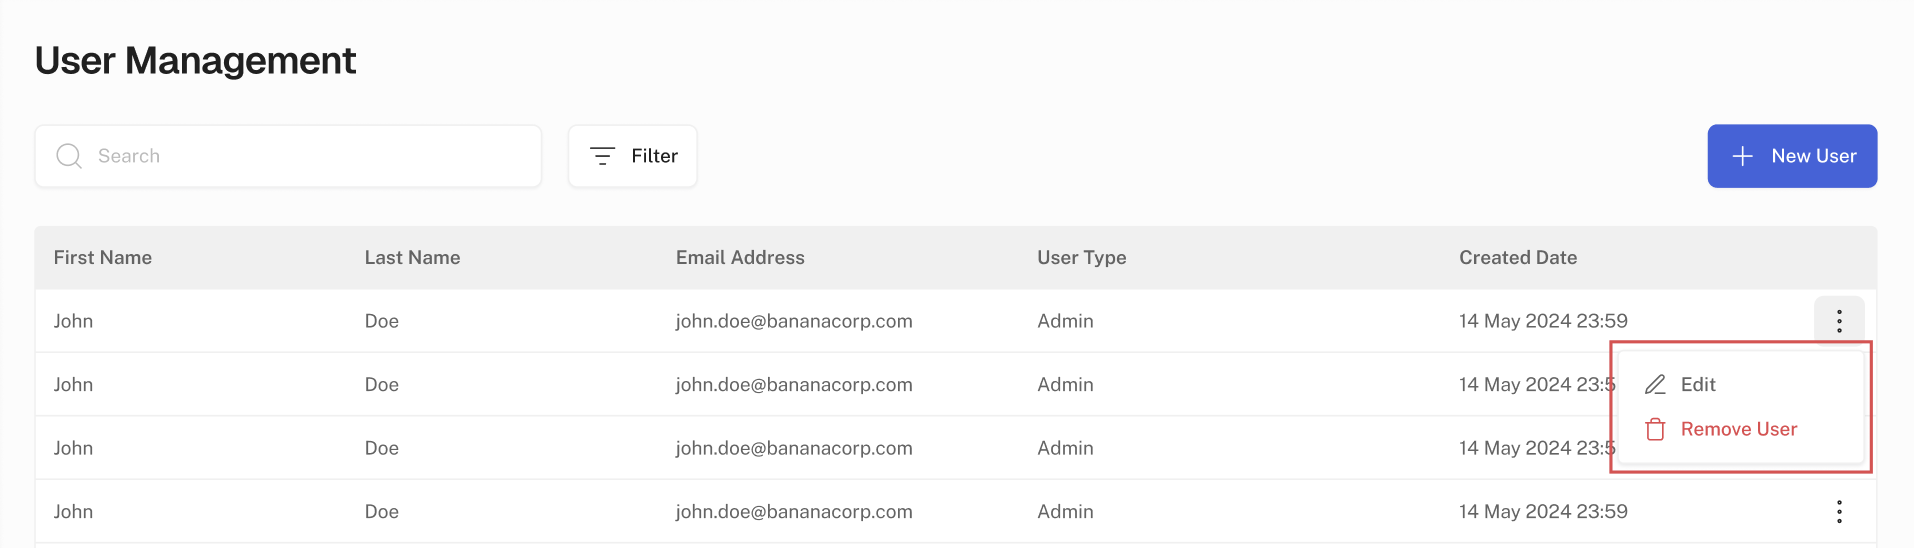
- Access Edit Menu: Click on the three dots menu (⋮) next to the account and select "Edit".
Note: To edit the email address or user with admin role, please reach out to [email protected]

Q5. How can I remove a user from my organisation?
If you need to remove a user from your organisation:
- Sign In: Log in to your Xenith account.
- Navigate to User Management: Go to the "User Management" section.
- Select Account to Remove: Locate the account you wish to remove.
- Access Remove Menu: Click on the three dots menu (⋮) next to the account and select "Remove User".
Note: To delete the email address or user with admin role, please reach out to [email protected]
Updated 6 months ago