

Payment Link
Overview
Payment Link allows you to collect payments by generating a secure link and sharing it with your customers. A Payment Link can include one or multiple payment methods or channels, giving customers the flexibility to choose their preferred way to pay. Customers complete their payments through Xenith’s hosted checkout page, providing a seamless and user-friendly experience. This pre-built page includes clear payment instructions, a visible payment expiry timer, multi-language support, quick copy functionality for essential payment details.
Check the video below to see what your customers experience when they use our payment link feature.
Process Flow
| Status | Description |
|---|---|
| Active | The link is valid and customers can proceed with payment. |
| Completed | A payment has been successfully completed using this link. |
| Expired | The link has passed its validity period without a completed payment. |
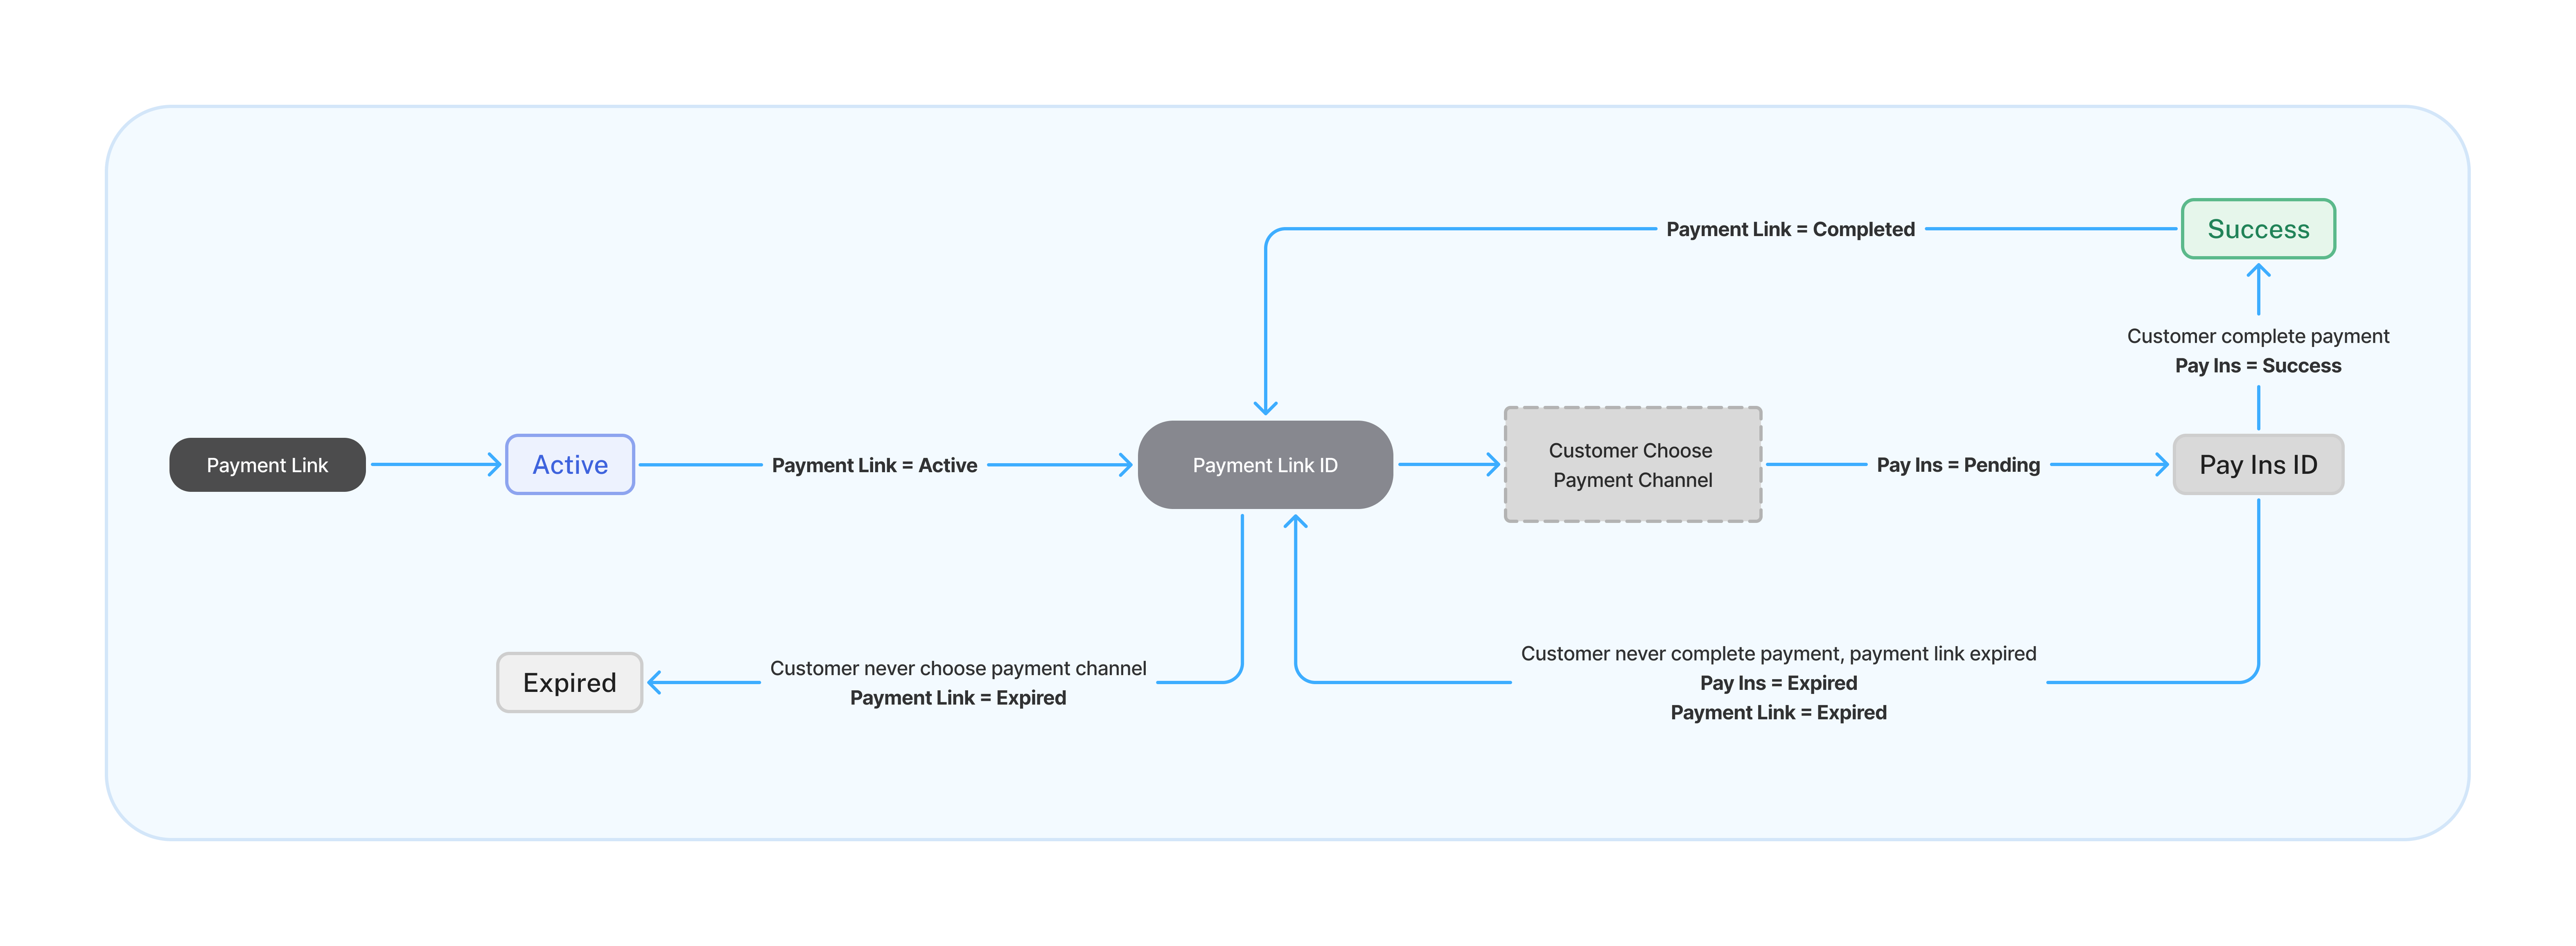
A Payment Link can include one or multiple payment methods or channels for customers to choose from. When a customer opens the link, the process works as follows:
- Active Link:
- The customer selects a payment method and proceeds with the payment.
- Only channels that are available and meet the minimum and maximum transaction limits will be displayed.
- Channels that are under maintenance will still be visible but disabled (greyed out).
- Once a channel is selected, a new Pay-In transaction is created with a Pending status.
- Switching Channels:
- If the customer selects a different payment channel, a new Pay-In transaction (Pending) is created.
- If a Pending Pay-In already exists for the selected channel, it will be reused instead of creating a new one.
- If the previous Pay-In is Expired, a new Pay-In will be created for the selected channel.
- Completed / Expired Link:
- Customers cannot proceed with payment if the link is Completed or Expired.
Key Features
You can track payment statuses, view transaction details, and download reports directly from your merchant dashboard.
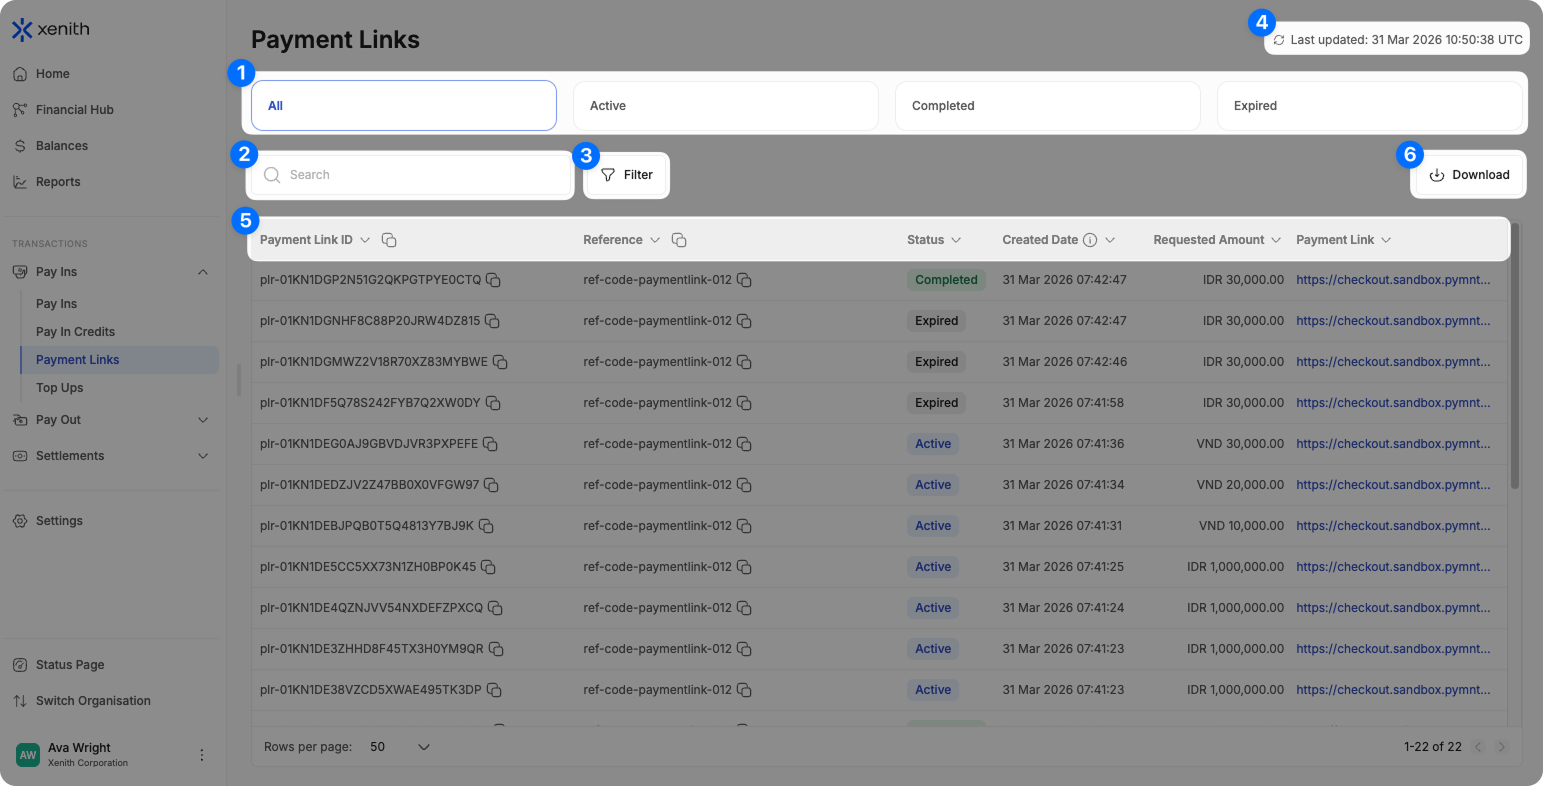
- Quick Status Filter: Instantly filter transactions by status — All, Active, Completed, Expired to quickly find what you need.
- Search: Locate specific transactions using Payment Link ID and Reference.
- Filter: Narrow down results based on Currency, Status, Amount range, or Created Date
- Real Time Updates: Data auto-refreshes every 5 seconds, or click 'Refresh' icon to update manually.
- Sort: Organize transactions in ASC or DESC value.
- Download Transaction Data: Easily download transaction data file for custom reporting and analysis (up to 6 months per export). Follow the steps below to export your data:
- Initiate Download: Click the "Download" button located in the top-right corner. If you've applied any filters, they will automatically be applied to your download.
- Select Date Range: If you haven’t specified a date range yet in the filter, it will default to "Today". You can choose from preset ranges such as: "Today", "This Week", "This Month", "Last Month", "Last 3 Months", or "Last 6 Months". Alternatively, select a Custom Date Range to define a specific date and time frame (up to 6 months max per download).
- Choose Recipient Email: Select who will receive the report. Your email is prefilled by default, but you can select other users within your organization. Note: If the selected user has restricted access (e.g., cannot view customer information), the report will be sent without the restricted data.
- Select Columns: By default, all columns are selected. If you prefer a more concise report, you can manually select only the columns you need.
- Download and Check Email: Click the "Download" button. The file will be sent to the selected email—please check your inbox (and spam folder) for the file. Files with up to 5,000 rows will also be downloaded directly from the browser. The file naming format:
paymentlinks_ddmmyy.csv
Getting Started
You can create a Payment Link from the dashboard or via API. For API-based creation, see the API Reference. To create a Payment Link from the dashboard, you must have Full Access for the Money In permission. Follow the steps here to create a payment link from the dashboard
-
In the dashboard sidebar, go to Payment Links and click + Create Payment Link.
-
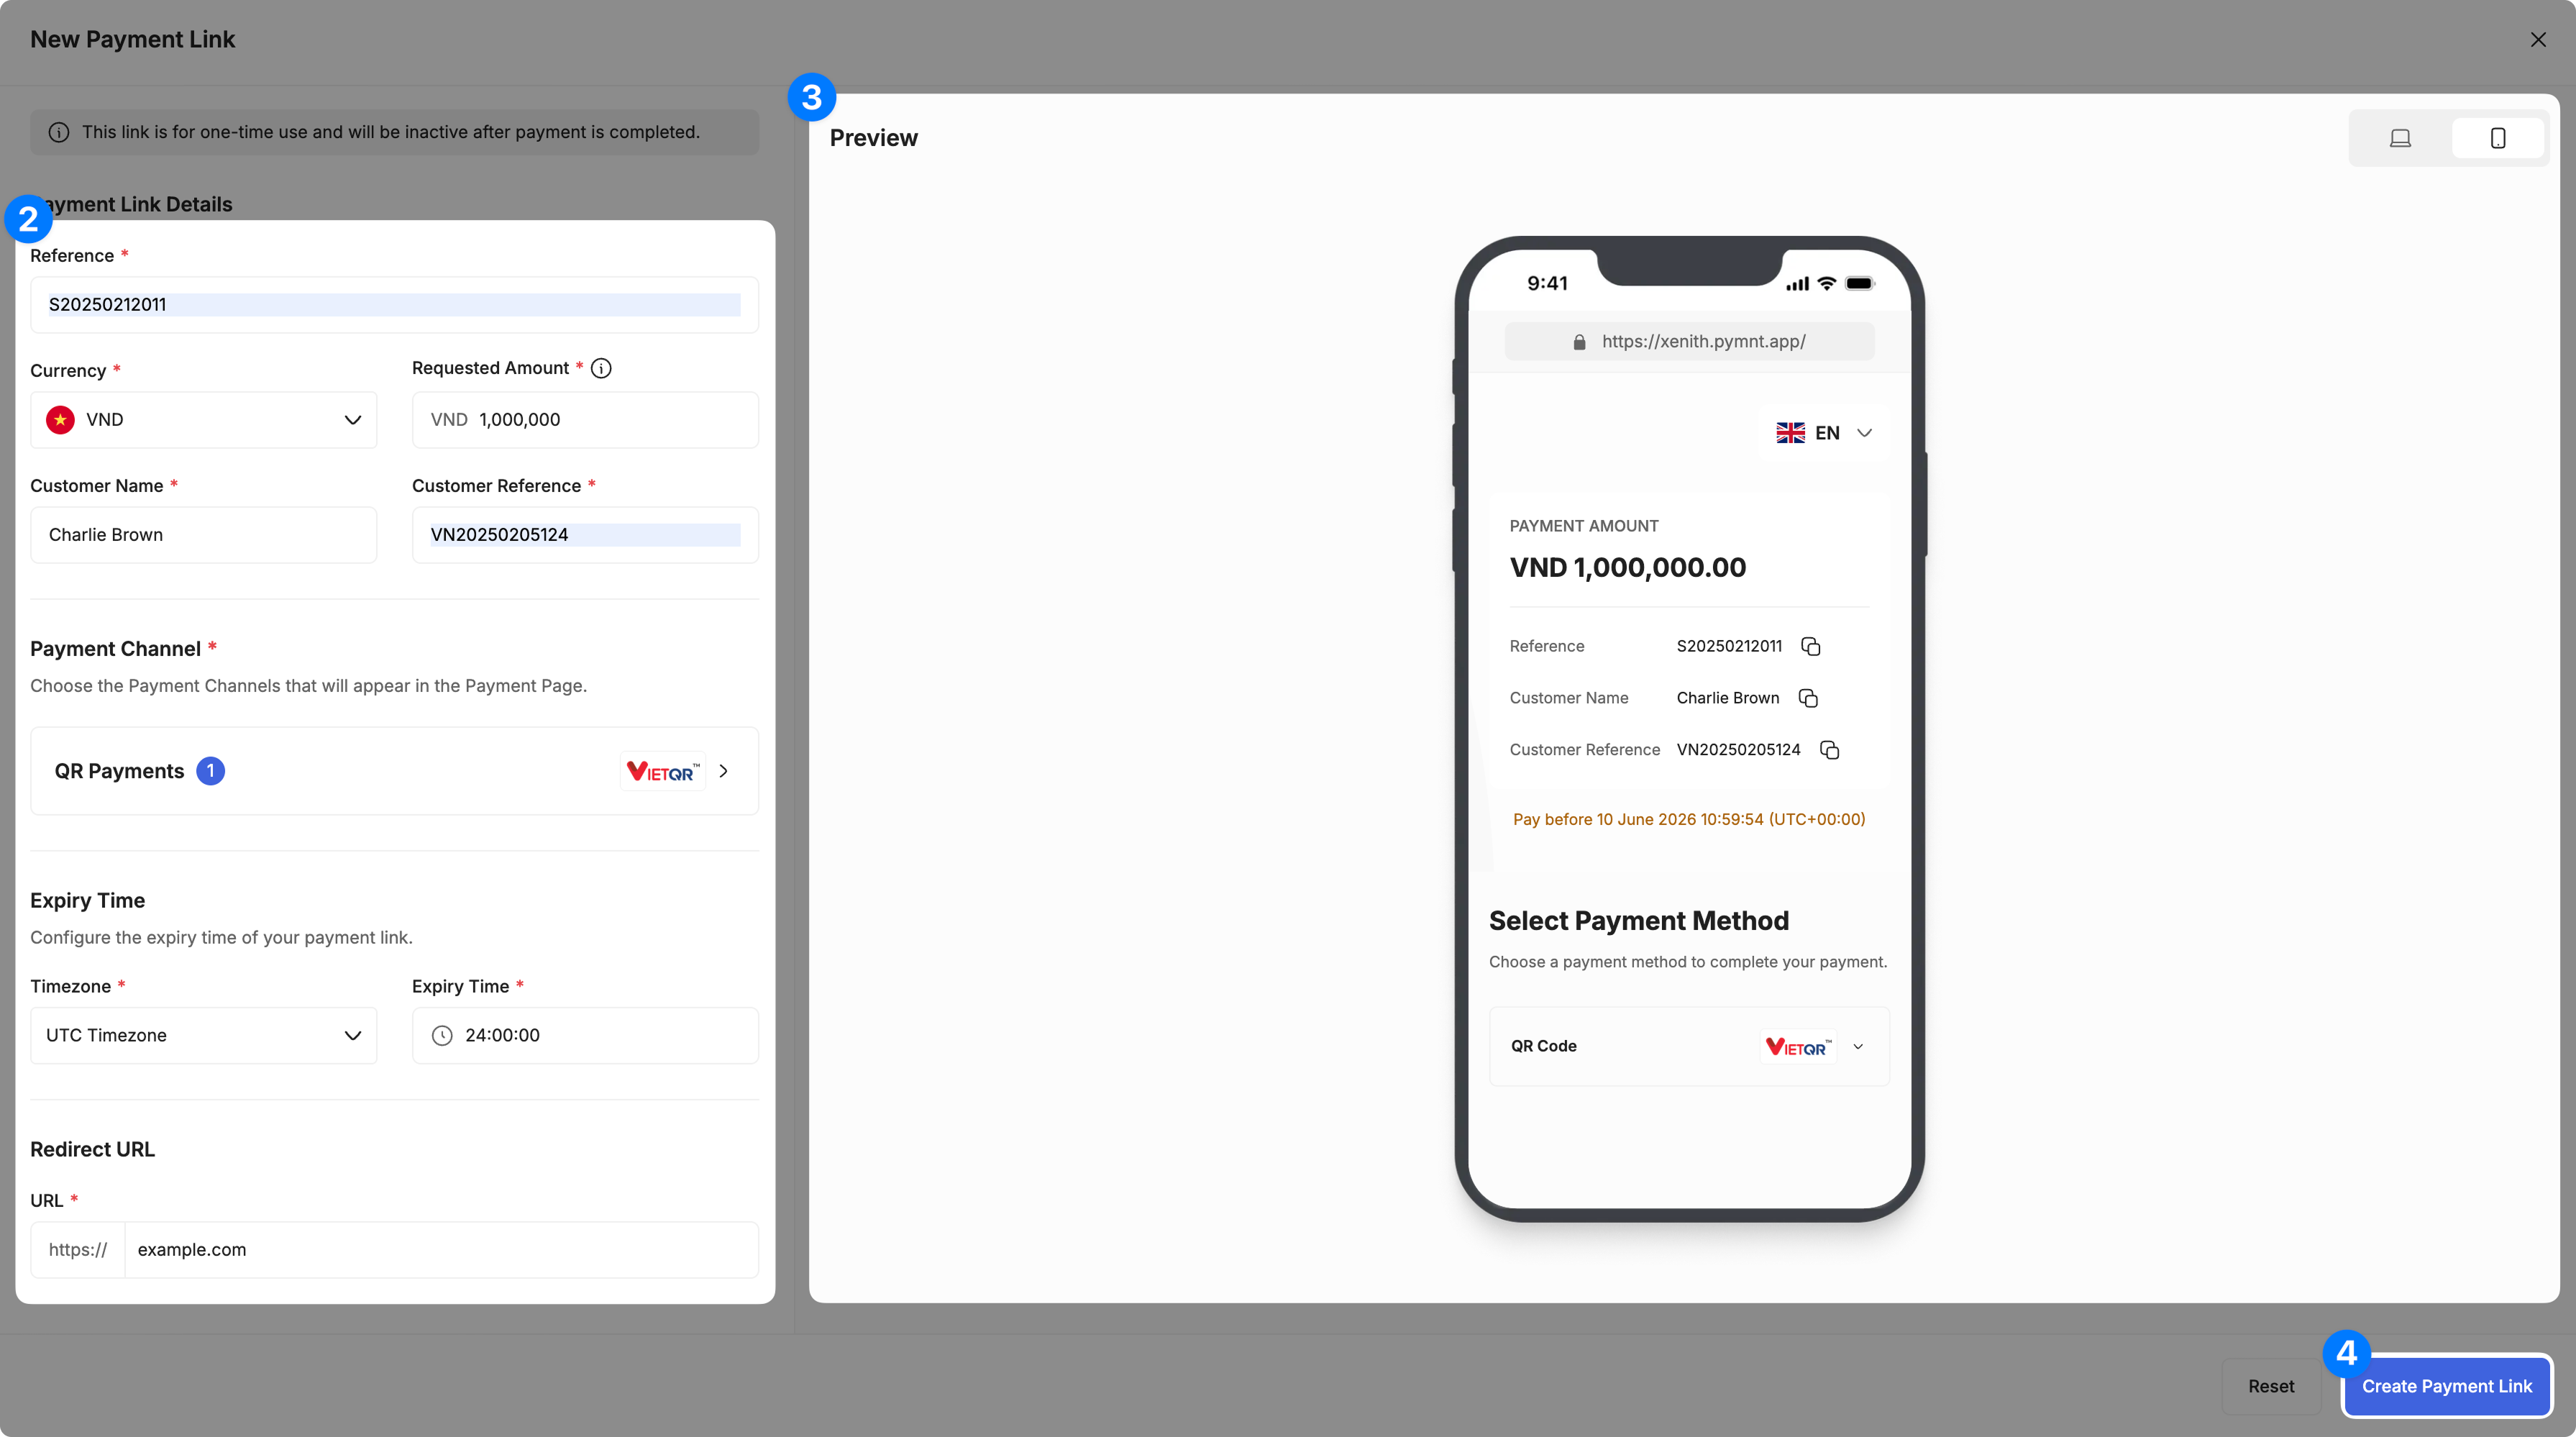
Complete the Payment Link details:
- Reference — your internal reference for this Payment Link.
- Currency — the currency you want to collect payment in.
- Requested Amount — the amount you want to collect from your customer.
- Customer Name — the customer’s name.
- Customer Reference — your unique identifier for the customer.
- Payment Channel — the available payment channels for the link. No channels are selected by default. Select the channels you want to enable.
- Expiry Time — how long the link remains active. The default and maximum expiry time is 24 hours.
- Redirect URL — the URL your customer is redirected to after completing the payment.
Depending on the selected currency and payment channel, additional fields may be required:
- IDR currency + OVO selected — Customer Phone Number
- LAK currency + LAOQR selected — Bank Account Name, Bank Account Number, and Bank Name. Please refer to
destinationPayoutChannelNamein LAK Payout Channels for Bank Name. - PKR currency + Ewallet selected — Customer Phone Number
- THB currency — Bank Account Name, Bank Account Number
-
Preview the Payment Link page on the right side of the screen. You can switch between Web and Mobile views to see how the page will appear to customers. The preview reflects your Payment Page configuration settings.
-
Click Create Payment Link.
-
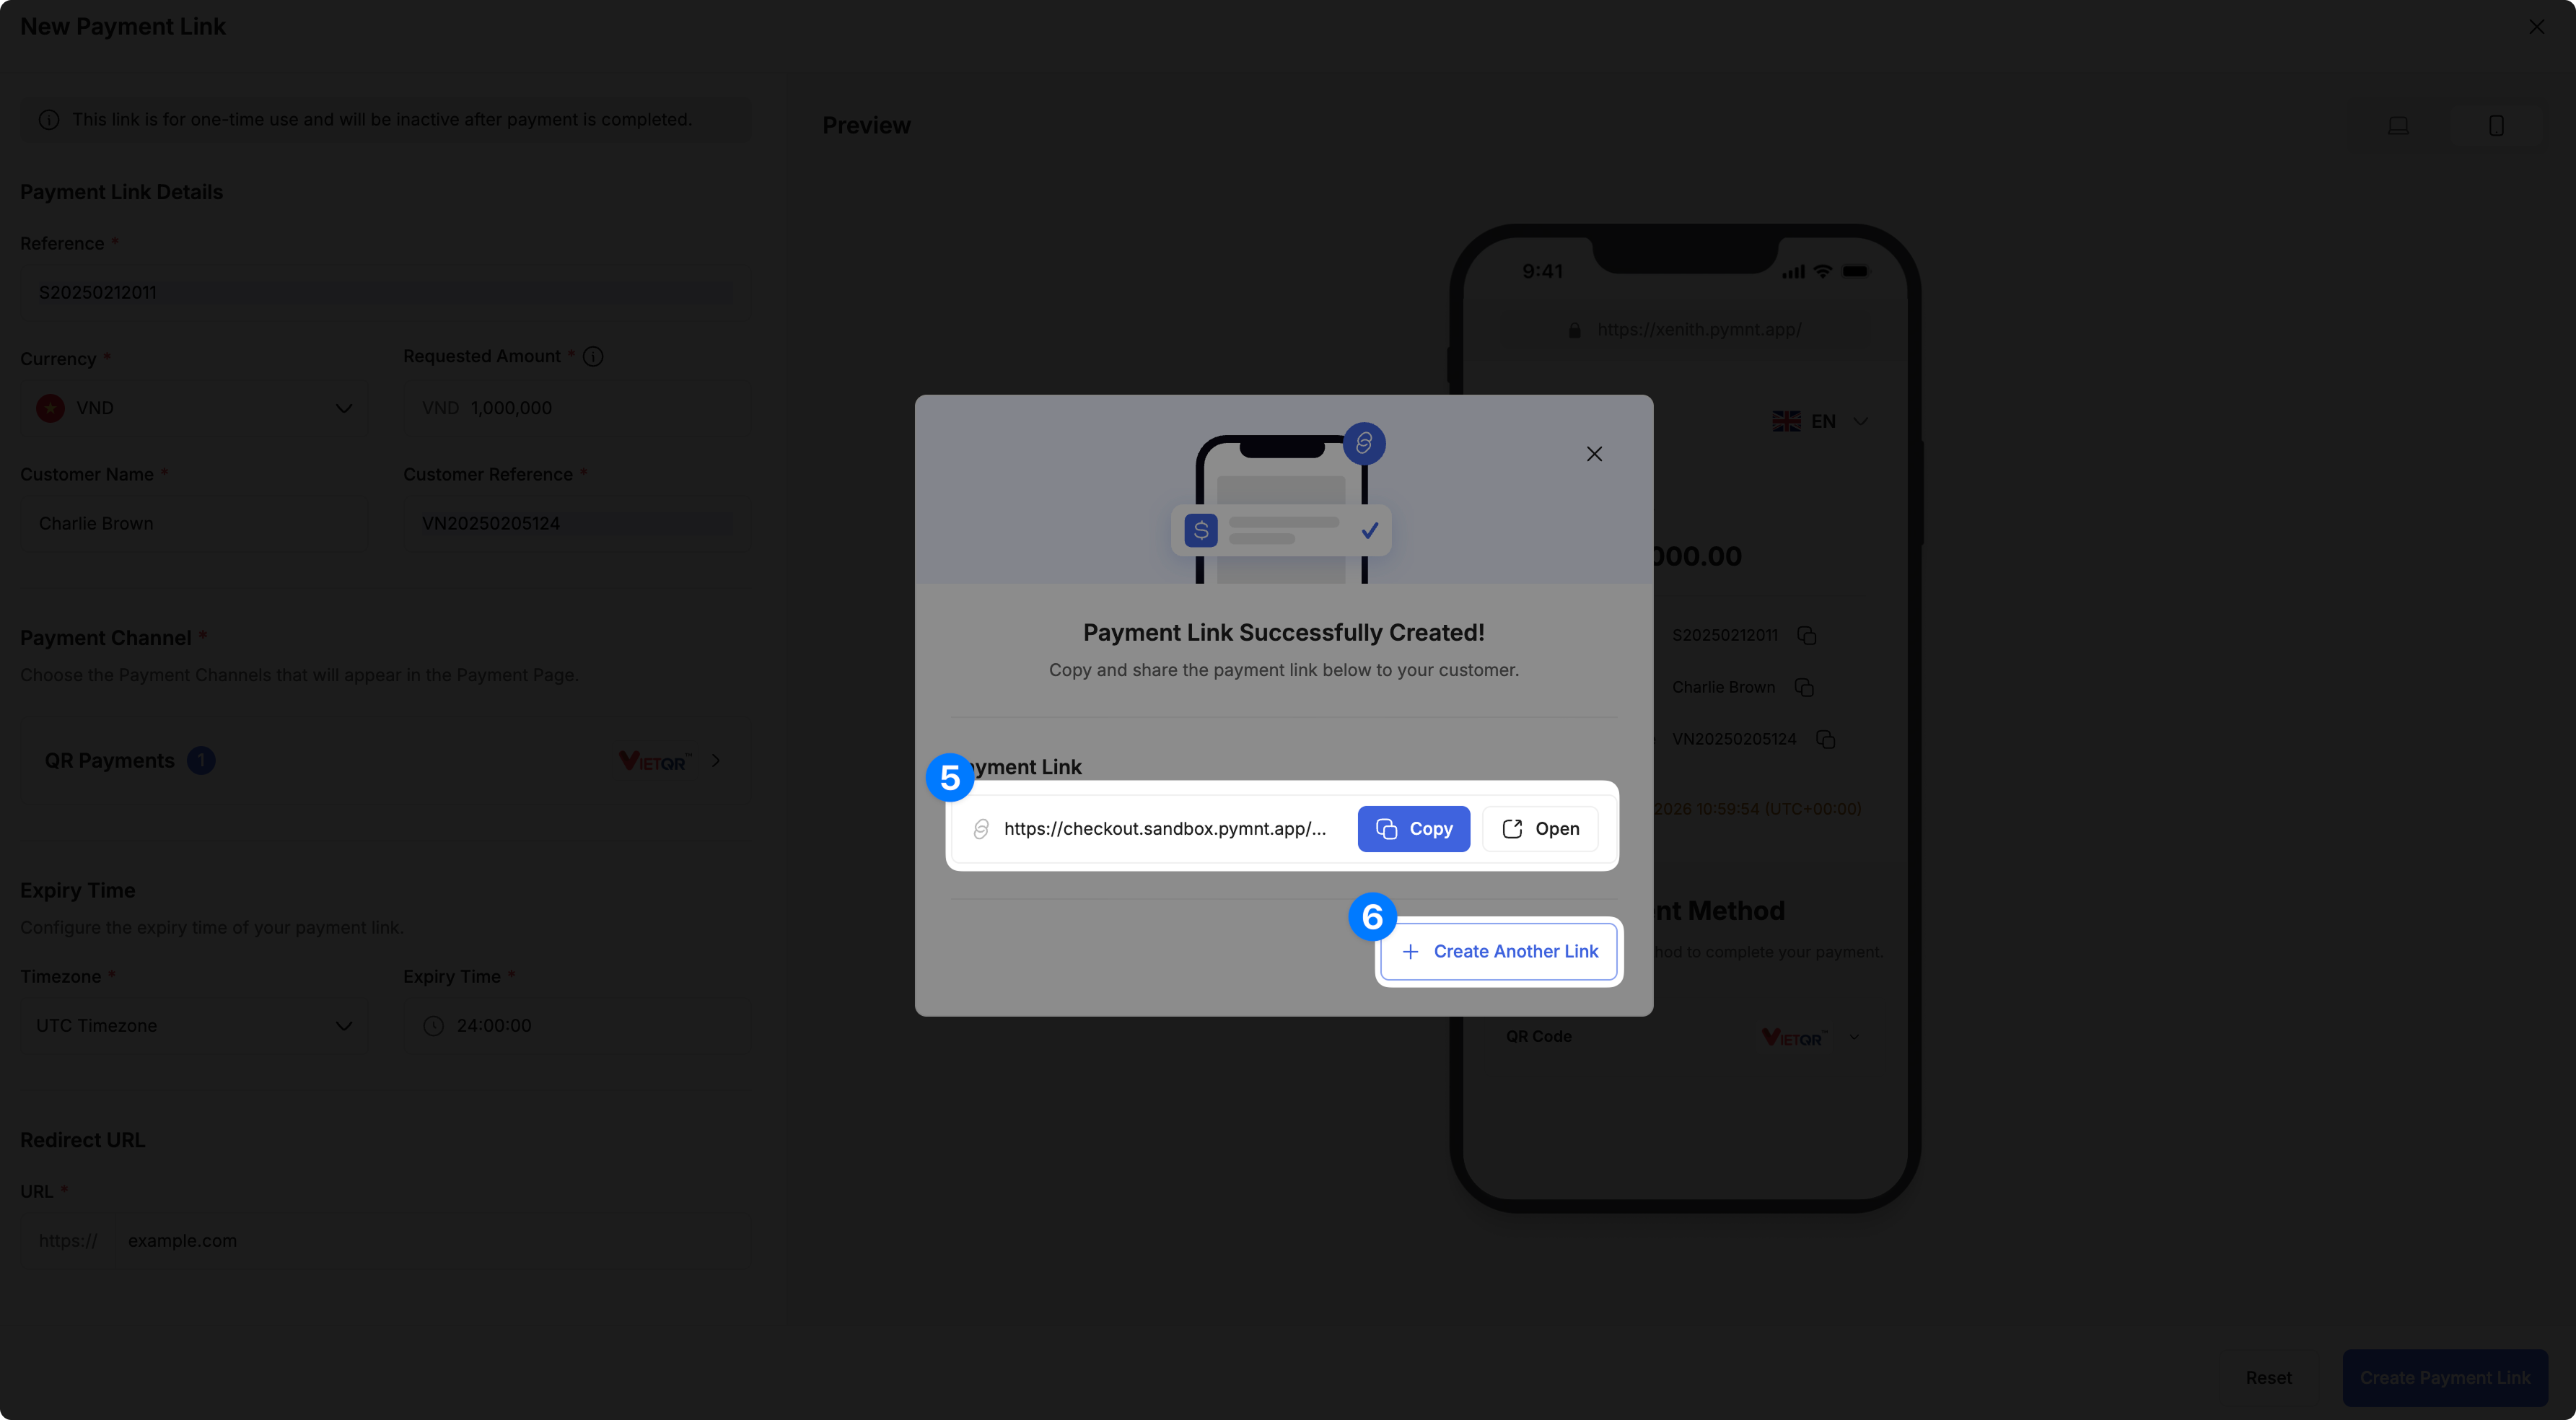
After the link is created, a confirmation popup displays the Payment Link URL. Click Copy to copy the URL to your clipboard, or Open to preview it in a new tab.
-
To create another Payment Link, click Create Another Link. The page reloads with all fields cleared. To return to the Payment Links table, click ✕ to close the popup.
Note: Currently, only one-time payments in a single currency are supported. A link becomes inactive after the payment is completed or the link expires.